
Propagation
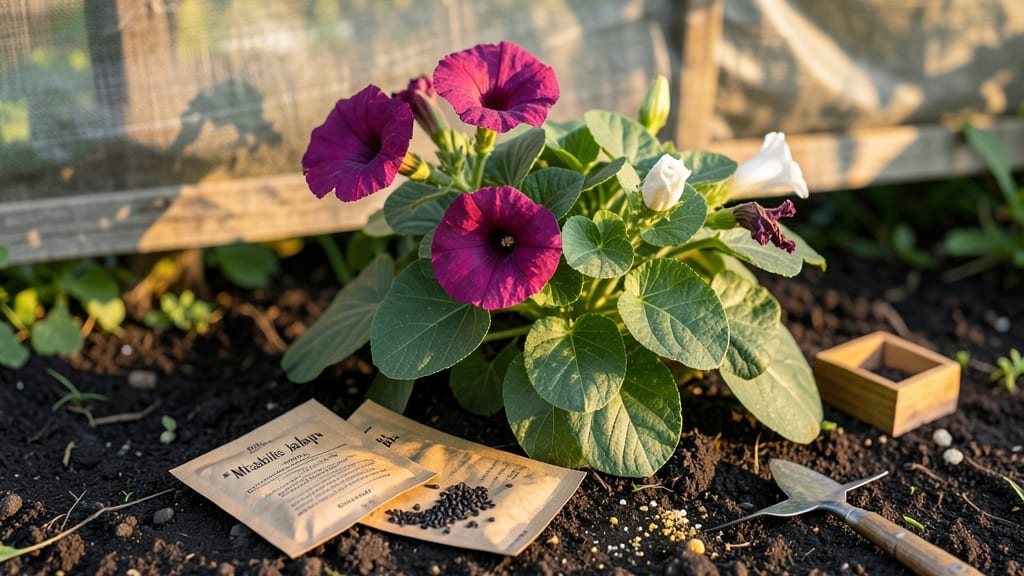
Growing 4 o'clock seeds from dried pods is like unlocking a secret garden that blooms every evening—no matter the season. ✨ I’ve grown these from saved seeds for years, and the first time I watched them unfurl bright pink and purple flowers at dusk, I was hooked.
These hardy annuals thrive even in poor soil and heat waves, making them perfect for beginners or anyone tired of fussy flowers.
The magic starts with those papery seed pods—no fancy prep needed. Just scatter them in well-draining soil after the last frost, or even in late summer for fall blooms. They’re drought-tolerant once established, so watering is easy: keep soil lightly moist until sprouts appear, then let it dry between waterings.
In cooler climates, start seeds indoors 6-8 weeks before your last frost for a head start.
By midsummer, you’ll have a riot of trumpet-shaped blooms that open at 4 PM and stay vibrant until nightfall. The fragrance lingers in the evening air, and hummingbirds adore them.
Even better? The seeds self-sow like crazy, giving you free plants year after year. Just watch for slugs—they love young seedlings—and pull up any volunteers where you don’t want them.
Works in sun or partial shade, in gardens, containers, or even as a living border. Once you try them, you’ll never buy 4 o’clock seeds again—just save your own. Here’s how to make it happen without a single dead plant in sight.
📚 In This Guide
- What you need
- Instructions
- Tips and common mistakes
- Wrapping up and next steps
What you need
- ● 4 o’clock seeds – Purchase from a trusted supplier (1-5 packets, depending on desired quantity). Look for heirloom varieties like Mirabilis jalapa for bold, colorful blooms.
- ● Seed-starting trays or small pots – 2-4 inch pots (6-12 per tray) with drainage holes. Biodegradable pots are eco-friendly!
- ● Seed-starting mix – A lightweight, sterile potting mix (1-2 bags, depending on scale). Avoid garden soil—it can compact and suffocate seeds.
- ● Watering can or spray bottle – A gentle spray nozzle helps avoid disturbing seeds.
- ○ Clear plastic wrap or humidity dome – Keeps moisture in while seeds germinate (optional but helpful for humidity-loving seeds).
- ● Grow lights or sunny windowsill – A 6-8 hour daily light source (e.g., a simple LED grow light or south-facing window).
- ○ Fertilizer (optional but recommended) – A balanced, water-soluble fertilizer (5-10-5 or 10-10-10 ratio) for transplanting.
- ● Small hand trowel – For transplanting seedlings into larger pots or garden beds.
- ● Labels & markers – Track varieties and planting dates (use popsicle sticks or plant tags).
- ○ Gloves (optional) – Protects hands from soil and sharp seed pods.
- ● Pruning shears – For trimming dead blooms or harvesting seeds later.
- ● Outdoor space or containers – After hardening off, seedlings need 6+ hours of sunlight daily. Containers (12+ inches deep) work well for patios.
Step-by-step instructions for growing 4 O'clock flowers from dried pods
Here's how to turn those dried seed pods into vibrant, long-lasting blooms that thrive year-round.
🌱 Step 1: Collect and Prepare the Dried Seed Pods
Harvest pods when they've fully dried on the plant but haven't opened yet. I like to collect them in late summer or early fall when they turn brown and papery. Store them in a dry, cool place until ready to use—this preserves viability for months.
Before planting, gently rub the pods between your fingers to release the tiny seeds inside. You'll need about 4 pods to get enough seeds for your 4 plants. Don't worry if some pods don't release seeds—they'll still produce a few when planted.
💧 Step 2: Soak Seeds for Faster Germination
Place the seeds in a small bowl and cover them with lukewarm water for 12-24 hours. This softens the tough seed coat and speeds up sprouting. I like to use a shallow dish so I can stir them occasionally—this ensures all seeds get equal exposure.
After soaking, drain the water and let the seeds sit for another 30 minutes to dry slightly. This prevents them from sticking together when you handle them. You'll see the seeds plump up slightly, which means they're ready for planting.
☀️ Step 3: Plant Seeds in Well-Draining Soil
Fill small pots with well-draining potting mix—4 O'clocks hate soggy roots. Plant the soaked seeds ¼ inch deep, spacing them about 1 inch apart. I use a toothpick to make small holes in the soil, then drop one seed per hole. Gently press the soil around each seed to secure it.
Water lightly with a spray bottle until the soil feels evenly moist. Avoid soaking the seeds—this can wash them away or bury them too deep. Place the pots in a warm spot (70-80°F) with bright, indirect light until germination, which should happen in 7-14 days.
🌿 Step 4: Transplant Seedlings and Provide Full Sun
Once seedlings have 2-3 true leaves (not just the first tiny cotyledons), they're ready for their permanent home. Choose a sunny spot with at least 6 hours of direct sunlight—4 O'clocks thrive in full sun and bloom best when they get plenty of light.
Dig holes slightly larger than the root ball and space plants 12-18 inches apart. Water deeply after transplanting to help the roots settle. You'll notice new growth within a week—that's your signal everything is working. Mulch around the base to keep soil moist and suppress weeds.
⏰ Step 5: Maintain and Encourage Continuous Blooms
Water deeply 2-3 times per week, letting the soil dry slightly between waterings. Overwatering causes yellow leaves, while underwatering leads to droopy flowers. I check the soil by sticking my finger 1 inch deep—if it feels dry, it's time to water.
Deadhead spent blooms regularly to encourage more flowers. Pinch off the faded blossoms with your fingers or small pruners, and you'll see fresh buds forming within 2-3 weeks. With consistent care, your 4 O'clocks will bloom continuously from spring through fall—and sometimes even into winter in mild climates.
Tips & tricks for perfect 4 O'clock blooms
Growing vibrant 4 O'clock flowers from dried pods is easier than you think—just follow these insider tips to maximize success.
The Soaking Secret: The 12-24 hour soak is non-negotiable for breaking the tough seed coat, but here's the thing: I stir my seeds every 4-6 hours during this time. This ensures all seeds get equal hydration and prevents any from getting left behind. After draining, I spread them on a paper towel for those crucial 30 minutes—this prevents them from clumping when I handle them later.
Planting Precision: That ¼ inch depth might seem shallow, but it's perfect for these delicate seeds. I use a toothpick to make the holes—it gives me better control than my fingers. Press the soil gently around each seed but don't compact it too much. The goal is to secure the seed without creating a barrier between it and moisture. Remember, 4 O'clocks hate soggy roots, so well-draining soil is your best friend.
Germination Conditions: The 70-80°F range is ideal, but if your home runs cooler, consider using a seedling heat mat. I've found that germination happens most reliably when the soil stays consistently warm. Place your pots under bright, indirect light—direct sunlight at this stage can scorch the tiny seedlings. You'll see sprouts in about a week, but be patient if it takes the full 14 days.
Transplanting Timing: Wait for those 2-3 true leaves before transplanting—don't rush it! I check for true leaves by looking for the second set of leaves that appear after the initial seed leaves. When transplanting, make sure to space your plants 12-18 inches apart. This gives them room to grow and prevents competition for nutrients that can lead to smaller blooms.
Pro Tips for 4 Oclock Seeds
- Growing vibrant 4 O'clock flowers from dried pods is easier than you think—just follow these insider tips to maximize success.
- The Soaking Secret: The 12-24 hour soak is non-negotiable for breaking the tough seed coat, but here's the thing: I stir my seeds every 4-6 hours during this time.
- Planting Precision: That ¼ inch depth might seem shallow, but it's perfect for these delicate seeds.
Frequently asked questions
What’s the best time to plant 4 o’clock seeds for continuous blooms?
For year-round flowers, sow seeds every 4–6 weeks in warm climates (spring through fall). In cooler zones, start indoors 8–10 weeks before the last frost or use a greenhouse. Succession planting ensures overlapping blooms—no gaps!
How long does it take for 4 o’clock seeds to germinate and flower?
Germination takes 7–14 days in warm soil (70°F+). Once sprouted, expect 6–8 weeks to first bloom, depending on light and warmth. Pro tip: Use a heat mat for faster germination if your climate is chilly!
Can I grow 4 o’clock flowers from dried pods instead of fresh seeds?
Dried pods
stay viable for years if stored in a cool, dry place. Simply crack open the pod, extract the seeds, and plant as usual. They’re just as effective—nature’s time capsule!
What if my 4 o’clock seeds aren’t sprouting? Troubleshooting tips?
Check these first:
- Moisture: Keep soil consistently damp (not soggy). Mist seeds daily if humidity is low.
- Temperature: Needs warmth (70°F+). Try a seedling heat mat or move pots to a sunny windowsill.
- Light: Seeds need bright light (grow lights help if natural light is weak).
- Freshness: Test viability by nicking a seed—if it’s hard and white inside, it’s good!
Are 4 o’clock seeds annuals or perennials?
They’re annuals in most climates but self-seed heavily, often returning year after year. Deadhead spent blooms to encourage more flowers, but let some seeds drop for free next-year plants!
Wrapping up and next steps
Discovering the magic of 4 o’clock seeds opens a world of vibrant, year-round blooms with minimal effort—perfect for gardeners of all levels! 🌸 Whether you’re reviving dried pods or experimenting with propagation, these hardy plants prove that beauty thrives even in small spaces.
With just a few simple steps, you’ll enjoy Mirabilis jalapa’s enchanting colors and fragrance for seasons to come.
Ready to take the next step? Grab those dried pods, follow the guide, and let your garden burst into life—one bloom at a time! 🌱 Share your progress or ask questions in the comments; we’re here to cheer you on! 🌟