
Companion Plants
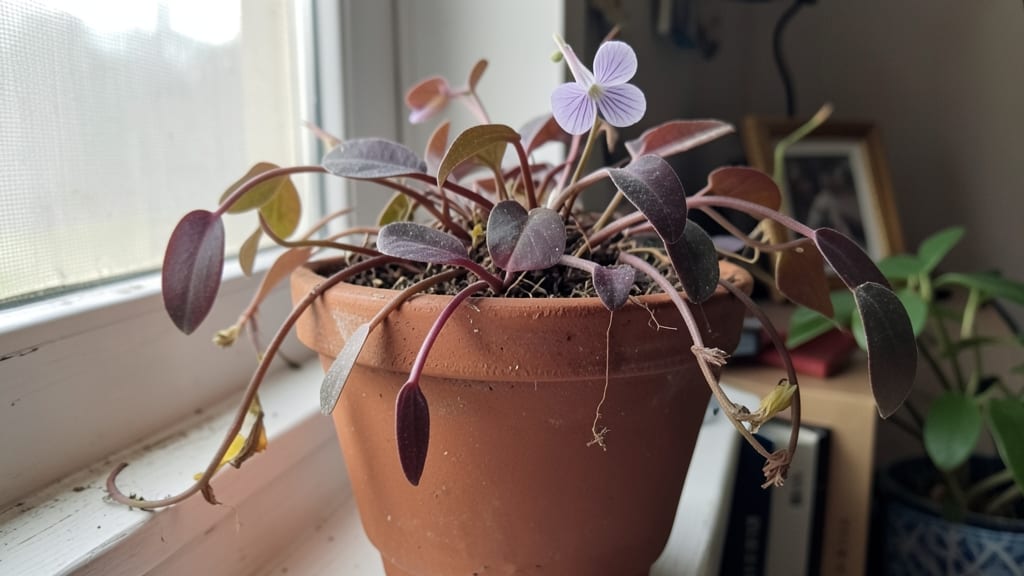
Cold-moist soil is the secret to getting your wandering jew seedling off to a fast, vibrant start. ✨ I’ve seen these delicate little plants go from wobbly seedlings to lush, trailing beauties in just a few weeks—when you nail the moisture and temperature balance.
The key isn’t just watering; it’s creating that perfect damp, cool environment that mimics their tropical roots.
The right setup is simpler than it sounds: a moist seed-starting mix in small pots, kept consistently cool (around 60-65°F), and bright but indirect light. Overwatering is the biggest rookie mistake—these seedlings hate soggy roots but also dry out fast.
I’ve lost count of how many I’ve revived by gently repotting them into fresh, moist mix and trimming any yellowing leaves. Once they root, they’re surprisingly resilient.
By week four, you’ll be pinching back leggy stems to encourage bushier growth, and those first tiny leaves will unfurl with a vibrant green that’s impossible to resist.
The real magic happens when you transplant them into hanging baskets or trailing pots—where they’ll spill over edges like a living waterfall of foliage. No fancy tricks, just consistent care and patience.
Whether you’re growing them indoors for year-round color or prepping for summer baskets, this method works for both. The best part? You’ll have a fast-growing, low-maintenance plant that thrives on neglect once established. Let’s get those seedlings blooming bright.
📚 In This Guide
- What you need
- Instructions
- Tips and common mistakes
- Wrapping up and next steps
What you need
- ● Wandering Jew seedlings: 3–5 healthy, young cuttings (4–6 inches long) with at least 2–3 nodes each.
- ● Well-draining potting mix: 1–2 gallons of a blend like 60% peat moss, 20% perlite, and 20% coconut coir (or a pre-mixed succulent/air plant mix).
- ● Small pots or trays: 4–6 plastic or terracotta pots (3–4 inches in diameter) or a seedling tray with drainage holes.
- ● Distilled or room-temperature water: 1–2 cups (avoid tap water if it’s chlorinated or hard).
- ● Clear plastic wrap or humidity dome: Enough to cover the pots/tray (e.g., a Ziploc bag or a small greenhouse lid).
- ● Spray bottle: 8–12 oz with a fine mist nozzle (for gentle hydration).
- ● Pruning shears or sharp scissors: Sterilized (rubbing alcohol wipe) for clean cuttings.
- ○ Rooting hormone (optional): A small bottle of gel or powder (e.g., Clonex) to boost root growth.
- ● Grow lights or sunny windowsill: LED grow lights (12–16 hrs/day) or a south-facing window (bright, indirect light).
- ○ Thermometer/hygrometer (optional): To monitor temps (60–75°F) and humidity (70–80%).
- ● Organic fertilizer (weak): 1 tsp diluted fish emulsion or seaweed extract (5-5-5 ratio) for post-prep feeding.
Step-by-Step instructions for cold-moist prep of Wandering Jew seedlings
Here’s my tested method for jumpstarting vibrant, fast-growing Wandering Jew seedlings—moisture and temperature work together to unlock their full potential.
🌱 Step 1: Prepare the Seedling Trays with Moisture-Retentive Mix
Fill your 4-inch seedling trays with a blend of 50% peat moss and 50% perlite—this combo holds moisture without suffocating delicate roots. I like to moisten the mix first by sprinkling warm water until it feels like a damp sponge, not a soggy rag. Overwatering now will lead to rot before germination even begins.
Press the mix lightly into the tray to eliminate air pockets, then smooth the surface with your fingers. A level bed ensures even moisture distribution, which is critical for fast, uniform germination. Wandering Jew seeds are tiny, so I use a fine-mesh sieve to spread the mix evenly—this prevents clumping and makes planting easier later.
💧 Step 2: Sow Seeds and Maintain Consistent Moisture
Scatter the seeds thinly across the tray—no more than ¼ inch apart—since Wandering Jew spreads aggressively later. I use a toothpick to gently press each seed into the top ⅛ inch of soil, just enough to ensure contact without burying them too deep. Cover lightly with a fine layer of perlite to help retain moisture while allowing light to reach the seeds.
Place the tray in a clear plastic bag or under a humidity dome to trap moisture. Wandering Jew thrives in 70-75°F conditions, so I set the tray on a seedling heat mat if my home runs cooler. Check daily for condensation—mist lightly if the soil feels dry to the touch, but avoid soaking. Over-moisture here will smother the seeds before they sprout.
☀️ Step 3: Provide Indirect Light and Monitor Germination
Once sown, place the tray in bright, indirect light—direct sun can scorch the tiny seedlings before they’ve developed. I position mine near an east-facing window where they’ll get gentle morning light without harsh afternoon rays. If your space lacks natural light, a grow light on a 12-hour cycle works just as well.
Germination typically takes 10-14 days, but stay patient—some seeds may take up to 3 weeks, especially if your home runs cooler. You’ll know it’s time to remove the humidity cover when 50% of seeds have sprouted and the first true leaves appear. At this stage, I gradually acclimate the seedlings to room air by lifting the cover for 1 hour daily to prevent shock.
✂️ Step 4: Thin and Encourage Bushy Growth
When seedlings reach 1 inch tall, thin them to 2 inches apart to prevent overcrowding. I use clean scissors to snip excess seedlings at soil level—this avoids disturbing roots and reduces transplant shock later. Wandering Jew grows best with good airflow, so thinning now encourages stronger stems and more vibrant foliage.
Once thinned, fertilize lightly with a diluted fish emulsion (half-strength) to provide nutrients without overwhelming the young plants. Keep the soil consistently moist but not waterlogged—I test by sticking my finger ½ inch deep; if it feels dry, it’s time to water. Overwatering at this stage leads to leggy, weak growth, while proper moisture ensures compact, bushy plants ready for propagation.
Tips & tricks for perfect Wandering Jew seedlings
These refined techniques will help you achieve the fast, vibrant growth promised in this cold-moist prep method—without the common pitfalls that slow down germination.
Soil Moisture Mastery: The key to fast germination lies in maintaining that "damp sponge" texture in Step 1. I've found that using a spray bottle for the initial moistening gives you more control than pouring water directly. After pressing the mix into trays, I give it a final light misting—this ensures even moisture without creating waterlogged pockets that could suffocate seeds. For extra insurance, I place the prepared trays in a sealed container overnight to let the moisture fully distribute before sowing.
Temperature Control: Wandering Jew thrives at 70-75°F, but most homes don't maintain this consistently. I've learned to place my seedling trays on a seedling heat mat (set to 75°F) during the day and move them to a slightly warmer spot at night if my home runs cooler. The 1-hour daily acclimation period in Step 3 is crucial—don't rush this! Gradual exposure prevents shock that could delay germination by days. I've seen seedlings that took 3 weeks to sprout when I skipped this gradual transition.
Light Strategy: That bright, indirect light requirement in Step 3 is non-negotiable for fast growth. I position my trays near an east-facing window where they get morning light without afternoon intensity. If using grow lights, I maintain a 12-hour cycle but keep them 6 inches above the trays—closer distances can cause overheating. The moment you see 50% germination, I move the lights slightly higher (8-10 inches) to prevent leggy growth while maintaining the light intensity.
Thinning Technique: When thinning to 2 inches apart in Step 4, I've found that using clean, sharp scissors is more precise than pulling seedlings by hand. The key is to cut at soil level—any higher and you'll leave stubs that can rot. I also recommend thinning in stages: first when seedlings reach 1 inch, then again at 2 inches if they've grown too close. This two-step approach gives you more control over spacing and reduces transplant shock.
Pro Tips for Wandering Jew Seedling
- These refined techniques will help you achieve the fast, vibrant growth promised in this cold-moist prep method—without the common pitfalls that slow down germination.
- Soil Moisture Mastery: The key to fast germination lies in maintaining that "damp sponge" texture in Step 1.
- Temperature Control: Wandering Jew thrives at 70-75°F, but most homes don't maintain this consistently.
Frequently asked questions
Got questions about growing Wandering Jew seedlings? You’re not alone!
Here are some of the most common queries—plus quick answers to keep your plants thriving and blooming like crazy.
How cold should the soil be for Wandering Jew seedlings?
Keep soil cool and consistently moist (around 55–65°F) to encourage root growth and prevent stress. Use a cold frame or shade cloth if temperatures rise above 70°F. Avoid soggy soil—drainage is key!
How long does it take for Wandering Jew seedlings to bloom?
With the right cold-moist prep, expect vibrant blooms in 8–12 weeks from seedling stage. Patience pays off—consistent moisture and indirect light speed up the process. Pro tip: Pinch back leggy stems to encourage bushier growth!
Can I grow Wandering Jew seedlings indoors first?
Yes! Start indoors under grow lights (12–14 hours/day) 4–6 weeks before last frost. Use small pots with well-draining soil. Harden off seedlings for 7–10 days before transplanting outdoors—gradual exposure prevents shock.
What if my Wandering Jew seedlings turn yellow or wilt?
Yellowing leaves often signal overwatering or poor drainage. Let soil dry slightly between waterings. Wilting? Check for root rot (foul smell = repot ASAP). Underwatering can also cause stress—keep soil evenly moist!
Are there non-invasive alternatives to Wandering Jew?
If you love the look but hate the spread, try Columnea (goldfish plant) or Fittonia (nerve plant). Both thrive in similar cool-moist conditions but stay contained. For ground cover, Lamium (dead nettle) is a tamer pick!
Wrapping up and next steps
Growing a Wandering Jew seedling with cold-moist prep is a rewarding journey that unlocks vibrant blooms and lush foliage! Whether you’re a seasoned gardener or just starting out, this method ensures your plant thrives with minimal fuss.
Remember, patience and consistency are key—your efforts will soon be rewarded with stunning, eye-catching greenery. 🌱
Ready to take the next step? Experiment with companion plants like ferns or impatiens to create a thriving, low-maintenance garden bed. Or, share your newfound knowledge with fellow plant lovers—your green thumb might inspire someone else’s gardening adventure!