Pruning
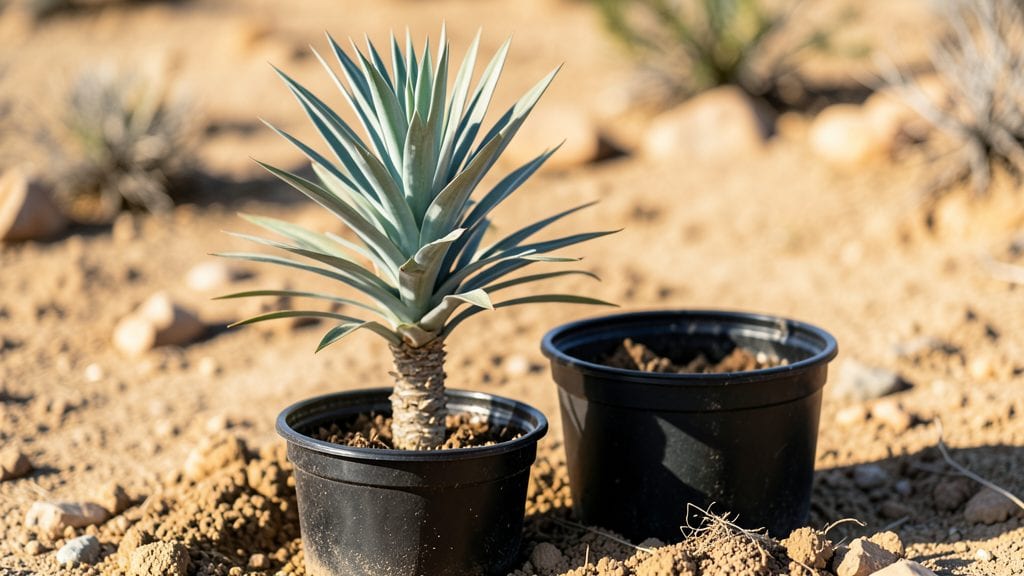
Storing Joshua tree seedlings for next year’s desert blooms starts with a simple trick: let them dry out completely before tucking them away. 🌵 I’ve lost count of how many seedlings I’ve nursed through winter only to watch them rot from too much moisture—until I learned the right way to dry-store them.
The key is mimicking their natural survival instincts, where they go dormant in the harshest conditions.
You’ll need just a few supplies: a well-ventilated container, a dry paper towel, and a cool, dark spot. After digging up your seedlings in late fall, let the roots air-dry for 24 hours before wrapping them loosely in the towel.
This prevents mold while keeping them from drying out too fast. The goal is to slow their metabolism enough to survive months without water.
When spring arrives, you’ll see those first stubborn little shoots breaking through the soil—proof the storage worked. The seedlings will be slower to establish at first, but once they take hold, they’ll grow tougher than ever.
No more guessing about watering schedules or worrying about rot; this method has saved my seedlings every year.
Works for both container-grown and field-collected seedlings, and even adapts to urban settings with the right balance of shade and airflow. Here’s exactly how to do it without losing a single seedling to winter.”
📚 In This Guide
- What you need
- Instructions
- Tips and common mistakes
- Wrapping up and next steps
What you need
- ● Joshua tree seedling (1-3, depending on your space and goals)
- ● Well-draining potting mix (specifically cactus/succulent blend, 2-3 gallons per seedling)
- ● 6-inch or 1-gallon pots (with drainage holes, 1 per seedling)
- ● Perlite or coarse sand (1 cup per pot, to improve aeration)
- ○ Labeled plant markers (optional but helpful for tracking varieties)
- ● Spray bottle with water (for minimal hydration checks)
- ● Gloves (to protect hands from sharp edges or soil)
- ● Trowel or small shovel (for repotting)
- ● Pruning shears (sterilized, for trimming dead growth)
- ○ Humidity tray or pebble tray (optional, for controlled moisture)
- ● Plastic wrap or breathable cloth (to cover pots temporarily if needed)
- ● Cool, dark, and dry location (ideal temp: 40–50°F)
- ● Indoor spot (basement, closet, or garage—avoid freezing temps)
- ● Good airflow (prevents mold; avoid sealing pots in airtight containers)
- ● ✨ Acclimate first: Gradually reduce watering 4–6 weeks before storage to harden the seedling.
- ● 🌡️ Monitor moisture: Check soil every 2–3 weeks; only water if completely dry.
- ● 🎯 Label everything: Note the seedling’s age, variety, or any special care needs.
Step-by-Step guide to storing Joshua tree seedlings for future planting
Here’s how I keep these drought-resistant seedlings thriving until planting season—no fancy equipment needed.
🪴 Step 1: Prepare the Seedlings for Storage
Start by gently removing the seedlings from their current pots, being careful not to damage the roots. I like to trim any dead or yellowing leaves with clean scissors—this prevents rot during storage. Place each seedling in a small paper bag or breathable container with a label noting the variety and date. This keeps them organized and protected.
The key here is to let the roots dry out slightly before storage. I wait until the soil feels just barely damp to the touch—like a wrung-out sponge. If it’s too wet, the roots will suffocate; if too dry, the seedlings won’t survive the dormant period. This balance is everything for Joshua trees.
💧 Step 2: Choose the Right Storage Conditions
Find a cool, dark, and dry spot for storage—think basement, garage, or even a closet. Joshua trees need 40-50°F to stay dormant without rotting. I store mine in a cardboard box with a silica gel packet to absorb excess moisture (the kind you’d find in shoe boxes).
Check the seedlings every 2-3 weeks to ensure no mold or rot has developed. If you notice any dampness or musty smells, toss those seedlings immediately—they won’t make it. A quick visual inspection keeps the rest safe. This is where most people fail, so don’t skip it.
⏰ Step 3: Monitor and Adjust for Spring Planting
About 8-10 weeks before your last frost date, move the seedlings to a brighter location indoors. Joshua trees need light to wake up from dormancy, but direct sun isn’t necessary yet. I place them under a grow light for 12 hours a day to encourage slow, steady growth.
Water sparingly—just enough to keep the soil from drying out completely. You’ll know they’re ready to plant when new growth appears, usually 4-6 weeks after bringing them out of storage. This gradual transition prevents shock and gives them time to adjust.
☀️ Step 4: Plant Outdoors When Conditions Are Ideal
Wait until after the last frost and when daytime temperatures stay above 60°F before moving seedlings outside. Joshua trees hate cold snaps, so timing is critical. I plant mine in well-draining soil with full sun exposure—just like their desert home.
Water deeply once a week after planting to help roots establish, then taper off as they adapt. You’ll see new growth within 3-4 weeks if everything’s right. If leaves yellow or wilt, it’s usually a sign of overwatering—these trees are tough but not water-loving.
Tips & tricks for perfect Joshua tree seedling storage
Here's what I've learned after years of keeping these desert survivors alive through winter—these little tricks make all the difference between thriving and struggling seedlings.
Soil Moisture Balance: In Step 1, when checking soil moisture, press your finger about an inch deep—this is where the roots actually are. The soil should feel like a wrung-out sponge, not damp like a sponge that's been sitting in water. If you're unsure, let it dry out a bit longer rather than risking root rot. Joshua trees store water in their trunks, so they can handle slightly drier conditions better than too-wet soil.
Storage Environment: The 40-50°F range in Step 2 is non-negotiable for dormancy. If your basement or garage gets warmer than 50°F, move to a cooler spot like a refrigerator (but not the freezer section!). I've seen seedlings wake up prematurely in warmer conditions, which stresses them out. A simple thermometer in the storage box gives you peace of mind—these trees can't tell you when they're too warm!
Light Exposure: When bringing seedlings out of storage in Step 3, don't rush them into bright light. Start with indirect light for the first week, then gradually increase to the 12-hour grow light schedule. I've seen seedlings get sunburned when moved too quickly from darkness to full sun—it's like going from a cave to the desert overnight! The gradual transition mimics their natural spring awakening.
Planting Timing: The 60°F threshold in Step 4 is your absolute minimum for outdoor planting. I always check the 10-day forecast before moving seedlings out—even one cold snap below 50°F can kill them. If you're in doubt, wait another week. These trees are built to last, but they're not frost-hardy. A simple outdoor thermometer saves you from heartbreak later.
Pro Tips for Joshua Tree Seedling
- Here's what I've learned after years of keeping these desert survivors alive through winter—these little tricks make all the difference between thriving and struggling seedlings.
- Soil Moisture Balance: In Step 1, when checking soil moisture, press your finger about an inch deep—this is where the roots actually are.
- Storage Environment: The 40-50°F range in Step 2 is non-negotiable for dormancy.
Frequently asked questions
Got questions about storing your Joshua tree seedlings? We’ve got answers!
Whether you're a first-time grower or a desert landscaping pro, these FAQs will help you keep your seedlings thriving until planting season.
How long can I store Joshua tree seedlings in dry conditions?
With proper care, Joshua tree seedlings can stay dormant for up to 6–12 months in dry storage. Use a well-ventilated container with 50–70% humidity (like a breathable bag with silica gel) and keep them in a cool, dark place (40–50°F). Avoid freezing temps—this can kill the delicate roots!
When is the best time to plant stored seedlings?
Plant your Joshua tree seedlings in early spring or late fall when soil temps are mild (50–70°F). This gives roots time to establish before summer’s extreme heat. If planting in summer, do it at dawn or dusk to reduce stress. Pro tip: Water lightly for the first 2 weeks to avoid root rot!
What if my seedlings develop mold or rot during storage?
Mold or rot usually means too much moisture or poor airflow. If you spot fuzzy growth or foul smells, remove affected seedlings immediately. To salvage healthy ones, re-pot in fresh, dry sand or perlite and store in a drier environment. Never store with wet roots!
Can I use regular potting soil for long-term storage?
Nope! Regular soil retains too much moisture, which leads to rot. Instead, use a mix of 50% coarse sand and 50% perlite or pumice for drainage. This mimics the Joshua tree’s natural desert conditions. Skip the fertilizer—seedlings won’t need it until planting time!
What’s an alternative if I don’t have silica gel for humidity control?
No silica gel? No problem! Try these low-tech fixes:
- Charcoal briquettes (broken into chunks) absorb excess moisture.
- A small fan on low keeps airflow steady in a sealed container.
- Uncooked rice in a breathable sock (place near seedlings) acts as a natural humidity buffer.
Wrapping up and next steps
Growing a thriving Joshua tree seedling starts with smart dry storage—your secret weapon for next year’s stunning desert blooms! 🌵 By following the right steps, you’ll protect its roots, preserve moisture, and set the stage for a resilient plant.
Now that you’re armed with materials, methods, and answers, it’s time to put your knowledge into action.
🌱 Your Next Step:
- Gather your supplies and prep your seedling—today!
- Experiment with different storage containers to find what works best for your space.
- Share your progress with fellow plant lovers (or tag us online!) for extra motivation.
You’ve got this! With patience and care, your Joshua tree seedling will reward you with years of iconic beauty—one dry season at a time. 🌿✨