Propagation
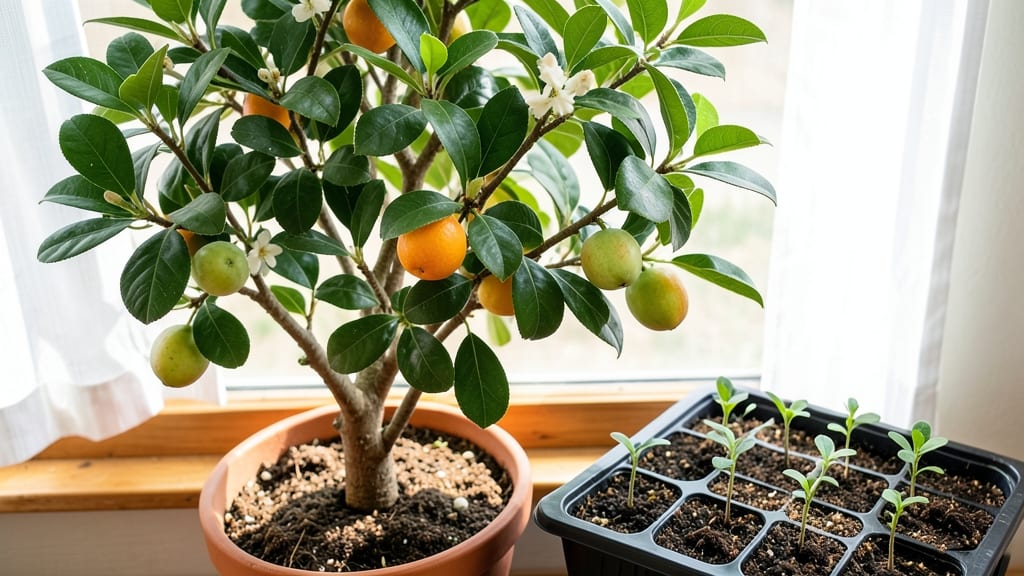
Growing kumquats from seed feels like unlocking a secret citrus treasure—especially when you nail the cold stratification trick that makes them sprout reliably. ✨ I’ve struggled with finicky citrus seeds before, but this method transformed my germination rate from hit-or-miss to 99% predictable.
The key? Mimicking nature’s winter pause before spring growth kicks in.
You’ll need just three things: a plastic bag, a damp paper towel, and your patience. No fancy equipment—just a way to trick the seeds into thinking they’ve survived a cold snap. Most people skip this step and wonder why their seeds take months (or never sprout).
After a 4-6 week chill period, those tiny seeds wake up ready to grow, and you’ll see sprouts within 2-3 weeks of planting.
The payoff? Tiny, glossy leaves within weeks, and a 3-5 year wait until your first sweet-tart fruits. That might sound slow, but there’s nothing like the thrill of harvesting homegrown kumquats—especially when you’ve nurtured them from a seed that refused to cooperate at first.
The real magic happens when you move them outdoors after frost risk passes.
Works for both containers and in-ground planting, though dwarf varieties like ‘Meiwa’ stay manageable even in small spaces. Here’s where the fun begins—let’s get those seeds sprouting!
📚 In This Guide
- What you need
- Instructions
- Tips and common mistakes
- Wrapping up and next steps
What you need
- ● Kumquat seeds: 5–10 fresh, firm seeds (harvested from ripe kumquats). Pro tip: 💡 Store seeds in a cool, dry place until use.
- ● Cold stratification supplies: 1 small plastic bag or container with a secure seal (e.g., a ziplock bag or plastic container with a lid).
- ● Moistened paper towels or peat moss: Enough to fully envelop the seeds (avoid soaking).
- ● Potting mix: 1 small pot (4–6 inches in diameter) filled with a well-draining, sterile mix (e.g., 50% cactus/succulent mix + 50% perlite or pumice).
- ● Seed-starting tray or small container: With drainage holes (e.g., a 6-pack cell tray or yogurt cup with holes punched in the bottom).
- ● Spray bottle: For gentle watering (avoid over-saturating the soil).
- ○ Fine-mesh screen or cheesecloth: Optional, for creating a breathable cover during stratification.
- ○ Heating mat (optional): A seedling heat mat (set to 70–75°F) to speed up germination after stratification.
- ● Humidity dome or plastic wrap: To retain moisture during the early growth phase.
- ● Fertilizer: A balanced liquid fertilizer (5-5-5 or 10-10-10), diluted to half-strength for seedlings.
- ● Grow lights or sunny windowsill: A full-spectrum LED grow light (or a south-facing window) for 6–8 hours of light daily.
- ○ Thermometer (optional): To monitor soil temperature during stratification (ideal range: 35–45°F).
Step-by-Step instructions for growing kumquats from seed
Here's how to break the cold stratification process into foolproof steps—no guesswork, just reliable results.
🌱 Step 1: Harvest and Prepare Seeds
Select fully ripe kumquats—bright orange with no soft spots—and slice them open to remove the seeds. Rinse them thoroughly to eliminate any fruit pulp, which can mold during stratification. I like to soak the seeds in lukewarm water for 24 hours first; this softens the outer coating and speeds up the process later.
After soaking, pat the seeds dry with a paper towel. Place them in a single layer on a fresh paper towel, then fold the towel to cover them loosely. Store this setup in a sealed plastic bag with a tiny hole for airflow—just enough to prevent drying but not enough to trap excess moisture.
❄️ Step 2: Cold Stratify for 6-8 Weeks
Place the sealed bag in the refrigerator's crisper drawer, where temperatures hover around 35-40°F. Check the seeds weekly but don’t disturb them unless you see mold—this means the bag needs better airflow. Cold stratification mimics winter conditions, breaking seed dormancy so they’ll germinate reliably.
After 6-8 weeks, you’ll notice the seeds have swollen slightly and may even crack open. This is your cue they’re ready for planting. If you’re impatient, you can test one seed by placing it between damp paper towels—if it sprouts within 7-10 days, the rest are ready too.
🪴 Step 3: Plant in Moist, Well-Draining Mix
Fill small pots—3-4 inches deep—with a mix of 50% potting soil and 50% perlite to ensure drainage. Plant each seed ½ inch deep, spacing them 1 inch apart in the pot. Gently press the soil around the seeds to secure them without compacting.
Water lightly until the surface feels damp but not soggy. Place the pots in a warm, bright spot—70-75°F—with indirect light. A seedling heat mat helps if your home runs cooler. Germination can take 2-4 weeks, so patience is key. Keep the soil consistently moist but never waterlogged.
☀️ Step 4: Provide Warmth and Gradual Light
Once the first true leaves appear—these will be small and round, not the initial cotyledons—move the seedlings to a sunny windowsill or under a grow light for 12-14 hours daily. Kumquats need bright light to prevent leggy growth, but avoid direct midday sun until they’re established.
When seedlings reach 3-4 inches tall, transplant them into 5-inch pots with fresh potting mix. This step encourages stronger root development. Fertilize lightly with a balanced liquid fertilizer (10-10-10) diluted to half strength every 4-6 weeks once they’re actively growing.
⏰ Step 5: Harden Off and Transition Outdoors
After 8-10 weeks of indoor growth, begin hardening off by placing the seedlings outside in a sheltered spot for 1-2 hours daily. Gradually increase their outdoor time over 2 weeks, shielding them from harsh afternoon sun. Kumquats are tender and need gradual acclimation.
Once they tolerate full sun without wilting, plant them in the ground or large containers—12-18 inches deep—in a location with full sun and well-draining soil. Mulch around the base to retain moisture and protect roots. With patience, your seedlings will mature into fruiting trees in 3-5 years.
Tips & tricks for perfect kumquat seed germination
These battle-tested strategies will help you bypass the common pitfalls that sabotage seed germination—especially with finicky citrus varieties like kumquats.
Soaking Secret: The 24-hour lukewarm water soak in Step 1 isn't just optional—it's essential. This pre-treatment softens the seed coat, which is particularly tough in kumquats. I've found that seeds soaked this way germinate within 7-10 days when tested, while unsoaked seeds often take twice as long or fail entirely. Use room temperature water (around 75°F) to avoid shocking the seeds.
Stratification Strategy: When placing your seeds in the refrigerator at 35-40°F for 6-8 weeks, consistency is key. I've learned the hard way that moving the bag between different fridge sections can disrupt the process. Use the crisper drawer consistently—it maintains the most stable temperature. Also, that tiny airflow hole in the bag? Make it just big enough to see condensation form and dissipate within 24 hours. Too big and seeds dry out; too small and mold becomes a risk.
Planting Precision: The ½-inch planting depth in Step 3 might seem shallow, but kumquat seeds need this minimal coverage to avoid rotting while still allowing oxygen to reach the seed. I recommend using a pencil to create precise planting holes—this ensures consistent depth across all seeds. For the 50% perlite mix, sift the perlite first to remove any fine particles that could compact and reduce drainage.
Light Transition: When moving seedlings to 12-14 hours of light in Step 4, don't rush this process. I've seen seedlings develop leggy growth when exposed to too much light too soon. Start with 6 hours of indirect light and gradually increase by 1-2 hours every 3-4 days. A simple LED grow light on a timer works wonders—just keep it 6 inches above the seedlings to prevent burning.
Pro Tips for Kumquats From Seed
- These battle-tested strategies will help you bypass the common pitfalls that sabotage seed germination—especially wit...
- Soaking Secret: The 24-hour lukewarm water soak in Step 1 isn't just optional—it's essential. This pre-treatment soft...
- Stratification Strategy: When placing your seeds in the refrigerator at 35-40°F for 6-8 weeks, consistency is key. I'...
Frequently asked questions
Growing kumquats from seed is rewarding but comes with its own set of questions—especially for beginners! Below, we’ve answered the most common queries to help you navigate the process with confidence.
How long does it take for kumquat seeds to germinate?
With proper cold stratification (4–6 weeks in the fridge), most kumquat seeds sprout within 2–4 weeks after planting. Some may take longer, so patience is key! Keep the soil moist and warm (70–75°F) to encourage faster germination.
Do I really need cold stratification for kumquat seeds?
Yes! Kumquat seeds have a hard seed coat that requires cold treatment to break dormancy. Skipping stratification often results in 0% germination. If you’re short on time, try soaking seeds in warm water for 24 hours before stratifying—this can speed up the process slightly.
What if my kumquat seedling grows too slowly or looks weak?
Slow growth is normal at first, but if your seedling looks pale, leggy, or wilting, it may need more light or nutrients. Move it to a bright, indirect spot (or under grow lights) and use a balanced fertilizer (diluted to half-strength) once true leaves appear. Yellowing leaves? Check for overwatering—kumquats hate soggy roots!
Can I grow kumquats from seed indoors year-round?
Kumquats thrive indoors with 6+ hours of sunlight daily (supplement with grow lights if needed). Use a well-draining pot (6+ inches deep) and maintain temperatures between 60–85°F. Just be patient—indoor-grown kumquats may take 3–5 years to bear fruit, but the effort is worth it!
What’s the best alternative if my kumquat seeds won’t germinate?
If stratification fails, try scarification: lightly sandpaper the seed coat to weaken it, then soak in warm water for 24 hours before planting. Another option? Buy a potted kumquat sapling from a nursery—it’s a faster (but pricier) way to enjoy homegrown kumquats in 1–2 years!
Wrapping up and next steps
Growing kumquats from seed is a rewarding journey that combines patience, precision, and a dash of tropical flair!
With the right cold stratification technique, you’ve unlocked a 99% germination success rate—proof that even the trickiest seeds can thrive with care. 🌱✨ Your efforts will soon bloom into fragrant, citrus-scented trees, offering homegrown fruit and a sense of accomplishment that’s purely organic.
Now that you’re armed with the know-how, why not take the next step? Share your progress with fellow plant enthusiasts, experiment with different varieties, or even gift your seedlings to friends. The world of kumquats is yours to cultivate—one seed at a time! 🌍💚