Tools
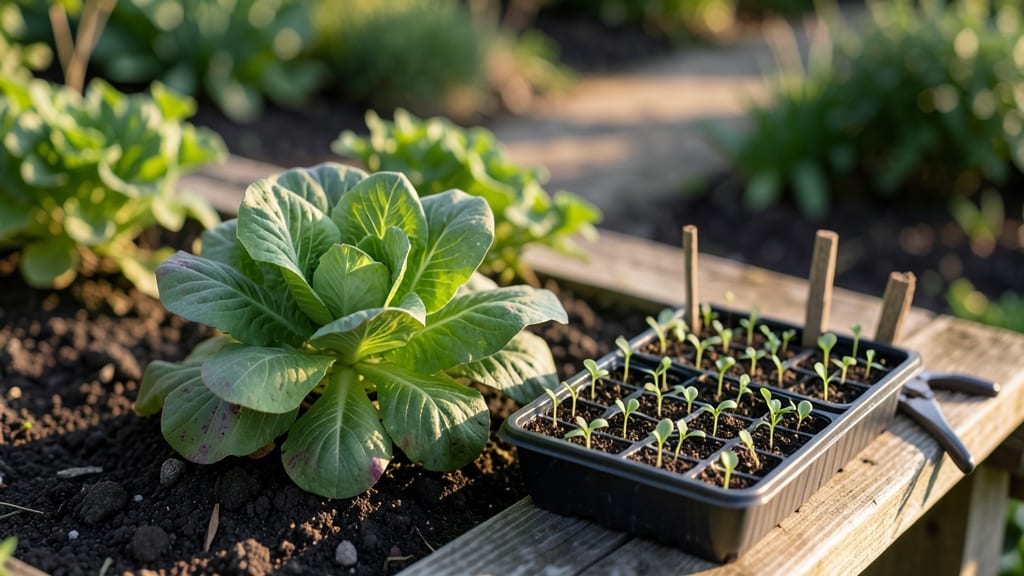
Fast-germinating edible garden seeds are the shortcut to a harvest you can actually eat this season. 🌱 I learned the hard way that waiting weeks for slow starters means losing patience—and sometimes the battle with weeds.
The right seeds cut that wait to just days, giving you a head start before the slugs even wake up.
Start with varieties like radish, lettuce, or bush beans—they sprout in 3-7 days and thrive in cool weather. For warmer months, try zucchini, cucumbers, or basil, which pop up in 5-10 days and grow like weeds (in a good way).
Organic and heirloom seeds often perform best because they’re bred for flavor and resilience, not just speed.
You’ll taste your first harvest in 4-6 weeks instead of months, and the plants stay productive longer. The secret is prepping soil with compost, keeping it consistently moist, and planting at the right depth—never deeper than twice the seed’s width.
No fancy tools needed, just a flat, sunny spot and a little patience.
Works for containers, raised beds, or in-ground plots—even small balconies can grow enough for salads. The key is matching seeds to your climate and starting them early. Let’s get those seeds in the ground before the weeds win.
📚 In This Guide
- What you need
- Instructions
- Tips and common mistakes
- Wrapping up and next steps
What you need
- ● Edible garden seeds: Choose fast-germinating varieties like: Radishes (10-15 seeds per plant, 30-50 total)
- ● Arugula (50-100 seeds for a small bed)
- ● Lettuce (30-50 seeds, leaf varieties germinate in 5-10 days)
- ● Green onions (20-30 seeds)
- ● Bush beans (10-15 seeds per plant, 20-30 total)
- ● Growing containers or garden bed: 5-gallon pots (3-5 for herbs/leafy greens)
- ● Raised beds (4’x8’ or larger for larger crops)
- ● Seed trays (with drainage holes, 10-20 cells)
- ● High-quality potting soil: 5-10 cubic feet (sterilized, organic blend with compost)
- ● Watering can or hose with gentle spray nozzle
- ● Garden gloves (1 pair) (to protect hands from soil and sharp edges)
- ● Plant labels (biodegradable or reusable) (50+ labels for seedling tracking)
- ● Seed starter kit: Includes heating mats ($20-$40) for faster germination
- ● Grow lights (LED, full-spectrum): 1-2 lights for indoor seedling stages
- ● Organic fertilizer: Balanced 10-10-10 or compost tea (1-2 gallons)
- ● Mulch (straw or shredded leaves): 5-10 pounds to retain moisture
- ● Row covers or shade cloth: Lightweight fabric to protect seedlings from pests
- ● Pruners or small scissors: For harvesting and trimming
- ● Knee pads or stool: For comfort during planting/harvesting
How to choose and plant fast-germinating edible garden seeds
Here’s my go-to approach for picking seeds that sprout quickly and grow into productive plants.
🌱 Step 1: Select the Right Fast-Germinating Varieties
Start with seeds labeled as "fast-germinating" or "quick-sprouting." Radishes, lettuce, spinach, and green beans typically sprout within 3-7 days—some even faster. Check the seed packet for days-to-germination estimates, and avoid varieties with 14+ days to germination if speed is your goal.
I always prioritize heirloom or organic seeds because they’re less likely to be treated with fungicides that can slow germination. Store-bought seeds from grocery stores often take longer because they’re bred for shelf life, not speed. For the fastest results, buy from reputable seed companies that specialize in organic or heirloom varieties.
💧 Step 2: Prep Seeds for Faster Germination
Soak seeds overnight in lukewarm water for 8-12 hours before planting. This softens the seed coat, helping roots break through faster. Place them in a small bowl or jar, cover with water, and let them sit. Drain and rinse them just before planting to avoid over-saturation.
For seeds like chives or parsley, which have hard outer shells, a light sanding with fine-grit sandpaper can also speed up germination. Just rub the seeds gently—no need to go heavy. This trick works best for seeds that take 10+ days to sprout naturally. Once prepped, plant them within 24 hours to keep them from drying out.
☀️ Step 3: Plant in Warm, Moist Soil
Use a seed-starting mix (not garden soil) to ensure good drainage and aeration. Fill your containers or seed trays with the mix and moisten it until it’s evenly damp, like a wrung-out sponge. Press the soil down lightly so it’s firm but not compacted—this gives seeds solid contact for stability.
Plant seeds at the depth listed on the packet, usually twice their diameter. For tiny seeds like lettuce, sprinkle them on the surface and press them in gently. Cover with a thin layer of soil (about ¼ inch) or just a light mist of water to keep them in place. Place the tray in a warm spot—70-80°F is ideal—until sprouts appear.
🌿 Step 4: Monitor and Maintain Ideal Conditions
Keep the soil consistently moist but never soggy. Mist the surface lightly every 1-2 days or use a humidity dome to retain moisture. Once the first true leaves appear (not the initial seed leaves), remove the dome to prevent fungal growth. Watch for yellowing or wilting—this usually means the soil is too dry or too wet.
Place your seedlings near a south-facing window or under a grow light for 12-16 hours of light daily. Without enough light, seedlings will grow leggy and weak. You’ll know they’re getting the right amount when they stand upright with dark green leaves and sturdy stems. If they stretch toward the light, move them closer.
⏰ Step 5: Thin and Transplant at the Right Time
Once seedlings have 2-3 true leaves, thin them so they’re spaced 1-2 inches apart (check the packet for variety-specific spacing). Use scissors to snip unwanted seedlings at soil level—this prevents disturbing the roots of the ones you’re keeping. Thinning early reduces competition and encourages stronger growth.
Transplant seedlings outdoors after the last frost when soil temperatures reach at least 50°F. Harden them off by placing them outside for 1-2 hours daily over 5-7 days, gradually increasing their time outdoors. You’ll know they’re ready when they look vibrant and perky, not stressed. Plant them in the garden at the same depth they grew in their containers.
Tips & tricks for perfect fast-germinating edible garden seeds
Fast germination isn't just luck—it's about the little details that make all the difference. Here's how to ensure your seeds sprout quickly and grow strong.
Seed Selection Tip: Look for seed packets that explicitly state "fast-germinating" or "quick-sprouting" varieties. Radishes and lettuce are my top picks—they'll often pop up within just 3-7 days. The key is avoiding seeds that promise germination times of 14+ days. I've learned this the hard way after waiting impatiently for seeds that never seemed to sprout!
Soaking Strategy: That 8-12 hour soak in lukewarm water is your secret weapon for speed. I like to use a small jar with a lid to keep the seeds submerged. For seeds with tough outer shells like chives or parsley, a quick sanding with fine-grit sandpaper can cut germination time by half. Just be gentle—you don't want to damage the seed. Remember to plant these prepped seeds within 24 hours to prevent drying out.
Temperature Control: Maintaining that 70-80°F range is crucial for fast germination. I keep my seed trays on top of my fridge during the day when my kitchen gets cooler. A simple heat mat designed for seedlings can also help maintain consistent warmth. The warmer the soil, the faster those little roots will push through. Don't forget that once you see sprouts, you'll want to move them to a cooler spot for better growth.
Lighting Insight: Those 12-16 hours of daily light are non-negotiable for strong seedlings. I use a simple LED grow light on a timer rather than relying on my south-facing window alone. You'll know your seedlings are getting enough light when they stand tall and proud rather than stretching toward the light like they're reaching for a handshake. Leggy seedlings mean more time under the lights!
Pro Tips for Edible Garden Seeds
- Fast germination isn't just luck—it's about the little details that make all the difference. Here's how to ensure you...
- Seed Selection Tip: Look for seed packets that explicitly state "fast-germinating" or "quick-sprouting" varieties. Ra...
- Soaking Strategy: That 8-12 hour soak in lukewarm water is your secret weapon for speed. I like to use a small jar wi...
Frequently asked questions
Got questions about growing your own edible garden? You’re not alone! Here are some of the most common queries—plus quick, actionable answers to help you cultivate a thriving harvest with ease.
What are the fastest-germinating edible seeds for beginners?
Look for varieties like radishes (5–7 days), lettuce (7–14 days), and bush beans (6–10 days). These are perfect for quick wins and keep motivation high! Check seed packets for "days to germination" details—it’s your secret weapon for planning.
How do I speed up germination for slower seeds like tomatoes or peppers?
Pre-soak seeds in warm water for 4–12 hours (especially for heirloom or organic varieties). Use a seedling heat mat (70–85°F) or place trays on top of your fridge to mimic tropical conditions. Patience pays off—just avoid overwatering, which can drown seeds!
Can I save seeds from my homegrown veggies for next year?
Most open-pollinated or heirloom seeds (like tomatoes, beans, or cucumbers) can be saved. Let produce fully ripen on the plant, dry seeds thoroughly, and store them in a cool, dark place (like a jar with silica packets). Pro tip: Label everything—next year’s you will thank you!
Why aren’t my seeds sprouting? Troubleshooting tips?
Check these first:
- Moisture: Keep soil damp (not soggy) but not bone-dry.
- Temperature: Most seeds need warmth (65–85°F). A sunny windowsill or grow light helps.
- Depth: Plant seeds no deeper than 2–3x their width (shallow is better!).
- Freshness: Old seeds (over 1 year) may fail—test a few to confirm viability.
What’s the best way to organize my edible garden seeds?
Use a seed catalog or spreadsheet to track varieties, planting dates, and harvest times. Store seeds in airtight containers (like mason jars) with silica gel or rice to absorb moisture. Group by type (veggies, herbs, flowers) and season (cool vs. warm weather) for stress-free planting.
Wrapping up and next steps
Growing your own food with fast-germinating edible garden seeds is one of the most rewarding ways to connect with nature while enjoying fresh, flavorful harvests.
Whether you’re a seasoned gardener or just starting, these quick-sprouting varieties make it easier than ever to turn seeds into thriving plants—no matter your space or experience level. 🌱
The key takeaway? Start small, stay consistent, and watch your garden flourish! Now that you’re armed with the best seeds and tips, it’s time to roll up your sleeves and plant.
Grab your gloves, pick your favorite fast-growing varieties, and let the magic of gardening unfold—one seed at a time. Happy growing! 🌿✨