Pruning
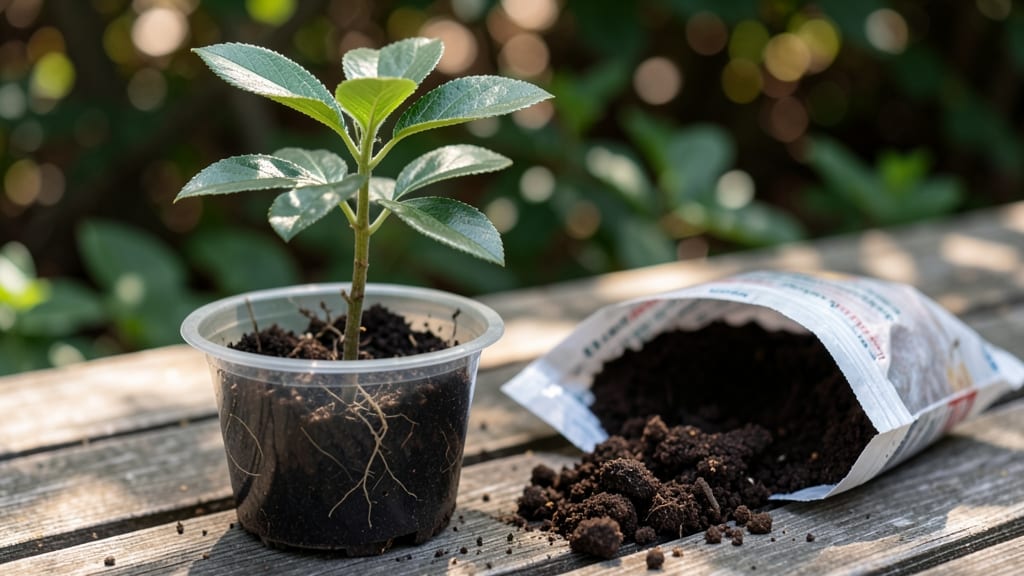
Growing a strawberry tree seedling starts with a little winter magic—cold stratification speeds up blooms by mimicking nature’s timing. ✨ I’ve seen seedlings that would’ve taken years to flower burst into life after just 60 days in the fridge, and the fragrant white blossoms arrive sooner than you’d expect.
The key isn’t complicated: moisture, patience, and a cold spell. Most gardeners overlook this step, but it’s what turns a slow starter into a showstopper by spring.
The soil mix matters just as much as the cold treatment—think well-draining, slightly acidic (like a 60/40 mix of peat and sand) to keep those delicate roots happy. Strawberry trees hate soggy feet, so raise the pot if your space gets wet.
Sunlight is next: full sun to partial shade (at least 6 hours of light daily) keeps the evergreen foliage glossy and encourages those signature red berries. Water lightly but consistently—overwatering is the #1 way to kill a seedling before it even thinks about blooming.
By summer, you’ll notice something incredible: the seedling’s first leathery, oval leaves thickening and the branches filling out. Prune only to shape—never cut back more than 1/3 of new growth—and watch how the tree rewards you with scented flowers by its second or third year.
The berries might take longer, but the fragrance alone makes the wait worth it. Here’s how to keep it thriving through every season.
This isn’t just a tree—it’s a low-maintenance evergreen that stays lush year-round, handles drought once established, and even attracts pollinators. Whether you’re in a mild climate or a cooler zone, the same cold stratification trick works. Let’s get that seedling blooming faster than you’d believe possible.
📚 In This Guide
- What you need
- Instructions
- Tips and common mistakes
- Wrapping up and next steps
What you need
- ● Strawberry tree seedlings – 1-5 seeds or seedlings (depending on your space and goals). Choose healthy, disease-free specimens from a trusted nursery.
- ● Well-draining potting mix – 1-2 gallons (look for a blend labeled for acid-loving plants or erics, like a mix of peat moss, perlite, and pine bark).
- ● Small pots or containers – 2-4 inches in diameter, with drainage holes (plastic or biodegradable pots work well).
- ○ Plastic bags or wrap – 1-2 (for humidity retention during stratification). Optional: Use breathable bags or poke small holes for airflow.
- ● Refrigerator or cold stratification setup – A standard home fridge (set to 34-40°F (1-4°C)) or a dedicated cold stratification box.
- ● Spray bottle – For gentle watering (avoid over-saturating the mix).
- ● Plant labels – To track dates and varieties (use popsicle sticks or small tags).
- ○ Gloves – Optional but helpful for handling soil or prickly seedlings.
- ○ Humidity dome or clear lid – Optional for creating a mini greenhouse effect during stratification.
- ● Grow lights or sunny windowsill – For post-stratification care (if your space lacks natural light).
- ○ Thermometer – Optional but useful to monitor fridge temperatures (some fridges fluctuate!).
- ○ Fertilizer (balanced, low-nitrogen) – Optional for post-stratification growth (e.g., 10-10-10 or fish emulsion).
Step-by-Step instructions for cold stratifying strawberry tree seedlings
Here's how to break dormancy and jumpstart growth in just a few weeks.
🌱 Step 1: Collect and Prepare the Seeds
Strawberry tree seeds (Arbutus unedo) need proper preparation to overcome their natural dormancy. Collect fresh seeds from fully ripe berries—press them gently to release the small, hard-coated seeds inside. Rinse them thoroughly under running water to remove any remaining fruit pulp, which can rot during stratification.
Spread the cleaned seeds on a paper towel and let them air-dry for 24 hours at room temperature. This prevents mold growth during the cold treatment. I like to place them in a single layer on a clean surface, gently stirring them every few hours to ensure even drying. Once completely dry, store them in a labeled envelope until you're ready to stratify.
❄️ Step 2: Perform Cold Stratification
Cold stratification mimics winter conditions, breaking dormancy faster than natural outdoor exposure. Moisten a sterile seed-starting mix (not garden soil) until it holds together when squeezed but doesn't drip. Fill a ziplock bag with the damp mix, leaving about 1 inch of space at the top.
Add the seeds to the bag, spacing them ½ inch apart to prevent crowding. Seal the bag tightly, then place it in a refrigerator for 6-8 weeks at 35-40°F. Check the mix weekly—it should stay lightly moist. If condensation forms, open the bag for 30 minutes to let excess moisture evaporate. This step is critical; too much dampness invites mold, while too little slows germination.
☀️ Step 3: Sow Stratified Seeds in Containers
After stratification, fill 4-inch pots with fresh seed-starting mix, leaving ½ inch of space at the rim. Plant each seed ¼ inch deep—deeper planting delays germination because the seedling must push through more soil. I use a toothpick to make small holes for precision.
Cover the pots with a clear plastic dome or wrap them in plastic wrap to retain humidity. Place them in a warm, bright location (65-70°F) with indirect light—direct sun can overheat the soil. Germination typically takes 4-8 weeks, so patience is key. Watch for the first cotyledons (tiny round leaves) breaking through the soil; this signals successful stratification.
🌿 Step 4: Transition to Light and Care
Once seedlings emerge, remove the plastic cover immediately to prevent damping-off (a fungal disease that collapses stems). Move them to a south-facing window or under grow lights for 14-16 hours daily. Strawberry tree seedlings grow slowly, so avoid overwatering—the top inch of soil should dry slightly between waterings.
Fertilize lightly with a balanced liquid fertilizer (10-10-10) at half-strength when the first true leaves appear. These seedlings are sensitive to overfeeding, so I wait until they show 3-4 leaves before introducing nutrients. This ensures strong root development before encouraging top growth.
Tips & tricks for perfect strawberry tree seedling stratification
Cold stratification might seem like a slow process, but these insider tricks will help you break dormancy faster—and with fewer headaches. The key is precision at every stage, from seed prep to post-germination care.
The Drying Factor: That 24-hour drying period in Step 1 isn't just about preventing mold—it's about creating the perfect moisture balance for stratification. I learned this the hard way after losing a batch to mold. Use a fan on low to circulate air around your seeds while they dry, which speeds up the process without over-drying. The seeds should feel dry to the touch but not brittle. This step ensures your seeds will absorb moisture evenly during stratification, setting the stage for successful germination.
Refrigerator Temperature Matters: The 35-40°F range in Step 2 is critical—any warmer and you risk breaking dormancy too soon, any cooler and germination slows dramatically. Most home refrigerators hover around 38°F, but I recommend placing your seeds on the middle shelf where temps are most consistent. If you notice condensation forming inside the ziplock bag, that's your cue to open it for 30 minutes as directed. This prevents anaerobic conditions that could lead to mold or rot.
Lighting Strategy for Germination: In Step 3, when you're setting up your warm, bright location, I can't emphasize enough how important indirect light is. Direct sunlight through a window can create heat spikes that cook your seeds before they germinate. A simple solution? Place your pots on a table near an east-facing window where they'll get gentle morning light without the intensity of midday sun. If you're using grow lights, position them 6-12 inches above the pots and adjust height as seedlings grow.
Make-Ahead Strategy: You can actually start the stratification process up to 4 weeks early and store your seeds in the refrigerator until you're ready to begin. Just make sure to check them weekly and maintain that same damp-but-not-soaked mix. This flexibility lets you time your germination with your planting schedule, ensuring you're ready to transition seedlings when they emerge. The key is to keep everything sealed and consistent—no sudden temperature changes or moisture fluctuations.
Pro Tips for Strawberry Tree Seedling
- Cold stratification might seem like a slow process, but these insider tricks will help you break dormancy faster—and ...
- The Drying Factor: That 24-hour drying period in Step 1 isn't just about preventing mold—it's about creating the perf...
- Refrigerator Temperature Matters: The 35-40°F range in Step 2 is critical—any warmer and you risk breaking dormancy t...
Frequently asked questions
Got questions about growing your strawberry tree seedling? You’re not alone! Here are answers to the most common queries to help you nurture a thriving plant with confidence.
How long does cold stratification take for strawberry tree seedlings?
Cold stratification typically requires 60–90 days in the fridge (33–41°F). For best results, place moist seedling mix and seeds in a sealed bag, then refrigerate. Check progress monthly—sprouting may start earlier if conditions are ideal! Pro Tip: Use a humidity tray to prevent drying.
Can I skip cold stratification and still grow a strawberry tree?
While possible, skipping stratification often delays germination or reduces success rates. Without it, seeds may take months longer to sprout or fail entirely. If you’re impatient, try soaking seeds in warm water for 24 hours first—but cold stratification remains the gold standard for consistency.
What’s the best temperature for germinating strawberry tree seeds?
After stratification, aim for 65–75°F during the day and 55–65°F at night. Use a heat mat if your home runs cooler. Avoid direct sunlight until sprouts emerge—indirect light keeps them safe while they develop roots. Pro Tip: A mini greenhouse kit can help maintain steady warmth!
Why aren’t my strawberry tree seedlings sprouting after stratification?
Common culprits include dampness (rotting seeds), dryness (insufficient moisture), or temperature fluctuations. Double-check your seedling mix—it should stay moist but not soggy. If seeds are old (<1 year), viability drops; try fresh seeds or a soaking solution (1 part hydrogen peroxide to 10 parts water) to boost germination.
How do I transplant a strawberry tree seedling without shocking it?
Wait until seedlings have 2–3 true leaves and harden off for 1–2 weeks (gradually expose to outdoor conditions). Transplant in spring or early fall, keeping soil moist. Bury the root ball deeply to stabilize the plant. Pro Tip: Water thoroughly before and after transplanting to reduce stress!
Wrapping up and next steps
Growing a strawberry tree seedling into a vibrant, blooming plant is a rewarding journey—especially when you harness the power of cold stratification! By mimicking winter’s chill, you’ve unlocked faster germination and healthier growth.
Whether you’re a seasoned gardener or just starting, these tricks will help you nurture your seedling with confidence.
Ready to see those showy pink blooms? 🌸 Start by planting your pre-stratified seedling in well-draining soil, and keep an eye on its progress. Soon, you’ll be enjoying the sweet rewards of your patience—and maybe even sharing cuttings with fellow plant lovers!