
Pruning
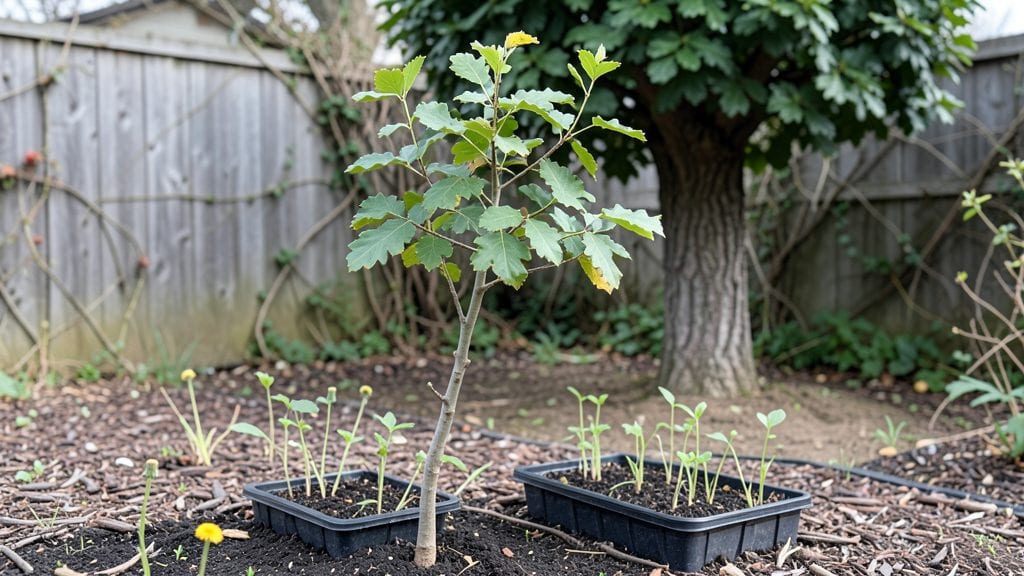
Transforming a delicate seedling into a sturdy tree happens faster when you prune in layers. ✨ I’ve watched saplings go from wobbly stems to strong trunks in just two growing seasons by focusing on strategic cuts at each stage—no guesswork, just proven techniques that work for fruit trees, shade trees, or even ornamental varieties.
The key is timing: your first pruning shapes the structure, the second strengthens the branches, and the third refines the shape. You’ll need sharp pruners, a ladder for taller growth, and a clear plan for where to cut—no need for fancy tools, just the right approach.
Most gardeners skip the layered method and end up with weak limbs or uneven growth.
By the end, your tree will stand tall with a trunk thick enough to support its own weight, branches that spread naturally, and a crown that lets sunlight reach all the leaves.
The best part? You’ll see the progress month by month—no waiting years for a mature look. Ready to skip the guesswork and get results?
This method works for apples, cherries, maples, or even citrus trees in warmer climates. The only difference is when you start: fruit trees need early pruning to encourage fruit production, while ornamentals focus on shape. Let’s get those branches growing strong.
📚 In This Guide
- What you need
- Instructions
- Tips and common mistakes
- Wrapping up and next steps
What you need
- ● Seedling: Choose a healthy, disease-free seedling (1–3 feet tall) suited to your climate. Pro tip: 🌡️ Opt for native species for easier adaptation!
- ● Pruning shears: Sharp, bypass-pruners (4–6 inch blades) for clean cuts.
- ● Gloves: Sturdy gardening gloves (waterproof if handling thorny plants).
- ○ Pruning saw: For thicker branches (optional but handy for larger seedlings).
- ● Disinfectant: Rubbing alcohol (70%+) or pruning sealant to prevent infections.
- ● Potting mix: Well-draining soil (e.g., 60% peat/coir, 30% perlite, 10% compost).
- ● Containers: 1–3 gallon pots (with drainage holes) or a nursery bed.
- ● Loppers: For branches up to 2 inches thick.
- ● Hand pruners: Anvil-style for small, precise cuts (if bypass-pruners aren’t available).
- ● Tree ties: Soft fabric strips to support young branches.
- ● Mulch: Organic mulch (wood chips, straw) to retain moisture.
- ● pH test kit: To ensure soil pH is ideal (most trees prefer 6.0–7.0).
- ● Growth regulator: (e.g., seaweed extract) to boost root development.
- ● Access to sunlight: 6+ hours of direct light daily (adjust for shade-tolerant species).
- ● Water source: Hose with a gentle spray nozzle or watering can.
- ● Patience! Layered pruning takes time—plan for 3–5 years of gradual shaping.
Instructions: layered pruning for fast, sturdy growth
Here's how to transform a fragile seedling into a strong, upright tree in record time.
🌱 Step 1: Establish the Central Leader
Identify the strongest upward-growing stem—the one that naturally reaches for the light. This becomes your central leader, the backbone of your tree. Use sharp pruning shears to remove any competing stems at the base, cutting them off flush with the soil. I always keep the central leader uncut during this phase because its growth direction determines the tree's future shape.
Watch for new shoots that emerge below the leader—these are called suckers and must go. They drain energy from the main stem and create weak branch structures. If you hesitate, the tree will split its resources, and you'll end up with a bushy mess instead of a sturdy trunk.
☀️ Step 2: Create the First Branch Layer
Once your central leader reaches 12-18 inches tall, it's time for the first pruning layer. Look for 4-6 strong side branches emerging at a 45-degree angle from the main stem. These should be spaced 6-8 inches apart vertically. Use clean pruning shears to trim back any branches that grow too close together or point directly upward—they'll never bear fruit or foliage properly.
Leave 3-4 buds on each remaining branch. These buds will become your next layer of growth. I like to make my cuts just above a bud that faces outward from the tree, which encourages branches to grow away from the center and create an open canopy. This prevents future shading problems in the middle of the tree.
✂️ Step 3: Refine and Strengthen the Structure
When your tree reaches 3-4 feet tall, it's time for structural refinement. Remove any branches that cross each other—these will rub and create wounds where disease can enter. Also cut out water sprouts (fast-growing vertical shoots) and dead or diseased branches. Always make cuts at a 45-degree angle, about ¼ inch above a bud or branch collar.
Here's the thing—you're not just pruning to shape, but to force the tree to grow stronger. By removing weak growth, you redirect the tree's energy into developing a thicker trunk and more robust branches. After pruning, give the tree a deep watering to help it recover and stimulate new growth.
🌿 Step 4: Maintain Growth Layers Annually
Each spring, repeat the layering process. Look for the newest set of branches that grew during the previous season. These form your next growth layer. Prune back any branches that grew too long or crowded the center. I aim to keep 3-5 main branches per layer, spaced 8-12 inches apart vertically.
Watch for epicormic buds—those little bumps that appear along the trunk. These can sprout into weak branches that compete with your main structure. Snip them off early before they grow more than 2 inches. This keeps your tree's energy focused on upward growth and strong branch development.
⏰ Step 5: Transition to Mature Pruning
Once your tree reaches 6-8 feet tall, shift focus to thinning cuts rather than heading cuts. Instead of trimming back branches to a certain length, remove entire branches that are thinner than a pencil or growing inward. This opens up the canopy and improves air circulation, which prevents fungal diseases.
You'll know you're doing it right when you see strong, outward-growing branches with thick trunks and fewer, larger leaves. The tree should look balanced, with no single branch dominating the structure. This layered approach ensures your tree grows fast and sturdy, ready for years of healthy growth.
Tips & tricks for layered pruning success
These game-changing tips will help you transform your seedling into a sturdy, fast-growing tree without sacrificing strength or beauty.
Timing is Everything: In Step 1, when establishing your central leader, don't rush—wait until your seedling has at least 6-8 inches of vertical growth before making any cuts. This ensures the leader has enough energy reserves to support future growth. I've seen too many beginners prune too early, which weakens the stem and leads to multiple weak leaders competing for dominance.
Tool Prep Matters: Before you start, sterilize your pruning shears with rubbing alcohol to prevent spreading disease between cuts. I also recommend using bypass pruners instead of anvil pruners—they make cleaner cuts that heal faster. Always sharpen your blades annually or when you notice cuts looking jagged. A sharp tool is gentler on the tree and promotes quicker healing.
Visualizing the Final Structure: In Step 2, when creating your first branch layer, imagine your tree's mature shape. Place your strongest branches where you want them to end up—this is called "target pruning." For example, if you want lower branches for fruit production, position them at 3-4 feet from the ground. This foresight prevents having to make drastic cuts later when the tree is larger and more difficult to prune.
Seasonal Strategy: The best time to prune is during the dormant season (late winter/early spring) before new growth begins. This allows wounds to heal before the tree puts energy into new leaves. If you must prune during growing season, do it on a cool, cloudy day to reduce stress on the tree. I've learned this the hard way—summer pruning can invite pests and diseases through fresh cuts.
Pro Tips for Seedling To Tree
- These game-changing tips will help you transform your seedling into a sturdy, fast-growing tree without sacrificing strength or beauty.
- Timing is Everything: In Step 1, when establishing your central leader, don't rush—wait until your seedling has at least 6-8 inches of vertical growth before making any cuts.
- Tool Prep Matters: Before you start, sterilize your pruning shears with rubbing alcohol to prevent spreading disease between cuts.
Frequently asked questions
Got questions about transforming seedlings into sturdy trees?
Here are some of the most common ones—plus practical answers to help you grow with confidence!
How often should I prune a young seedling to encourage strong growth?
For seedlings, light pruning is key! Trim just the top set of leaves (about 1/3 of the height) when the plant is 6–12 inches tall. Repeat every 4–6 weeks during the growing season (spring/fall) to promote branching. Avoid over-pruning—focus on removing only dead or weak growth.
How long does it take for a pruned seedling to mature into a tree?
Timing varies by species, but with layered pruning, you’ll see noticeable trunk thickening and canopy expansion in 1–2 years. Fast-growing trees (like willows or poplars) may mature sooner, while slower varieties (oaks, maples) take 3–5 years. Patience + consistent care = stronger roots and branches!
What’s the difference between pruning for shape vs. pruning for strength?
Shape pruning (e.g., topiary) focuses on aesthetics—even cuts for symmetry. Strength pruning, however, targets structural integrity: remove crossing branches, weak crotches, or water sprouts (shoots growing straight up). For seedlings, prioritize strength first—shape comes later!
Can I prune seedlings in rainy or cold weather?
Avoid pruning during rain (damp wood spreads disease) or freezing temps (stresses the plant). Wait for dry, mild days (50–75°F). Early spring (before buds swell) or late summer (after flowering) are ideal. If you must prune in humidity, sterilize tools with rubbing alcohol to prevent fungal infections.
What if my seedling doesn’t grow after pruning?
Don’t panic! Check these first:
- Light: Seedlings need 6+ hours of sunlight daily—move to a sunnier spot if growth stalls.
- Water: Overwatering suffocates roots; underwatering stresses the plant. Aim for 1 inch of water per week.
- Soil: Amend with compost if soil is poor. A balanced fertilizer (10-10-10) can help.
- Pests: Inspect for aphids or mites—spray with neem oil if needed.
Wrapping up and next steps
Transforming a delicate seedling into a strong, thriving tree is a rewarding journey—one that starts with patience, the right tools, and layered pruning techniques. By understanding growth patterns, removing deadwood early, and encouraging structural strength, you’ve set your young plant up for long-term success. 🌱✨
Now that you’re armed with knowledge, take the next step: grab your pruners and give your seedling some love! Start small, observe progress, and adjust as it grows. Every cut is a step toward a healthier, more resilient tree—so get pruning!