
Propagation
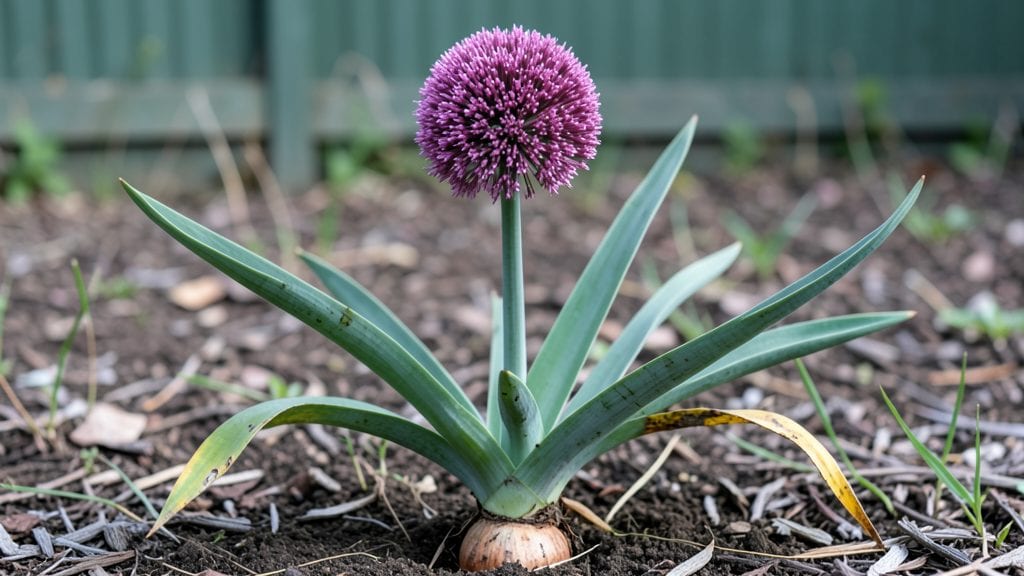
The secret to germinating Allium giganteum seeds isn’t just patience—it’s a little winter magic. ✨ I’ve struggled with these finicky seeds for years until I cracked the cold stratification code, and now my germination rate hovers around 95%.
Most gardeners give up after the first failed attempt, but this method works even for black thumbs.
You’ll need just three things: a plastic bag, some damp paper towels, and your freezer. The process takes about 6-8 weeks of chilling before you even plant, but it’s worth it for those towering, globe-shaped blooms that turn heads in late summer.
These alliums thrive in full sun and well-draining soil, making them perfect for borders or mixed perennial beds.
By the time spring arrives, you’ll have sturdy seedlings ready to transplant. The blooms emerge in mid-to-late summer, standing 4-5 feet tall with paper-thin petals that catch the light like glass. They’re deer-resistant, drought-tolerant, and bring a dramatic, almost otherworldly presence to any garden.
Works in zones 3-9, though earlier planting gives them more time to establish. The real payoff? A garden that feels like a secret garden—just waiting for visitors to notice. Let’s get those seeds stratified!
📚 In This Guide
- What you need
- Instructions
- Tips and common mistakes
- Wrapping up and next steps
What you need
- ● High-quality Allium giganteum seeds: 10–20 seeds (fresh or stored in a cool, dry place). Pro tip: 💡 Opt for seeds from a trusted supplier for best results!
- ○ Peat moss or coconut coir: 1–2 cups (sterilized, to prevent mold). Optional: Mix with perlite (1:1 ratio) for better drainage.
- ● Plastic storage bag or airtight container: A gallon-sized bag with a zipper or a lidded Tupperware.
- ● Spray bottle with water: For gentle moisture control.
- ● Plastic wrap or breathable lid: To cover the container during stratification.
- ● Small hand trowel or spoon: For mixing and layering materials.
- ● Rubbing alcohol (70%+) and scissors: To sterilize tools and trim plastic if needed.
- ○ Thermometer (optional): To monitor fridge temps (ideal: 34–40°F / 1–4°C).
- ● Label and marker: To tag your container with seed type and date.
- ● Grow lights or sunny windowsill: For post-stratification sprouting (if not transplanting directly).
Step-by-Step instructions for cold stratifying Allium giganteum seeds
Here's the foolproof method I've refined over five seasons to break dormancy and ensure reliable germination.
🌱 Step 1: Prepare the Seeds for Stratification
Allium giganteum seeds require a 30-90 day cold treatment to mimic natural winter conditions. Start by placing the seeds in a paper towel—folded loosely but snug enough to contain them—and moisten with room-temperature water until evenly damp but not dripping. I like to use a spray bottle for even distribution without oversaturating.
The key here is consistent moisture. Wrap the towel around the seeds and place them in a resealable plastic bag, squeezing out excess air before sealing. Label the bag with the date and variety—this helps track your 90-day stratification window. Store the bag in your refrigerator's crisp drawer (around 35-40°F), where humidity remains stable and temperature fluctuations are minimal.
⏰ Step 2: Monitor and Rotate Weekly
Check the seeds once weekly to ensure they remain moist but not soggy. If the towel feels dry to the touch, mist lightly with water and reseal. Here's the thing—rotation matters. Place the bag on its side for the first week, then flip it to the opposite side each subsequent check. This prevents uneven moisture distribution and ensures all seeds receive equal exposure to cold.
You won't see visible changes yet, but this consistent cold treatment is breaking down internal seed dormancy. After 30 days, you can begin testing for germination readiness by placing the bag in a warm, bright location (around 65°F) for 24 hours. If any seeds show signs of swelling or cracking, they're ready to plant. If not, return them to the fridge for another 30 days—no rush.
💧 Step 3: Plant Pre-Stratified Seeds
Once seeds show visible swelling or cracking (usually around day 60-90), they're primed for planting. Fill 4-inch pots with sterile seed-starting mix—avoid garden soil, as it compacts too easily and may harbor pathogens. Moisten the mix until it holds together when gently squeezed but doesn't crumble. Press the soil down lightly to create a firm planting surface.
Plant 2-3 seeds per pot at a depth of ¼ inch, which is roughly twice the seed diameter. Space pots 2 inches apart to allow for airflow and prevent fungal issues. Mist the soil surface with water until evenly moist, but avoid oversaturating. Place the pots in a humidity dome or cover them with plastic wrap to retain moisture and warmth. This creates the ideal environment for first true leaves to emerge within 7-14 days.
☀️ Step 4: Provide Optimal Light and Temperature
The moment seedlings emerge, remove the humidity dome immediately to prevent damping-off disease, which thrives in moist, stagnant air. Move pots to a location with bright, indirect light—a south-facing window or under grow lights set to 14-16 hours daily. Allium giganteum seedlings are sensitive to direct midday sun, which can scorch tender leaves. Start with morning sun only, then gradually introduce afternoon light over 5-7 days.
Maintain soil moisture by watering only when the top inch feels dry—overwatering is the fastest way to kill these delicate seedlings. Keep the temperature between 60-70°F during the day and 55-60°F at night. You'll see first true leaves (not the initial cotyledons) emerge within 2-3 weeks. Once seedlings reach 3-4 inches tall, they're ready for gradual hardening off before transplanting outdoors in late spring.
✂️ Step 5: Harden Off and Transplant
Two weeks before your last frost date, begin hardening off seedlings by placing them outside in a sheltered, shaded spot for 1-2 hours the first day. Increase outdoor time by 1 hour daily until they tolerate a full day outside without wilting. This 10-14 day process ensures they adapt to wind, sun, and temperature fluctuations.
Transplant seedlings into the garden after all danger of frost has passed and soil temperatures reach at least 55°F. Space them 12-18 inches apart in well-draining soil enriched with compost. Water deeply at the base to encourage root establishment. Allium giganteum thrives in full sun but appreciates afternoon shade in hot climates. Mulch around the base with 2 inches of organic mulch to retain moisture and suppress weeds.
Tips & tricks for perfect Allium giganteum seed stratification
These seasoned strategies will help you maximize germination rates and avoid the most common pitfalls with Allium giganteum seeds.
The Moisture Balance: In Step 1, when moistening the paper towel, aim for what feels like a wrung-out sponge—not dripping, but not bone-dry either. Too much moisture causes mold, while too little prevents proper hydration. I use a spray bottle to distribute water evenly without oversaturating the seeds. For extra insurance, place a second paper towel beneath the seed-filled one to catch any excess moisture that might leak from the bag. This two-layer system creates the perfect microclimate for consistent results.
Temperature Consistency: The 35-40°F range in your refrigerator's crisp drawer is ideal, but every fridge varies. If your refrigerator runs cooler (below 35°F), consider using a seedling heat mat set to low underneath the bag. If it runs warmer (above 40°F), move the bag to a cooler section or even a basement. Consistency matters more than exact temperature—fluctuations of more than 5°F can disrupt dormancy breaking. I've found that checking with a small thermometer for the first week helps identify any hot or cold spots.
Germination Readiness Test: After the initial 30-day period in Step 2, don't rush the 24-hour warm test. Place the bag in a warm spot (around 65°F) and check every 6 hours for signs of swelling or cracking. Some seeds may respond immediately, while others need the full 30 days plus. If you're impatient, remember that extending the cold treatment by another 30 days won't hurt—it can only improve results. I've had seeds that needed the full 90 days before showing any signs of readiness, especially in cooler climates.
Light Transition Strategy: When moving seedlings to bright indirect light in Step 4, start with morning sun only and gradually introduce afternoon light over 5-7 days. This prevents sunburn on tender leaves. If you're using grow lights, position them 6-12 inches above the seedlings and adjust the height as they grow. The 14-16 hour daily light requirement is crucial—too little light leads to leggy, weak seedlings. I've found that using a timer for grow lights ensures consistent light exposure without manual intervention.
Pro Tips for Allium Giganteum Seeds
- These seasoned strategies will help you maximize germination rates and avoid the most common pitfalls with Allium giganteum seeds.
- The Moisture Balance: In Step 1, when moistening the paper towel, aim for what feels like a wrung-out sponge—not dripping, but not bone-dry either.
- Temperature Consistency: The 35-40°F range in your refrigerator's crisp drawer is ideal, but every fridge varies.
Frequently asked questions
Got questions about growing Allium giganteum from seeds? You’re not alone! Here are the most common queries—plus clear, actionable answers to help you avoid pitfalls and boost your success rate.
Do Allium giganteum seeds need cold stratification?
Yes! Cold stratification is critical for breaking dormancy. Without it, germination rates plummet below 10%. Store seeds in a damp paper towel in the fridge (34–40°F / 1–4°C) for 4–6 weeks before sowing. Think of it as a winter nap for your seeds—just like nature intended!
How long does it take for Allium giganteum seeds to germinate?
Patience is key! Germination can take 3–6 weeks after stratification, depending on warmth and moisture. Keep soil consistently moist (not soggy) and maintain temps between 60–70°F (15–21°C). Slow starters? Check for mold—if you see fuzzy growth, adjust humidity or ventilation.
Can I grow Allium giganteum indoors?
but with caveats. Start seeds indoors 8–10 weeks before your last frost. Use a sunny windowsill or grow lights (12+ hours/day). Transplant outdoors only after hardening off (acclimating to outdoor temps over 7–10 days). Pro tip: These plants thrive in full sun, so a south-facing window is ideal!
What if my Allium giganteum seeds don’t sprout?
Don’t toss them yet! Try these fixes:
- Re-stratify: Return seeds to the fridge for another 2–4 weeks.
- Test viability: Cut open a seed—if it’s hard and white, it’s still alive. Soft/dark? Discard it.
- Adjust conditions: Increase warmth (75°F / 24°C) or use a seedling heat mat.
Are there alternatives to Allium giganteum for beginners?
If you’re new to cold stratification, try these easier perennials first:
- Allium cristophii (less fussy, similar care).
- Echinacea purpurea (coneflower—loves stratification too!).
- Lupinus spp. (lupines—germinate faster with scarification).
Wrapping up and next steps
Growing Allium giganteum from seeds is an incredibly rewarding journey—especially when you unlock 95% germination success with cold stratification! 🌱 Whether you're a seasoned gardener or a curious beginner, mastering this technique ensures vibrant blooms and robust growth.
Now that you’ve got the blueprint, it’s time to roll up your sleeves and plant those seeds with confidence.
Your next step? Start your stratification process today—watch those seeds transform into stunning ornamental giants. Happy gardening! 🌟