
Flowers
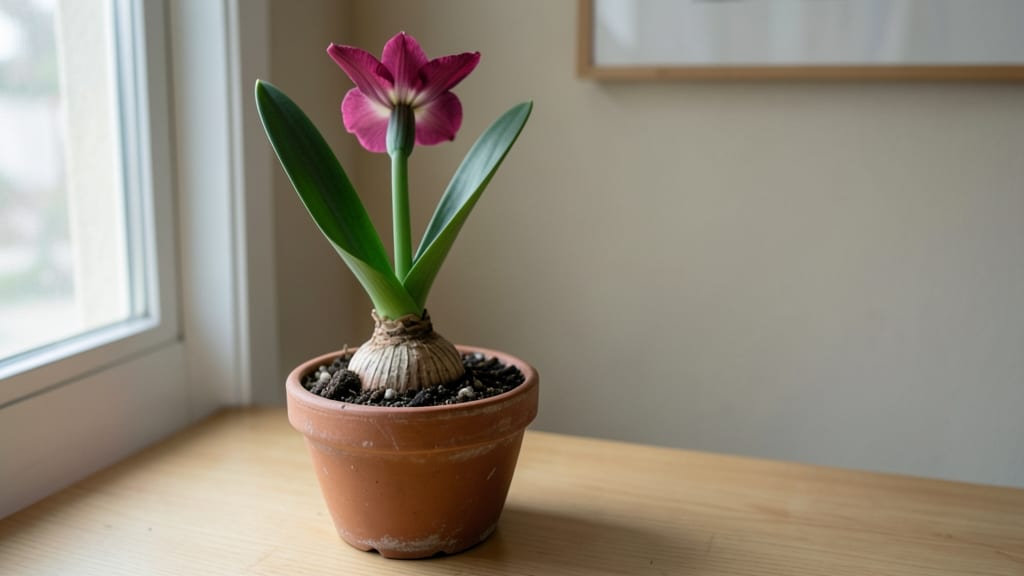
Growing amaryllis from flower seeds isn’t as quick as buying bulbs, but the payoff—those bold, trumpet-shaped blooms—makes the wait worth it. 🌱 I’ve grown amaryllis from seed three times now, and each batch taught me how to skip the common pitfalls like moldy soil or slow germination.
The secret isn’t fancy equipment—it’s patience and the right conditions.
Start with fresh seeds and a well-draining mix of peat moss and perlite. Plant them just below the surface—no deeper than ¼ inch—and keep the soil lightly moist but never soggy.
A warm spot (around 70°F) and bright, indirect light are non-negotiable. Most people rush the watering, but seedlings hate soggy roots—this is where many beginners lose their first batch.
Germination can take anywhere from 2 to 4 weeks, and the first shoots will look like tiny, pale green spears pushing through the soil. Once they’re about 2 inches tall, you’ll start seeing real progress—thicker stems and the first signs of true leaves.
By spring, with consistent care, you’ll have sturdy plants ready to bloom, and the process gets easier every year.
This method works for both indoor pots and outdoor beds, though seeds take longer to mature than bulbs. If you’ve ever wanted to grow your own amaryllis from scratch, here’s how to do it without the guesswork.
📚 In This Guide
- What you need
- Instructions
- Tips and common mistakes
- Wrapping up and next steps
What you need
- ● High-quality amaryllis seeds: Choose Hippeastrum or Amaryllis hybrid seeds (e.g., 'Apple Blossom,' 'Pink Nymph'). Buy from reputable suppliers for viability.
- ● Seed-starting mix: 1–2 gallons of sterile, well-draining potting soil (e.g., 50% peat moss + 50% perlite or coconut coir). Avoid garden soil—it’s too dense!
- ● Containers: Small pots (3–4 inches wide) for individual seeds, or
- ● A seed tray with drainage holes (for batch planting).
- ● Grow lights or sunny windowsill: A full-spectrum LED grow light (12–16 hours/day) or a south-facing window (60°F+).
- ● Misting spray bottle: For gentle hydration without disturbing seeds.
- ○ Plastic wrap or humidity dome: To retain moisture during germination (optional but helpful).
- ● Fine-tip tweezers: For delicate seed placement (avoid fingers—seeds are tiny!).
- ● Labeling tags: Mark pots with seed variety and date planted.
- ○ Heating mat (optional): Speeds up germination (70–75°F ideal).
- ● Fertilizer: A balanced, water-soluble 10-10-10 or organic option (diluted to half-strength) for seedlings.
- ● Transplanting pots (later stage): 6-inch pots with fresh potting mix for mature bulbs.
Step-by-Step instructions for growing amaryllis from seeds
Here’s how to turn those tiny seeds into vibrant spring blooms—no fancy tools needed.
🌱 Step 1: Stratify Seeds for Better Germination
First, scatter the seeds in a small container with a mix of equal parts peat moss and perlite. Moisten the mix until damp but not soggy—think of a wrung-out sponge. Cover the container loosely with plastic wrap or a damp paper towel to keep humidity high.
Place the container in the fridge for 8-12 weeks. This cold treatment mimics winter, breaking seed dormancy. Check occasionally to ensure the mix stays moist. Once the time’s up, move the container to a warm spot—around 65-75°F—and keep it there until sprouts appear.
☀️ Step 2: Provide Warmth and Light for Sprouting
Once you see tiny green shoots (usually in 4-8 weeks after removing from cold), uncover the container and place it under a grow light or in a sunny window. Amaryllis seedlings need 12-14 hours of light daily to grow strong. If leaves start stretching or turning pale, the light isn’t strong enough—move it closer.
Keep the soil consistently moist but never waterlogged. Stick your finger in the mix—if the top inch feels dry, it’s time to water. Overwatering now can cause rot, so let excess water drain away completely before placing the container back in its tray.
🪴 Step 3: Transplant Seedlings into Individual Pots
When seedlings have 2-3 true leaves (not just the initial seed leaves), it’s time to pot them up. Fill 4-inch pots with a well-draining mix of cactus/succulent soil blended with perlite. Gently remove each seedling, keeping the root ball intact, and place it in its own pot.
Press the soil lightly around the base to secure the plant, but don’t pack it down too tightly. Amaryllis roots need airflow to thrive. Water lightly after transplanting to help settle the soil. Place the pots in bright, indirect light for the first week to reduce stress on the young plants.
🌿 Step 4: Encourage Strong Growth Before Winter
Over the next 6-8 weeks, keep seedlings in bright light and water when the top inch of soil feels dry. Amaryllis love warmth, so aim for 70-75°F during the day. If you notice leaves yellowing, it’s often a sign of overwatering—let the soil dry out more between waterings.
Once seedlings reach 4-6 inches tall, you can fertilize lightly with a balanced liquid fertilizer (like 10-10-10) diluted to half strength. Feed every 4-6 weeks to support steady growth. Avoid heavy-handed fertilizing—amaryllis are sensitive to salt buildup in the soil.
⏰ Step 5: Prepare for Winter Dormancy
In late fall, when nighttime temperatures drop below 50°F, reduce watering and stop fertilizing. Let the soil dry out completely between waterings. Amaryllis need this dormancy period to store energy for spring blooms. Place pots in a cool, dark spot (around 50-60°F) until spring.
Check the pots monthly—if you see any new growth, it’s time to bring them back into light and resume watering. This dormancy trick ensures your amaryllis will reward you with stunning spring flowers. Patience here pays off in bold, showy blooms later!
🌸 Step 6: Bloom Care and Future Growth
When buds appear in spring, move the pots to a bright, sunny spot (like a south-facing window) and water lightly to encourage blooming. Once flowers fade, trim the spent stems but keep the leaves—they’ll continue photosynthesizing to fuel next year’s blooms.
After blooming, resume regular watering and fertilizing to build strength for another dormancy cycle. With care, your amaryllis will thrive for years, gifting you with vibrant blooms season after season. The key? Stay consistent with light, water, and dormancy—your plants will thank you with stunning flowers!
Tips & tricks for growing amaryllis from seeds
Turning those tiny amaryllis seeds into blooming beauties takes patience—but these simple tricks make all the difference.
Stratification Secret: Don't rush the 8-12 week cold treatment in Step 1. This mimics winter conditions and breaks seed dormancy. I've seen seeds sprout faster when placed in the crisper drawer of the fridge—it maintains more consistent 35-40°F temperatures. Mark your calendar when you start to avoid guessing when those 12 weeks are up!
Lighting Up Sprouts: In Step 2, those 12-14 hours of daily light are crucial. If your windows aren't sunny enough, a simple LED grow light (around $20) works wonders. I place mine just 6 inches above seedlings—close enough to notice a difference but not so close it overheats. Watch for leaves stretching toward light (called "etiolation")—this means they need more intensity.
Transplanting Like a Pro: When moving to 4-inch pots in Step 3, use your finger to gently loosen the root ball before placing in new soil. This prevents transplant shock. I also add a handful of perlite to each pot—it improves drainage and mimics the airy mix from Step 1. The first week after transplanting is critical: keep them in bright, indirect light to reduce stress.
Fertilizer Timing: Once your seedlings hit 4-6 inches in Step 4, that diluted 10-10-10 fertilizer becomes your best friend. But here's the thing: amaryllis hate salt buildup. After fertilizing, I always water thoroughly to rinse away excess salts. And remember—feed every 4-6 weeks, not more frequently. Too much fertilizer now can damage those delicate roots.
Pro Tips for Amaryllis Flower Seeds
- Turning those tiny amaryllis seeds into blooming beauties takes patience—but these simple tricks make all the difference.
- Stratification Secret: Don't rush the 8-12 week cold treatment in Step 1.
- Lighting Up Sprouts: In Step 2, those 12-14 hours of daily light are crucial.
Frequently asked questions
Got questions about growing amaryllis flower seeds? You’re not alone! Here are some of the most common concerns—and their answers—to help you bloom with confidence.
How long does it take for amaryllis seeds to germinate?
Amaryllis seeds can take anywhere from 2 weeks to 3 months to sprout, depending on temperature, moisture, and seed freshness. Patience is key—keep the soil consistently moist (not soggy) and warm (around 70°F). If nothing emerges after 4 months, the seeds may not have been viable. Pro tip: Use a heat mat to speed up germination!
Can I grow amaryllis from seeds instead of bulbs?
Yes, but it’s a slower process! Bulbs produce blooms in 6–8 weeks, while seeds can take 2–5 years to mature enough for flowers. If you’re patient and want rare varieties, seeds are a fun challenge. For quick results, bulbs are the way to go.
What’s the best time of year to plant amaryllis seeds?
Plant seeds in early spring (March–April) for summer blooms or late summer (August–September) for a winter display. Avoid extreme heat or cold—aim for 60–75°F soil temps. A sunny windowsill or greenhouse works well until seedlings are sturdy enough for outdoor transplanting.
Why aren’t my amaryllis seeds sprouting?
Common culprits include:
- Dry soil: Seeds need constant moisture (cover with plastic wrap to retain humidity).
- Poor light: Place near a bright window or under grow lights (12+ hours/day).
- Old seeds: Amaryllis seeds lose viability after 1–2 years. Buy fresh!
- Temperature swings: Keep soil warm but not hot (use a seedling heat mat if needed).
Will my amaryllis grown from seed look like the parent plant?
Not guaranteed! Seeds produce hybrid offspring with unpredictable colors, sizes, or bloom times. For consistent results, save bulbs or buy named varieties. If you love surprises, embrace the gamble—some seed-grown amaryllis can be stunningly unique!
Wrapping up and next steps
Growing amaryllis flower seeds is a rewarding journey that brings vibrant blooms and a touch of spring indoors—even in the off-season! 🌸 With the right soil, patience, and care, you’ll soon enjoy stunning flowers that brighten any space. Now’s the perfect time to start!
Ready to dive in? Grab your seeds, follow the steps, and watch your garden flourish. Share your progress or blooms with fellow plant lovers—happy growing! 🌱