
Watering
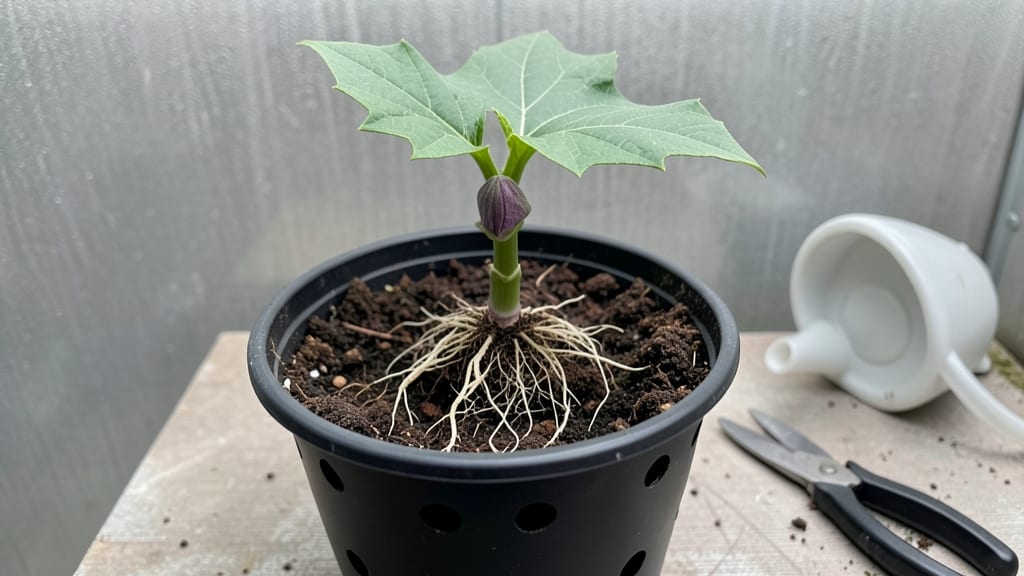
Growing an Amorphophallus titanum seedling starts with keeping that soil perfectly moist—not soggy, not dry, but just right to coax the roots awake. 🌱 I’ve watched these slow-growing giants push through the soil for years, and the secret isn’t fancy equipment—it’s patience and precision with moisture.
One wrong move, and you’ll either drown the seed or watch it sit dormant for months. The timeline for germination can stretch from 4 weeks to 6 months, depending on how consistently you maintain that balance.
The key is a fine-mist spray bottle and a clear plastic dome or bag to trap humidity without suffocating the seed. Check the soil daily—it should feel like a wrung-out sponge, never letting the top inch dry out.
Too much water, and you’ll see black, mushy roots; too little, and the seedling will stall. I’ve lost count of how many times I nearly gave up, only to see a tiny shoot emerge after adjusting just slightly. This plant rewards those who pay attention to the details.
Once germination kicks in, you’ll spot a tiny, papery leaf unfurling—the moment you’ve been waiting for. From there, growth speeds up (though still slowly), and within a year, you’ll have a sturdy, broad-leafed plant ready for its next phase.
The real magic happens when you see that first leaf, proof that your moisture game is on point. It’s not just about watering; it’s about creating the perfect little ecosystem where this rare beauty can thrive.
Now, here’s the catch: this isn’t a fast process. We’re talking years before you see the famous corpse flower bloom, but every step—from that first sprout to the sturdy leaves—is worth it.
The patience pays off in a plant that feels like a living monument in your garden. Let’s get those seeds germinating right.
📚 In This Guide
- What you need
- Instructions
- Tips and common mistakes
- Wrapping up and next steps
What you need
- ● Seeds: 1–3 Amorphophallus titanum seeds (fresh or pre-soaked for 24–48 hours in warm water)
- ● Germination Medium: Sphagnum moss (sterilized, not peat moss) – 1–2 cups
- ● OR a mix of perlite and coco coir (50/50 ratio) – 2–3 cups
- ● Container: Clear plastic container (e.g., takeout tray or seedling tray) – 6" x 12" minimum
- ● OR a small propagator with a humidity dome
- ● Watering Tools: Spray bottle (for gentle misting)
- ○ Fine-mist sprayer (optional, for humidity control)
- ● Heat Mat: Germination mat set to 75–85°F (24–29°C) (critical for speedy sprouting!)
- ● Plastic Wrap or Clear Lid: To maintain high humidity (90%+)
- ● pH Test Kit: To monitor moisture acidity (ideal range: 5.5–6.5)
- ● Digital thermometer/hygrometer (to track temperature and humidity)
- ● Fungicide (e.g., hydrogen peroxide 3%, diluted to 1:10 ratio) to prevent mold
- ● Small fan (for gentle airflow to avoid rot)
- ● Grow lights (if natural light is insufficient)
- ● Notebook/journal (to log moisture levels, temperature, and seedling progress)
Instructions for germinating Amorphophallus titanum seeds with precision
Here’s how to coax those stubborn seeds into life while keeping moisture just right.
🌱 Step 1: Prepare the Seedling Tray and Moisture System
Fill a clean, shallow tray with a mix of 50% peat moss and 50% perlite—this keeps roots aerated while holding moisture without drowning them. I like to press the mix down lightly so it’s firm but not compacted. The goal is a texture like a damp sponge: if you squeeze, a few drops should form, but it shouldn’t feel soggy.
Place the tray in a warm spot, ideally between 75-85°F. A seedling heat mat under the tray gives that extra push for germination. Water the mix until it’s evenly moist to the touch, but avoid puddles. The top layer should feel slightly damp, not wet—this is your baseline moisture mark. Cover the tray loosely with clear plastic wrap to lock in humidity, but leave a tiny gap for airflow.
💧 Step 2: Sow Seeds and Monitor Moisture Daily
Scatter the seeds on the surface—don’t bury them. Amorphophallus titanum seeds need light to germinate, so pressing them lightly into the top layer is enough. Mist the surface with a spray bottle until the mix feels uniformly damp again. Here’s the trick: check moisture every 2-3 days by lifting the tray. If the top inch feels dry, mist again. If it’s still damp, wait.
Overwatering is the silent killer. Too much moisture triggers rot before germination even begins. You’ll know it’s right when condensation forms on the plastic wrap but no water pools in the tray. Patience is key—germination can take 4-12 weeks, depending on warmth and consistency.
☀️ Step 3: Introduce Indirect Light After Sprouting
Once you see the first tiny shoots—usually 3-6 weeks in—remove the plastic wrap immediately. These seedlings are sensitive to excess moisture now. Move the tray to bright, indirect light (think filtered sunlight or a grow light 12 inches away). Direct sun will scorch the delicate leaves, so avoid south-facing windows.
Water only when the top ½ inch of soil feels dry—this keeps roots active without shocking the plant. You’ll notice the seedlings develop a single, broad leaf first. This is their energy reserve, and it’s a sign they’re ready for slightly more care. Keep the temperature steady at 70-75°F to prevent stress.
⏰ Step 4: Transplant When True Leaves Appear
After 8-12 weeks, when the seedlings show two true leaves (not the initial seed leaf), it’s time to transplant. Fill 4-inch pots with the same peat-perlite mix, making a small hole with your finger and gently sliding the seedling in. Press the soil around the base to secure it, but don’t pack it down.
Water lightly until the soil is moist but not soggy. Place the pots in a shady spot for the first week to help them adjust. Over the next few weeks, gradually introduce more light. This plant grows slow but steady—don’t rush it. You’ll see the classic arrowhead-shaped leaves develop as it matures.
Tips & tricks for germinating Amorphophallus titanum seeds
These precision tips will help you avoid the most common germination pitfalls while keeping that perfect moisture balance.
Temperature Matters: The 75-85°F range in Step 1 is non-negotiable for germination. I place my tray on a seedling heat mat set to 80°F—this consistent warmth mimics tropical conditions. If your home runs cooler, consider a small greenhouse setup with a built-in heater. The moment you see condensation forming on the plastic wrap, you know you've hit the sweet spot.
Moisture Monitoring: In Step 2, the 2-3 day moisture check interval is your best friend. I use a small wooden skewer to test—insert it into the mix and pull out. If it comes out clean, mist again. If it feels damp, wait. The key is that top inch should feel like a wrung-out sponge: damp but not dripping. Overwatering here is the #1 reason seeds fail to sprout.
Light Transition: When those first shoots appear in 3-6 weeks (Step 3), remove the plastic immediately—this prevents fungal growth from excess moisture. I move my tray to an east-facing window where it gets morning sun but stays shaded in the afternoon. A grow light on a timer set to 12 hours/day works perfectly if natural light is limited. Watch for the seedlings to develop that first broad leaf—this is their signal they're ready for slightly more care.
Transplant Timing: Waiting for two true leaves in Step 4 is crucial—this ensures the seedling has developed a strong root system. I transplant mine into 4-inch pots filled with the same peat-perlite mix, but I make the hole just slightly larger than the seedling's root ball. Gently pressing the soil around the base secures it without compacting, which could stress the delicate roots.
Pro Tips for Amorphophallus Titanum Seedling
- These precision tips will help you avoid the most common germination pitfalls while keeping that perfect moisture balance.
- Temperature Matters: The 75-85°F range in Step 1 is non-negotiable for germination.
- Moisture Monitoring: In Step 2, the 2-3 day moisture check interval is your best friend.
Frequently asked questions
Got questions about growing Amorphophallus titanum seedlings? You’re not alone!
This rare plant demands patience, precision, and the right conditions. Below, we tackle the most common concerns—from germination timelines to troubleshooting—so you can nurture your seedling like a pro.
How long does it take for an Amorphophallus titanum seedling to germinate?
Germination can take 6 weeks to 6 months, depending on temperature (ideal: 70–80°F) and moisture consistency. Keep the seedling’s medium evenly damp (not soggy) and avoid direct sunlight until sprouts appear. Patience is key—this isn’t a fast-growing plant!
What’s the best moisture level for a seedling?
The medium should stay consistently moist but never waterlogged. Use a hygrometer to aim for 60–70% humidity and water only when the top inch feels dry. Overwatering causes root rot, while underwatering stunts growth. A misting bottle or humidity dome helps maintain ideal conditions.
Can I grow Amorphophallus titanum from a seedling indoors?
Yes, but it requires bright, indirect light (like an east-facing window) and a warm, humid environment. Supplement with a grow light if natural light is insufficient. Avoid drafts and maintain temperatures above 65°F. Outdoor seedlings thrive faster but need 6+ months of warm weather before transplanting.
Why isn’t my seedling growing? Troubleshooting tips.
Slow growth?
Check light (needs 12+ hours/day), temperature, and nutrient levels. A balanced fertilizer (diluted) every 4–6 weeks helps.
Yellowing leaves?
Overwatering or poor drainage. Let the medium dry slightly between waterings and ensure pots have holes.
No new leaves?
It might be dormant—Amorphophallus cycles between growth and rest. Reduce water slightly and wait.
Are there easier alternatives to Amorphophallus titanum?
If you’re overwhelmed, try Philodendron or Monstera for beginner-friendly tropical plants. For something equally dramatic but simpler, Anthurium or Alocasia offer stunning foliage with less fuss. But if you’re hooked on the “corpse flower” vibe, stick with it—just adjust your expectations!
Wrapping up and next steps
Growing an Amorphophallus titanum seedling is a thrilling journey that rewards patience with one of nature’s most fascinating plants! By mastering the precise moisture timeline—from the initial soaking to the dormancy phase—you’ll set your seedling up for success.
Remember, consistency is key: track humidity, monitor soil moisture, and stay observant for those tiny signs of growth.
Ready to take the next step? Celebrate your progress—even small milestones like sprouting or root development are cause for excitement! Now, document your journey with photos, adjust your care routine as needed, and watch your corpse flower seedling thrive.
The wait will be worth it when you see that iconic bloom! 🌱✨