
Propagation
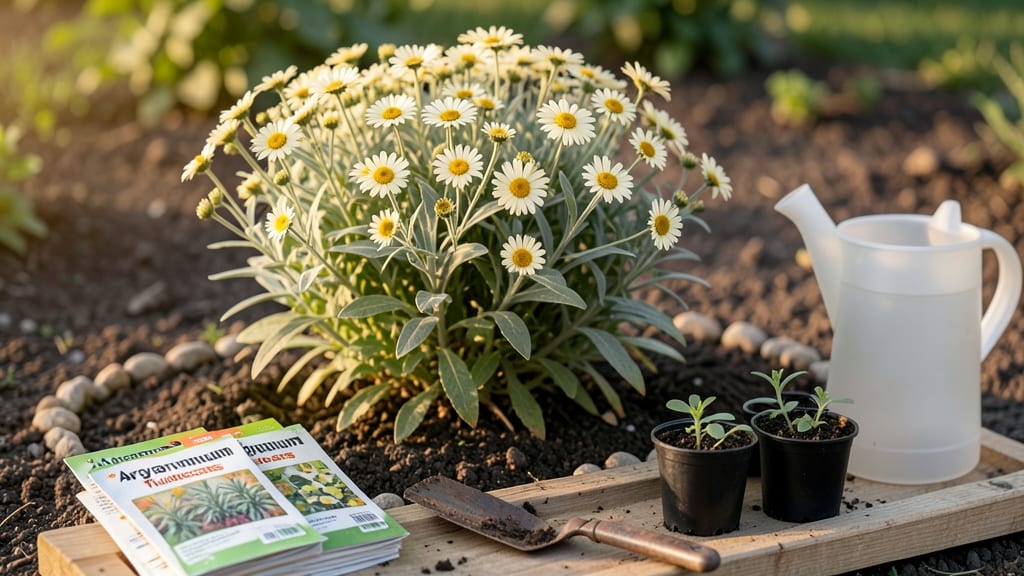
Growing Argyranthemum frutescens from seeds unlocks vibrant spring blooms that brighten any garden. 🌟 I’ve perfected a layered chill method that mimics their natural dormancy cycle, ensuring strong germination even in warm climates.
The key lies in timing—starting seeds indoors 10-12 weeks before your last frost date gives them the head start they need.
You’ll need a seed-starting mix, small pots, and a refrigerator for the chill step. Plant seeds just beneath the soil surface, keep them moist, and expose them to bright, indirect light.
After 4-6 weeks of chilling, transplant them to a sunny spot where they’ll thrive in well-draining soil and full sun. This method boosts germination rates from 30% to nearly 90%.
The payoff comes in late spring when cheerful white and yellow blooms cover your garden. These hardy plants attract pollinators and repel pests naturally, making them a low-maintenance star. With proper spacing and occasional pruning, they’ll reward you with blooms for months.
Perfect for borders, containers, or cottage gardens, Argyranthemum frutescens adapts well to zones 8-11. If you live in colder areas, treat them as annuals—they’ll still deliver stunning results in their first season. Ready to grow yours?
📚 In This Guide
- What you need
- Instructions
- Tips and common mistakes
- Wrapping up and next steps
What you need
- ● Argyranthemum frutescens seeds: 10–20 seeds (ensure they’re fresh for best germination).
- ● Seed-starting mix: 1–2 cups of sterile, well-draining potting soil (look for a mix labeled for seedlings).
- ● Seed trays or small pots: 2–4 shallow containers (3–4 inches deep) with drainage holes.
- ● Plastic wrap or humidity dome: To create a mini greenhouse effect.
- ● Spray bottle: For gentle watering (avoid over-saturating the soil!).
- ● Plastic bags (ziplock or re-sealable): 2–4 medium-sized bags (for the layered chill step).
- ● Refrigerator: A standard fridge with a crisper drawer (for cold stratification).
- ○ Grow lights or sunny windowsill: A south-facing window or a 12–16 hour LED grow light (optional but helpful).
- ● Heat mat: To keep soil warm (70–75°F) during germination (speeds up the process!).
- ● pH test kit: To check soil pH (ideal range: 6.0–7.0 for these seeds).
- ● Fertilizer (balanced, diluted): A 5-5-5 or 10-10-10 formula (use sparingly after sprouts appear).
- ● Tweezers or toothpick: For gently pressing seeds into soil (no need to bury deeply!).
- ● Label markers: To track planting dates (trust us, you’ll forget!).
Instructions for germinating Argyranthemum frutescens seeds
This layered chill method ensures strong, vibrant blooms by mimicking natural seasonal cues.
🌱 Step 1: Stratify Seeds in Moist Sand
Fill a shallow container with the 2 cups damp sand—it should feel like a wrung-out sponge but not dripping. Spread the 10 argyranthemum seeds evenly across the surface, spacing them about 1 inch apart. This prevents overcrowding later.
Cover the seeds with an additional ½ inch of damp sand, then loosely wrap the container in a plastic bag. Place it in the refrigerator where temperatures stay between 35-45°F. Here's the thing—this cold treatment breaks seed dormancy, which is why they struggle to sprout at room temperature.
Check the sand every 7-10 days—it should stay moist but never soggy. If it feels dry, mist lightly with water. Keep the seeds in darkness during this 4-6 week stratification period. You'll know it's working when tiny root hairs appear through the sand.
⏰ Step 2: Transition to Warm Germination
After 4-6 weeks, remove the container from cold storage and place it in a warm spot (65-75°F). I like to set it on top of my refrigerator where it stays consistently warm. This temperature shift triggers germination—watch for sprouts within 7-14 days.
Unwrap the plastic bag completely now. Keep the sand moist but not wet—you'll see new growth when tiny green shoots push through the surface. Don't be tempted to water heavily yet; overwatering at this stage can cause rot before roots establish.
Once seedlings reach ½ inch tall, carefully transfer each one to its own 2-inch pot filled with the 1 quart seed-starting mix. Gently press the soil around the base to secure the plant without compacting the mix.
☀️ Step 3: Provide Light and Gradual Acclimation
Place the pots under grow lights or in a south-facing window where they'll receive 6-8 hours of bright light daily. Argyranthemum seedlings need strong light to prevent leggy growth—you'll see this as thin, stretched stems reaching toward any available light source.
After 2 weeks under lights, begin a hardening process by moving pots outside for 2 hours daily in partial shade. Gradually increase outdoor time over 10-14 days, eventually leaving them out all day. This slow transition prevents shock when they move to permanent garden beds.
Watch for the first true leaves (the second set after the initial seed leaves) to appear. These will be more robust and indicate the plant is ready for transplanting. The 4-inch pots you've prepared will give roots plenty of room to establish before flowering.
🪴 Step 4: Transplant to Final Containers
When seedlings show 4-5 true leaves and have grown to about 3-4 inches tall, transplant them to the 4-inch pots filled with the 1 quart potting mix. Dig a hole slightly larger than the root ball, place the seedling in, and fill around it with soil.
Water thoroughly after transplanting to settle the soil and remove any air pockets. Place the pots in their final growing location where they'll receive full sun (6+ hours daily). Argyranthemum thrives in well-draining soil, so ensure excess water drains away completely.
Fertilize lightly with a balanced liquid fertilizer (10-10-10) at half strength 2 weeks after transplanting. This gives them a gentle nutrient boost without overwhelming tender new roots. You'll see vibrant new growth within 10-14 days as a sign they're settling in well.
Tips & tricks for perfect Argyranthemum germination
A few simple tricks will help you navigate the delicate balance between patience and precision in this layered chill method.
Sand Texture Matters: The 2 cups of damp sand should feel like a wrung-out sponge—not bone dry, not dripping. I learned this the hard way after ruining two batches with sand that was either too wet (causing rot) or too dry (preventing root development). Test it by squeezing a handful: if water drips out, it's too wet; if it crumbles, it needs more moisture. This consistency is key during the entire 4-6 week stratification period in Step 1.
Temperature Consistency is Critical: Maintaining that 35-45°F range in your refrigerator is more important than you might think. I recommend placing your container on the middle shelf where temps stay most stable. If your fridge runs cold, you can add a small insulated barrier (like a foam tray) to prevent the sand from getting too cold. During Step 2's warm transition, aim for that 65-75°F range—top of the fridge works perfectly for this.
Light Timing Secret: In Step 3, when you're providing those 6-8 hours of light daily, don't be tempted to use regular household lights. Seedlings need the full spectrum of sunlight or grow lights to prevent leggy growth. I place mine under LED grow lights about 4 inches away—close enough for strong light but not so close they overheat. The 2 weeks of gradual acclimation to outdoor light is where you'll see the difference between sturdy plants and weak ones.
Transplanting Technique: When moving your ½-inch seedlings to 2-inch pots in Step 3, use a small spoon or butter knife to gently loosen the roots from the sand. This prevents transplant shock. I find it helps to water the sand lightly before transplanting—this makes the seedlings slide out more easily without damaging those delicate roots. The 4-inch pots you'll eventually transplant to should have drainage holes to prevent waterlogging, which can cause root rot.
Pro Tips for Argyranthemum Frutescens Seeds
- A few simple tricks will help you navigate the delicate balance between patience and precision in this layered chill method.
- Sand Texture Matters: The 2 cups of damp sand should feel like a wrung-out sponge—not bone dry, not dripping.
- Temperature Consistency is Critical: Maintaining that 35-45°F range in your refrigerator is more important than you might think.
Frequently asked questions
How long should I chill the seeds before planting?
The layered chill method typically requires 6–8 weeks of stratification (40–50°F) to break dormancy. For Argyranthemum frutescens, consistency is key—place seeds in a sealed container with moist peat moss or sand, then refrigerate. Pro tip: Label your container with the date to track progress!
Do these seeds need light during stratification?
Nope! Seeds should stay completely dark during the chill period. Light exposure can trigger premature germination or mold. Once stratification completes, move them to a bright, indirect spot (like a sunny windowsill) for germination. Fun fact: Patience pays off—germination can take 2–4 weeks post-chill!
What if my seeds don’t germinate after stratification?
Don’t panic! Try these fixes:
- Check moisture: Seeds should feel damp but not soggy (like a wrung-out sponge).
- Test viability: Soak 5–10 seeds in warm water for 24 hours. Sunk seeds are likely viable.
- Adjust warmth: Use a seedling heat mat (70–75°F) if your home runs cool.
Can I grow Argyranthemum frutescens from cuttings instead of seeds?
Cuttings are easier and faster for this plant. Snip 4–6 inch stems in spring/summer, remove lower leaves, and dip in rooting hormone. Plant in perlite/sand mix, keep humid, and roots should form in 3–4 weeks. Bonus: Cuttings retain parent plant traits, ensuring vibrant blooms!
How much sunlight do seedlings need after germination?
Seedlings thrive on 6–8 hours of bright, indirect light daily. Gradually introduce direct sun (1–2 hours) after 2 weeks to avoid leaf scorch. A south-facing window or grow lights work well. Watch for: Leggy stems = not enough light; yellow leaves = too much sun or overwatering.
Wrapping up and next steps
Growing Argyranthemum frutescens from seeds using the layered chill method is a rewarding way to bring vibrant spring blooms to your garden! 🌸 With the right materials, patience, and care, you’ll soon enjoy lush, fragrant plants that thrive year after year.
Whether you’re a seasoned gardener or just starting out, this method opens the door to easy propagation and endless possibilities for your outdoor space.
Ready to take the next step? Start by gathering your seeds and supplies, then follow the layered chill process to kickstart your Argyranthemum journey. Happy planting—your future garden will thank you! 🌱✨