Propagation
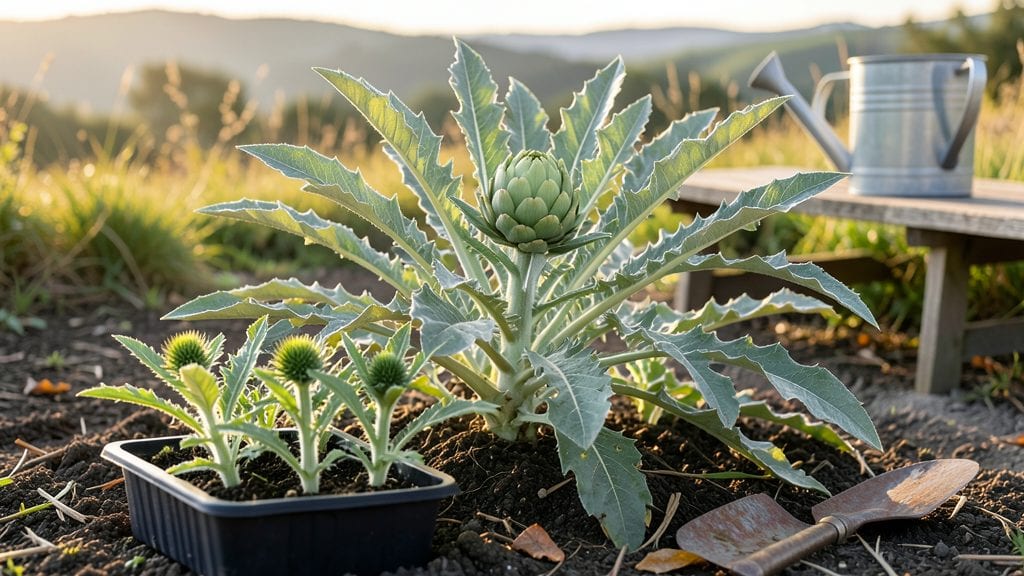
Growing artichokes from seed is like planting a three-year payoff—literally. 🌱 The first year might look like nothing but fuzzy leaves, but by year three, you’ll be harvesting globe-sized artichokes straight from your garden.
My first attempt nearly gave up after the slow start, but persistence paid off with a harvest that lasted from late summer through frost.
You’ll need a sunny spot with well-draining soil, patience for the slow germination (sometimes 30+ days), and a way to stake the taller varieties as they grow. The key is keeping seeds consistently moist during germination and giving them room to spread—artichokes aren’t shy about their space.
Most gardeners skip this process because it feels too long, but the payoff makes it worth every day of waiting.
By year two, you’ll see thick stalks and budding florets, and by year three, you’ll have artichokes so big they’ll make grocery store ones look tiny. The trick is consistent watering—never soggy, never dry—and watching for pests like slugs that love young plants.
With the right care, you’ll end up with a plant that feeds you for years, not just one season.
This method works best in cooler climates (zones 7-10), but even in warmer areas, you can extend the season with row covers. The real reward? Fresh artichokes picked straight from your garden, not a store shelf. Let’s get those seeds in the ground—your future self will thank you.
📚 In This Guide
- What you need
- Instructions
- Tips and common mistakes
- Wrapping up and next steps
What you need
- ● Artichoke seeds: Choose Cynara cardunculus varieties like 'Green Globe' or 'Violetto' (3–5 seeds per plant). Opt for certified organic seeds for best results.
- ● Well-draining potting mix: A blend of 50% peat moss, 30% perlite, and 20% compost (1–2 gallons per seedling). Avoid heavy clay soil.
- ● Seed-starting trays or biodegradable pots: 2–3 inch (5–7.5 cm) deep containers (12–24 cells per tray).
- ● Grow lights or sunny windowsill: Provide 12–14 hours of light daily (LED grow lights work well for indoor starts).
- ● Misting bottle or spray nozzle: For gentle watering to prevent seed rot.
- ● Fertilizer: A balanced, water-soluble fertilizer (e.g., 10-10-10) diluted to half-strength for seedlings.
- ○ Hardening-off tray (optional but helpful): A shaded outdoor space or cold frame to acclimate seedlings before transplanting.
- ● Hand trowel or small shovel: For transplanting seedlings into the garden.
- ● Garden gloves: To protect hands from prickly artichoke leaves.
- ● Mulch (straw or wood chips): 2–3 inches (5–7.5 cm) to retain moisture and suppress weeds.
- ○ Support stakes (optional): Tall varieties (like 'Romanesco') may need 6-foot (1.8 m) stakes for stability.
- ● Climate considerations: Artichokes thrive in USDA Zones 7–10 but can be grown in cooler zones with row covers or greenhouses.
- ● Plant after the last frost when soil temps reach 60°F (15°C).
Step-by-step instructions for growing artichokes from seed
Here’s how to grow robust artichoke plants that reward you with edible buds in just three years.
🌱 Step 1: Start Seeds Indoors 10-12 Weeks Before Last Frost
Artichoke seeds need warmth to germinate, so begin indoors using the 4 seed trays and 2 gallons of seed-starting mix. Fill the trays to the rim with moistened mix, pressing lightly to remove air pockets. Scatter 2-3 seeds per cell—they’re large, so don’t crowd them. Cover with ¼ inch of additional mix and mist until the surface looks damp but not soggy.
Place the trays in a warm spot (70-75°F) like on top of a refrigerator or under a heat mat. Germination takes 2-4 weeks, so patience is key. Keep the mix consistently moist by misting daily—never let it dry out. Once sprouts appear, move them to a sunny windowsill or under grow lights for 14-16 hours of light daily.
☀️ Step 2: Harden Off and Transplant Seedlings
When seedlings have 4-5 true leaves (about 8-10 weeks after sowing), it’s time to harden them off. Start by placing them outside in a shaded spot for 1-2 hours the first day, gradually increasing exposure over 10-14 days. This toughens their stems so they don’t wilt when transplanted.
Choose a sunny, sheltered spot in your garden for the 4 artichoke plants. Dig holes twice as wide as the root ball but only as deep as the container. Space plants 4 feet apart—they need room to grow into sturdy bushes. Gently remove seedlings, loosen their roots, and place them in the holes. Backfill with soil, tamp lightly, and water deeply to settle everything.
💧 Step 3: Maintain Moisture and Fertility for Strong Growth
Artichokes thrive with consistent moisture, so water 1-2 inches per week, more during dry spells. Use the 5-gallon watering can to deliver water slowly at the base, avoiding the leaves to prevent fungal diseases. Mulch around plants with 3 inches of straw mulch to retain moisture and suppress weeds.
Feed plants every 4-6 weeks with the 1 lb of 10-10-10 fertilizer (divided into 4 applications). Scatter the granules around the base, then water deeply to help them dissolve. You’ll see vigorous growth—large, glossy leaves and thick stems—by mid-summer. This is your sign the plants are healthy and ready for bud formation.
✂️ Step 4: Protect and Harvest Mature Buds
Artichokes take 2-3 years to produce buds, but once they do, you’ll need to act fast. In their second year, watch for tight, fuzzy buds forming in the leaf axils. Harvest them when they’re 3-5 inches tall and still firm—this ensures tender, flavorful buds. Use a sharp knife to cut the stem just below the bud, leaving the rest of the plant intact for future harvests.
If buds open before you harvest, don’t worry—the plant will produce more. In colder climates, protect plants with row covers or move containers indoors before the first frost. With proper care, your artichokes will reward you with year-round harvests for decades.
Tips & tricks for perfect artichoke seed starting
A few simple strategies will help you avoid common pitfalls and grow thriving artichoke plants from seed.
Warmth is Key: Maintaining that 70-75°F temperature range during germination is absolutely critical. I've found that placing seed trays on top of a refrigerator works perfectly—just make sure the top isn't too hot to touch. If your home runs cooler, consider using a seedling heat mat underneath the trays. The 2-4 week germination window can feel long, but consistency in warmth makes all the difference.
Lighting Strategy: Once those first sprouts appear, you'll need to provide 14-16 hours of light daily. I recommend using LED grow lights positioned about 6 inches above the seedlings. Regular fluorescent bulbs won't provide enough intensity for artichoke seedlings. Rotate the trays daily so all seedlings get even light exposure—this prevents them from leaning toward the light source.
Transplanting Technique: When it's time to transplant your 4 artichoke plants, focus on the root system. Gently loosen the roots before placing them in their final holes to encourage better establishment. I've seen many gardeners skip this step and end up with stunted plants. Also, make those holes twice as wide as the root ball—this gives roots plenty of room to spread without getting cramped.
Watering Wisdom: The 1-2 inches per week watering guideline is perfect, but timing matters just as much. Water in the morning so the foliage has time to dry before nightfall, which helps prevent fungal diseases. I've learned this the hard way after losing several batches to powdery mildew. That 5-gallon watering can is your best friend—it delivers water slowly at the base without disturbing the soil surface.
Pro Tips for Artichoke From Seed
- A few simple strategies will help you avoid common pitfalls and grow thriving artichoke plants from seed.
- Warmth is Key: Maintaining that 70-75°F temperature range during germination is absolutely critical.
- Lighting Strategy: Once those first sprouts appear, you'll need to provide 14-16 hours of light daily.
Frequently asked questions
Got questions about growing artichokes from seed? You’re not alone—this rewarding (but patient!) process has a few quirks. Here are answers to the most common queries to set you up for success!
How long does it take for artichoke seeds to germinate?
Artichoke seeds can take 2–4 weeks to sprout, depending on soil warmth and moisture. Keep the soil consistently moist (not soggy) and maintain temperatures around 70–75°F (21–24°C). If germination stalls after 3 weeks, gently press seeds into fresh, warm soil—patience is key!
Can I grow artichokes from seed indoors first, then transplant?
Start seeds 6–8 weeks before your last frost indoors under grow lights (they need 12+ hours of light daily). Use small pots with well-draining soil, and harden off seedlings for 1–2 weeks before transplanting outdoors after all frost risk has passed. This extends your growing season in cooler climates!
Why aren’t my artichoke plants flowering or producing buds?
Artichokes are biennials—they focus on leaf growth in Year 1 and need chill hours (40–50°F/4–10°C for 30+ days) to trigger flowering in Year 2. If you’re in a warm climate, try simulating winter by moving potted plants to a garage or cold frame for 6–8 weeks. Patience pays off—buds appear in spring of Year 2 or 3!
What’s the best alternative if I can’t grow artichokes in my climate?
If your zone is too cold (Zone 7 or below) or hot (Zone 10+), try these artichoke-like alternatives:
- Jerusalem artichoke (sunchoke): Hardy, edible tubers, thrives in cooler climates.
- Cardoon: A close relative with edible buds (similar taste, easier to grow in cooler zones).
- Globe artichoke varieties like ‘Green Globe’ or ‘Imperial Star’: Some tolerate slightly cooler temps than others.
Are artichoke plants prone to pests or diseases?
Artichokes are generally low-maintenance, but watch for:
- Pests: Aphids, slugs, and earwigs may nibble. Use neem oil or row covers for prevention.
- Diseases: Fungal issues like powdery mildew thrive in humid conditions. Improve airflow, avoid overhead watering, and rotate crops.
- Bolting: If plants bolt (send up flowers) too early, harvest leaves for greens or try succession planting in warm climates.
Wrapping up and next steps
Growing artichokes from seed is a rewarding journey that pays off in bold flavors and bountiful harvests—all in just three years! 🌱 Whether you're a patient gardener or a beginner eager to try something new, this process proves that great things come with time and care.
Now that you’re armed with the right knowledge, it’s time to roll up your sleeves and get planting—your future artichoke feasts await!
Ready to take the next step? Start by ordering seeds or gathering organic artichoke heads to extract your own. Then, mark your calendar for planting season and watch your garden transform into a thriving artichoke patch. Happy growing! 🌿