Planting
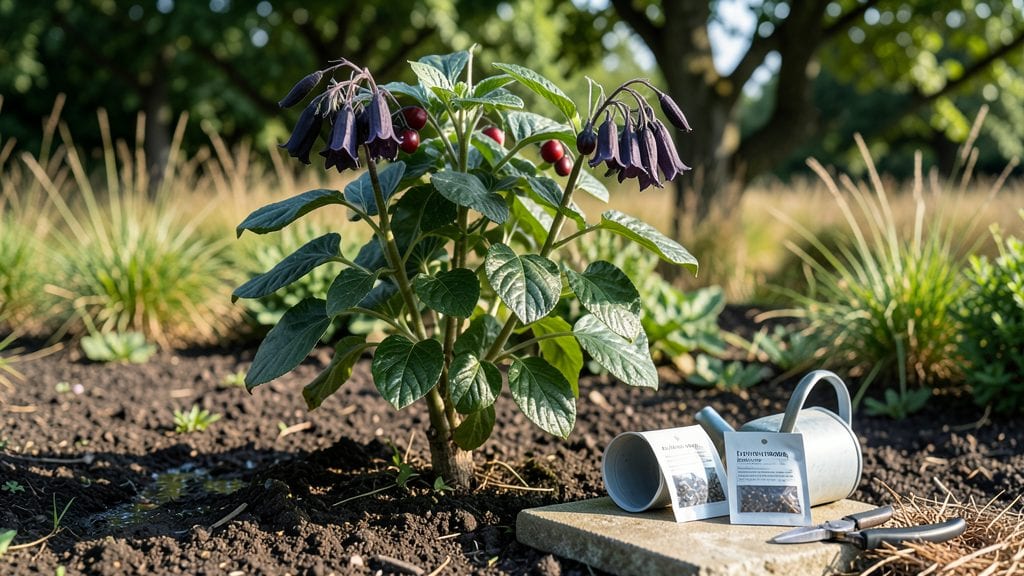
Growing belladonna from seeds means unlocking a plant that’s as dangerous as it is striking—its glossy black berries and bell-shaped flowers are legendary in folklore, but handling them demands caution. I’ve grown it twice now, and while the process is straightforward, every step requires respect for its toxicity.
The seeds themselves are tiny and tricky, but with the right prep, you’ll coax them into life without mishaps.
Cold stratification is non-negotiable for these seeds—without it, germination rates plummet. I use a simple DIY method: mix the seeds with damp sand in a sealed container, then refrigerate for 4-6 weeks before planting.
You’ll need well-draining soil (a mix of potting soil and perlite works), a sunny spot with 6+ hours of light daily, and patience—they’re slow starters but worth the wait for their dramatic foliage.
Once sprouted, belladonna grows aggressively, so contain it early with deep pots or a dedicated garden bed. The plants reward careful handling with 3-foot-tall stalks of dark green leaves and clusters of deadly nightshade berries by late summer.
But here’s the catch: every part is toxic, especially the berries and roots—keep it away from pets, kids, and curious wildlife.
Legal red flags vary by state, so check local regulations before planting—some areas restrict it entirely. If you proceed, wear gloves when handling seeds or plants, and never compost clippings.
The beauty is undeniable, but the risks aren’t worth cutting corners. Start small, stay vigilant, and enjoy the drama from a safe distance.
📚 In This Guide
- What you need
- Instructions
- Tips and common mistakes
- Wrapping up and next steps
What you need
- ● Belladonna seeds – 10–20 seeds (ensure they’re fresh or cold-stratified).
- ● Cold-stratification setup: Small plastic bag or container with a moistened paper towel or peat moss.
- ● Refrigerator (set to 34–40°F (1–4°C)) for 6–8 weeks.
- ● Seed-starting trays – 4–6” deep with drainage holes.
- ● Well-draining potting mix – Sterile, peat-based or cactus/succulent blend (avoid compost-heavy soil).
- ● Spray bottle for gentle watering.
- ● Clear plastic dome or plastic wrap (to retain humidity).
- ● Gloves (nitrile or latex—belladonna is toxic!).
- ● Small hand trowel for transplanting seedlings.
- ● Grow lights or sunny windowsill (full sun after germination).
- ● pH test kit (ideal soil pH: 6.0–7.0).
- ● Fertilizer (balanced 10-10-10 or slow-release granules, lightly after 4–6 weeks).
- ● Label markers (to avoid mix-ups with edible plants!).
Step-by-step instructions for cold-stratifying belladonna plant seeds
This method ensures strong germination rates for these notoriously finicky seeds.
Prepare the Seeds for Stratification
Belladonna seeds require cold stratification to break dormancy—without it, germination rates plummet. Place the seeds in a paper towel or cotton cloth and moisten them with lukewarm water until evenly damp but not soaking. Fold the towel or cloth to contain the seeds, then place it inside a resealable plastic bag with a few small holes punctured for airflow.
Label the bag with the seed variety and date. The goal is to maintain consistent moisture while preventing mold. Store the bag in your refrigerator’s crisper drawer, where temperatures hover around 35-40°F. This cold, damp environment mimics winter conditions and triggers the seeds to break dormancy.
Monitor and Maintain Stratification Conditions
Check the seeds every 7-10 days to ensure they remain moist but not soggy. If the towel or cloth feels dry, lightly mist it with room-temperature water and reseal the bag. Overwatering here risks mold, while under-moisture halts stratification. You’ll see nothing dramatic yet—just patience—until 4-6 weeks have passed.
After 60 days, remove the seeds from the refrigerator and allow them to sit at room temperature (65-70°F) for 24-48 hours. This gradual warming mimics spring’s arrival and signals the seeds that it’s time to germinate. If you rush this step, the seeds may not respond as predictably.
Sow the Stratified Seeds
Fill small seed-starting trays or biodegradable pots with a sterile seed-starting mix—never garden soil, as it’s too dense and may harbor pathogens. Moisten the mix until it holds together when gently squeezed but doesn’t drip. Plant the seeds ¼ inch deep, spacing them 1 inch apart to avoid overcrowding.
Cover the trays with a clear plastic dome or plastic wrap to retain humidity, then place them in a warm, dark location (70-75°F). Belladonna seeds germinate slowly—expect 3-6 weeks before the first sprouts appear. Avoid disturbing them; even a slight shift can discourage weak seedlings.
Provide Light and Care for Emerging Seedlings
Once the first true leaves (not the initial cotyledons) appear, remove the plastic dome and move the seedlings to bright, indirect light. Direct sunlight at this stage can scorch delicate young plants. Use a grow light if natural light is insufficient, keeping it 2-3 inches above the seedlings for 12-14 hours daily. You’ll notice leggy growth if light is insufficient—this is a red flag to adjust immediately.
Water gently from the bottom of the tray to prevent disturbing the soil surface. Keep the mix evenly moist but not waterlogged—Belladonna seedlings are sensitive to both drought and overwatering. After 8-10 weeks, when seedlings have 3-4 sets of true leaves, they’re ready for transplanting into individual 4-inch pots with well-draining soil.
Harden Off and Transplant Carefully
Begin hardening off the seedlings 2 weeks before transplanting outdoors. Place them in a sheltered, shaded spot for 1-2 hours daily, gradually increasing exposure over 10-14 days. This acclimates them to outdoor conditions and prevents shock. Choose a partially shaded location for mature Belladonna plants, as they tolerate morning sun but prefer afternoon shade in hot climates.
Transplant on a cool, overcast day to minimize stress. Dig a hole twice as wide as the root ball and slightly deeper to encourage root spread. Water deeply after planting to settle the soil and reduce air pockets. Mulch with 2-3 inches of organic mulch to retain moisture and suppress weeds—critical in Belladonna’s first growing season.
Tips & tricks for perfect belladonna seed stratification
Cold stratification isn't just a process—it's an art that transforms these notoriously stubborn seeds into thriving plants. Here's what I've learned after years of trial and error with Belladonna.
Moisture Balance is Critical: The 7-10 day check-ins during stratification are your window to prevent two silent killers: mold and dehydration. I use a spray bottle for misting because it gives me precise control—just enough to dampen the towel without creating a swampy environment. Think of it like Goldilocks: the moisture should be just right, not too wet, not too dry. If you see any fuzzy growth, that's mold, and you'll need to start over immediately.
Temperature Consistency Matters: Those 35-40°F temperatures in your refrigerator's crisper drawer aren't just suggestions—they're non-negotiable for breaking dormancy. I've found that some refrigerators have temperature variations, so if your crisper runs warmer, consider using a seed stratification fridge or even a DIY setup with a cooling unit. The goal is to maintain that steady cold, which mimics winter conditions that Belladonna seeds evolved to expect.
Gradual Warming is Essential: The 24-48 hour room temperature transition after 60 days is where many gardeners rush the process. I've seen seeds fail to germinate when moved too quickly from cold to warm. Place your seeds in a spot where they'll experience natural room temperature fluctuations (65-70°F) rather than direct heat sources. This gradual warming mimics spring's arrival and signals the seeds that it's time to break dormancy and begin growth.
Light Timing for Seedlings: Once those first true leaves appear, you'll need to transition carefully to 12-14 hours of light daily. I recommend using a timer for your grow lights to maintain consistency. Belladonna seedlings are particularly sensitive to light deprivation, which causes that classic leggy growth. If you notice stems stretching toward the light source, it's a clear sign you need to increase light exposure immediately. The key is bright, indirect light—think dappled sunlight through a sheer curtain rather than harsh direct rays.
Pro Tips for Belladonna Plant Seeds
- Cold stratification isn't just a process—it's an art that transforms these notoriously stubborn seeds into thriving plants.
- Moisture Balance is Critical: The 7-10 day check-ins during stratification are your window to prevent two silent killers: mold and dehydration.
- Temperature Consistency Matters: Those 35-40°F temperatures in your refrigerator's crisper drawer aren't just suggestions—they're non-negotiable for breaking dormancy.
Frequently asked questions
Got questions about growing belladonna plant seeds?
Here are some of the most common ones—plus practical answers to help you navigate this stunning (but dangerous) beauty with confidence!
Do belladonna seeds need cold stratification before planting?
Yes! Belladonna seeds require cold stratification (6–8 weeks in the fridge) to break dormancy. Skip this step, and you’ll likely end up with zero sprouts. Place seeds in a damp paper towel, seal in a bag, and refrigerate before planting in spring. Patience pays off—this process mimics winter’s natural cycle!
How long does it take for belladonna seeds to germinate?
Germination can take 3–6 months—sometimes even longer! Start seeds indoors in early winter (after stratification) for the best results. Keep soil consistently moist (not soggy) and maintain temperatures around 60–70°F (15–21°C). Slow germination is normal—don’t give up!
Are there non-toxic alternatives to belladonna for ornamental use?
If you love belladonna’s dramatic look but want safer options, try Atropa belladonna’s cousins like deadly nightshade (Atropa belladonna)’s milder look-alikes such as Datura (Jimsonweed) or Brugmansia (Angel’s Trumpet). For classic beauty, Lobelia or Petunia offer vibrant flowers with zero toxicity. Always research before planting!
Why aren’t my belladonna seeds sprouting after stratification?
Several factors could be at play: old seeds (viability drops after 1–2 years), improper stratification (too short or warm), or poor soil conditions (drainage, light, or temperature). Try a fresh batch of seeds or test germination in a controlled environment (like a seedling heat mat). If all else fails, consider buying young plants from a reputable nursery.
Can I grow belladonna in containers, or does it need a garden bed?
Belladonna thrives in containers if they’re at least 12 inches deep with drainage holes. Use a well-draining potting mix and place in full sun. Just be cautious—containers limit root spread, but they’re great for controlling growth in urban areas. Avoid placing near pets or children!
Wrapping up and next steps
Growing belladonna plant seeds is a fascinating journey into the world of Atropa belladonna, but remember—this stunning yet deadly beauty demands respect and patience. Cold stratification is your secret weapon for unlocking germination success, so embrace the process with care and curiosity.
Whether you're a seasoned gardener or a curious beginner, your efforts will reward you with a rare and striking addition to your collection.
Ready to take the next step? Start small—order your seeds from a trusted supplier, gather your materials, and dive into the cold-stratification process. With each step, you’re not just growing a plant; you’re cultivating knowledge and a deeper appreciation for nature’s duality. Happy (and safe) gardening! 🌱✨