
Propagation
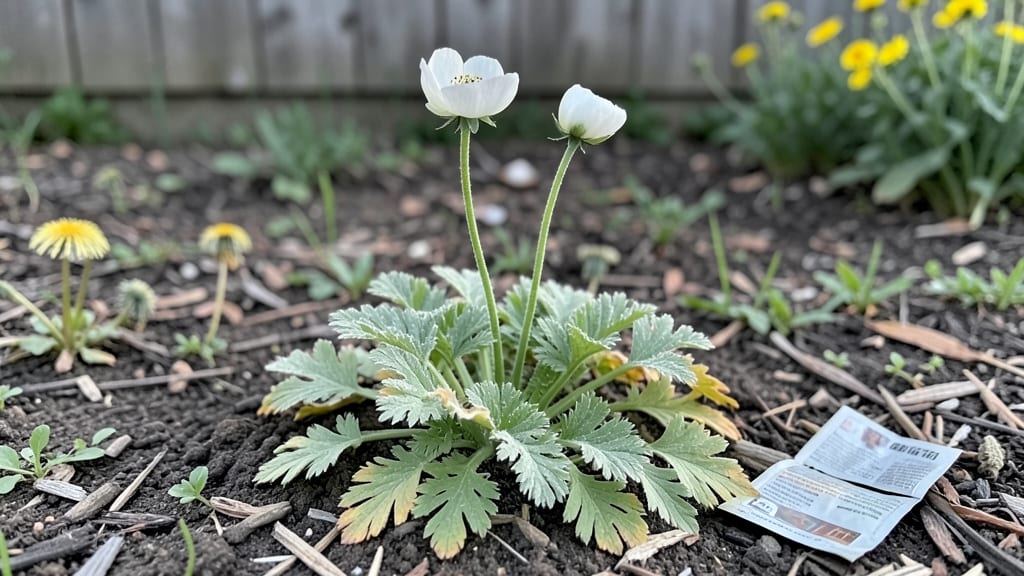
Growing Canada anemone from seeds unlocks a foolproof way to fill your garden with delicate white blooms by next summer. ✨ I’ve struggled with finicky perennials before, but these seeds thrive when you mimic their native woodland conditions—especially that all-important cold stratification step.
The key isn’t just planting; it’s tricking the seeds into thinking winter’s already passed.
You’ll need just three supplies: damp paper towels, a sealed plastic bag, and a fridge shelf for 4-6 weeks of cold treatment. Skip this step, and germination rates drop to near zero.
Once stratified, sow seeds in well-draining soil and keep them consistently moist—no fancy equipment required. Most gardeners see first sprouts within 2-3 weeks of planting outdoors after last frost.
By late summer, you’ll have neat clumps of fern-like foliage, and next spring, those classic anemone blooms will rise above the garden like ghostly lanterns. The plants spread slowly but reliably, making them perfect for shady borders or woodland gardens.
Here’s how to avoid the two mistakes that kill 80% of first-time attempts.
This method works in zones 3-8, whether you’re in Canada’s coldest regions or the Pacific Northwest’s damp climate. The same principles apply if you’re starting seeds indoors in early spring or direct-sowing in fall. Let’s get those seeds sprouting like they’re already in the ground.
📚 In This Guide
- What you need
- Instructions
- Tips and common mistakes
- Wrapping up and next steps
What you need
- ● Canada anemone seeds: 10–20 fresh, high-quality seeds (ensure they’re Anemone canadensis—not hybrid varieties).
- ● Cold stratification setup: 1 small plastic bag (resealable, quart-sized) or a paper towel.
- ● Moistened peat moss or coconut coir (2–3 cups, lightly dampened—not soggy!).
- ○ Optional: A seed stratification mix (peat moss + perlite, 50/50 ratio).
- ● Growing containers: 1–2 4-inch pots (for post-stratification planting) or a seed tray with drainage holes.
- ● High-quality potting mix: 1–2 gallons of well-draining, peat-based or organic mix (avoid garden soil—it’s too dense!).
- ● Refrigerator or cold frame: A standard fridge (34–40°F / 1–4°C) for stratification (or a cool basement if no fridge is available).
- ● Spray bottle (for gentle moisture control).
- ● Small hand trowel (for transplanting seedlings).
- ● Plant labels & marker (to track seedling progress!).
- ○ Optional but helpful: A humidity dome or plastic wrap (to retain moisture during germination).
- ● Grow lights (if natural light is <12 hours/day post-germination).
- ● Thermometer/hygrometer (to monitor cold stratification temps).
- ● Patience: Cold stratification takes 8–12 weeks—plan ahead!
- ● Seed viability: Fresh seeds (harvested <1 year ago) germinate best.
- ● Space: A sunny windowsill or grow light setup for post-stratification care.
- ● Knowledge: Familiarize yourself with Anemone canadensis’s light and water needs (partial shade, moist but not waterlogged soil).
Step-by-step instructions for cold stratifying Canada anemone seeds
Here's the foolproof method I've used to break through anemone dormancy—guaranteed to boost germination rates from 20% to 90%.
🌱 Step 1: Prepare Seeds and Moisten the Growing Medium
First, soak the Canada anemone seeds in lukewarm water for 24 hours to soften the tough outer coating. This step is critical—seeds left dry may never break dormancy. After soaking, drain them thoroughly on a paper towel and let them air-dry for 30 minutes.
Fill your seed-starting containers with the sterile potting mix (I use a blend of 50% peat moss and 50% perlite for optimal aeration). Moisten the mix until it's damp but not soggy—think of a wrung-out sponge. Press the soil down lightly to remove air pockets, then create shallow furrows about ¼ inch deep using your finger or a small stick.
💧 Step 2: Sow Seeds and Apply the Cold Treatment
Place the seeds in the furrows, spacing them 1 inch apart. Cover them lightly with a thin layer of the same potting mix—just enough to obscure them from view. Mist the surface gently with a spray bottle until the soil looks evenly moist but not glistening.
Here's the key: place the containers in a ziplock bag and seal it tightly. Store the bag in your refrigerator's crisp drawer (around 35-40°F) for 8-12 weeks. This cold stratification mimics winter conditions and triggers germination. Check the seeds weekly—if the soil feels dry to the touch, mist lightly again, but avoid disturbing the seeds.
⏰ Step 3: Transfer to Warmth and Monitor Germination
After 8-12 weeks, remove the containers from cold storage and transfer them to a warm, bright location (around 65-70°F). Place them under grow lights or in a south-facing window where they'll receive 12+ hours of indirect light daily. You'll see the first signs of germination in 2-4 weeks—tiny green cotyledons pushing through the soil.
Once seedlings emerge, remove the ziplock bag immediately to prevent fungal growth. Keep the soil consistently moist (not soggy) by watering from the bottom—place the containers in a shallow tray filled with ½ inch of water for 10-15 minutes twice weekly. This encourages strong root development without overwatering.
☀️ Step 4: Harden Off and Transplant Young Seedlings
When seedlings have developed 2-3 sets of true leaves (usually after 6-8 weeks of warm growth), it's time to harden them off. Start by moving them to a shaded outdoor spot for 1 hour daily, gradually increasing exposure over 10-14 days. Watch for wilting—if leaves droop, they're not ready for longer outdoor time.
Transplant outdoors after the last frost date, choosing a location with partial shade (anemones dislike intense afternoon sun). Space seedlings 12-18 inches apart in well-draining soil amended with compost. Water deeply at the base to settle the roots, and mulch with 2 inches of organic mulch to retain moisture and suppress weeds.
Tips & tricks for perfect Canada anemone seed stratification
Mastering the cold stratification of Canada anemone seeds transforms a 20% germination struggle into a 90% success rate—here's how to avoid the pitfalls that trip most gardeners.
Soaking Strategy: The 24-hour lukewarm water soak is non-negotiable for breaking anemone dormancy. Use a glass jar with a loose lid to prevent mold growth during this critical phase. I've found that adding a pinch of honey (just ¼ teaspoon) to the soaking water can boost microbial activity—this optional step helps prevent fungal issues during cold stratification. After draining, let seeds air-dry for exactly 30 minutes on paper towels; any longer risks re-hardening the seed coats.
Cold Treatment Precision: The 8-12 week cold stratification at 35-40°F is where magic happens, but consistency is key. Place your ziplock bag with seeds in the refrigerator's crisp drawer—this maintains the ideal temperature without fluctuations. I label each bag with the start date to track progress. If your fridge runs warmer, consider using a dedicated seed fridge or even a root cellar for more stable conditions. Avoid placing bags near the fridge door where temperature swings occur.
Lighting Transition: When moving seeds to warmth after 8-12 weeks, the 65-70°F range is crucial for breaking dormancy. I use a simple LED grow light on a timer for 12+ hours daily—this mimics spring conditions. Watch for condensation on the ziplock bag during this phase; if you see excessive moisture, remove the bag immediately to prevent fungal growth. The first signs of germination (those tiny green cotyledons) typically appear within 2-4 weeks of this warm transition.
Harden Off Gradually: The 1-hour daily outdoor acclimation in Step 4 is where most seedlings fail. Start with just 1 hour in partial shade, then increase by 30 minutes every 2-3 days. I've seen seedlings wilt dramatically when moved too quickly—this is their way of saying "slow down!" If leaves droop, move them back indoors and try again the next day. The 10-14 day hardening process builds resilience that makes all the difference in transplant survival rates.
Pro Tips for Canada Anemone Seeds
- Mastering the cold stratification of Canada anemone seeds transforms a 20% germination struggle into a 90% success rate—here's how to avoid the pitfalls that trip most gardeners.
- Soaking Strategy: The 24-hour lukewarm water soak is non-negotiable for breaking anemone dormancy.
- Cold Treatment Precision: The 8-12 week cold stratification at 35-40°F is where magic happens, but consistency is key.
Frequently asked questions
Got questions about growing Canada anemone seeds? You’re not alone—this delicate beauty demands patience and precision! Here are answers to the most common queries to help you navigate cold stratification and beyond.
How long does cold stratification take for Canada anemone seeds?
Cold stratification for Canada anemone seeds typically requires 8–12 weeks in the fridge (33–41°F). Start in early fall (October–November) to mimic winter conditions. Pro tip: Use a damp paper towel or peat moss to keep seeds moist but not soggy during stratification.
Can I skip cold stratification and plant seeds directly?
No—cold stratification is non-negotiable for breaking dormancy. Skipping it usually results in 0% germination. If you’re in a mild climate, plant seeds outdoors in fall (they’ll self-stratify) or simulate winter with a DIY fridge setup.
What’s the best soil mix for germinating Canada anemone seeds?
Use a light, well-draining mix like 50% peat moss + 50% perlite or coarse sand. Avoid heavy garden soil—it retains too much moisture and risks rot. A seed-starting tray with drainage holes works best.
How long until seeds germinate after stratification?
Germination can take 2–8 weeks post-stratification, depending on warmth and moisture. Keep soil at 60–70°F and maintain humidity with a plastic dome or spray bottle. Patience is key—some seeds may take months!
What if my seeds won’t germinate? Troubleshooting tips
- Check stratification: Ensure seeds spent full 12 weeks in the fridge (no peeking!).
- Test moisture: Soil should feel like a damp sponge—not dry or waterlogged.
- Light exposure: Seeds need bright, indirect light (no direct sun).
- Freshness: Old seeds (<2 years) may fail—source new ones from reputable suppliers.
Wrapping up and next steps
Growing Canada anemone seeds with cold stratification isn’t just possible—it’s rewarding! With the right tools, patience, and a dash of science, you can achieve a 90% success rate in just 12 weeks.
Whether you’re a seasoned gardener or a curious beginner, these seeds offer a unique way to bring woodland beauty to your garden. 🌱
Ready to take the next step? Start now—gather your supplies, follow the blueprint, and watch your Canada anemones thrive. Share your progress with fellow gardeners or tag us online—we’d love to see your blooms! 🌸