
Lawn
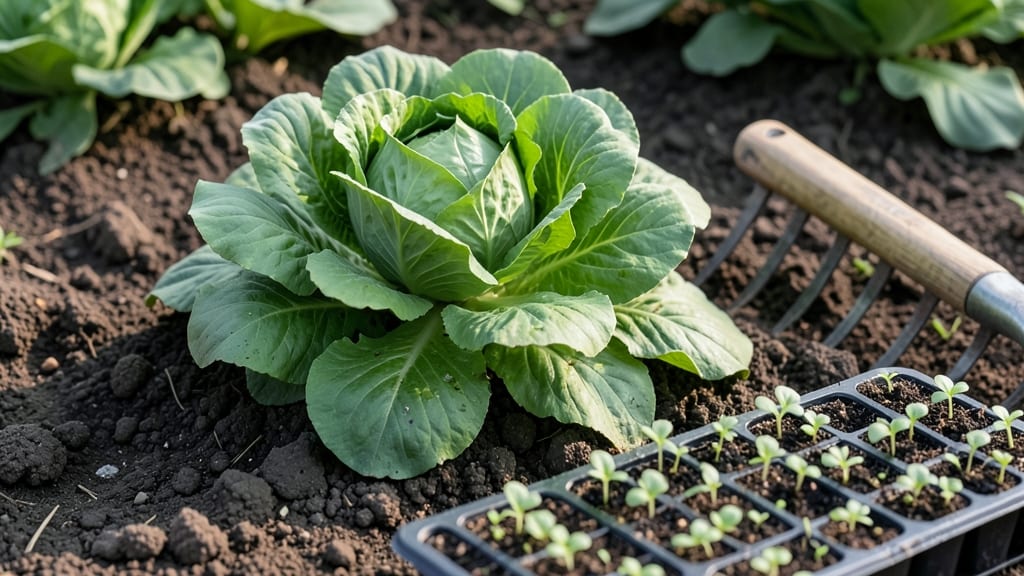
Preparing a seed bed with loose soil is the secret weapon for seedlings that pop up in days instead of weeks. 🌱 I’ve seen stubborn seeds refuse to germinate in compacted soil—until I learned to fluff the ground just right.
The right texture lets roots spread freely, so plants grow strong from day one.
You’ll need basic tools: a garden fork, rake, and maybe a tiller if your soil’s tough. Work on dry-ish soil to avoid clumps, and aim for 3-4 inches of loose topsoil.
The goal? Soil that crumbles like cake when you squeeze it—not rock-hard or muddy. Skip the heavy tilling unless you’re dealing with deep compaction.
Once prepped, keep the bed moist but not soggy—like a wrung-out sponge. Seeds need consistent dampness to wake up, but too much water drowns them. A light sprinkle daily or a thin layer of mulch helps maintain that perfect balance.
You’ll see the first sprouts in 5-7 days with the right setup.
This method works for lawns, veggie patches, or flower beds—just adjust depth for what you’re planting. The key is patience: rushing leads to clods, and clods mean slow starts. But when you get it right, your garden becomes a fast-track to growth instead of a waiting game.
📚 In This Guide
- What you need
- Instructions
- Tips and common mistakes
- Wrapping up and next steps
What you need
- ● Garden rake – A sturdy bow rake (18–24" wide) for leveling and breaking up clumps.
- ● Hoe or broadfork – A stiff-bladed hoe (for compacted soil) or a 4-tine broadfork (for deep loosening, 12–18" long).
- ● Shovel or spade – A round-point shovel (for digging out debris or rocks).
- ○ Soil tester kit – Optional but highly recommended to check pH (aim for 6.0–7.0 for most grasses).
- ● Compost or organic matter – 1–2 inches of well-aged compost, leaf mold, or peat moss to enrich soil.
- ● Lawn seeds – Choose high-quality, fast-germinating varieties (e.g., tall fescue, Kentucky bluegrass for cool climates). Quantity: ~10–15 lbs per 1,000 sq ft.
- ● Water source & hose – A soaker hose or sprinkler for gentle, even watering.
- ○ Garden twine or stakes (optional) – To mark seed rows if needed.
- ● Soil conditioners – Gypsum (for clay soil) or lime (if pH is too low).
- ● Mulch or straw – ¼–½ inch layer to retain moisture and protect seeds.
- ● Hand cultivator – For precision weeding in tight spots.
- ● Wheelbarrow – To haul compost, soil amendments, or debris.
- ● Knee pads or gloves – Because comfort matters when you’re on your hands and knees! 😉
Step-by-Step instructions for preparing a seed bed
Here’s how to create the perfect loose, crumbly base for seeds to sprout quickly and roots to spread.
🪴 Step 1: Clear and Mark Your Planting Area
Start by removing all weeds, grass, rocks, and debris from your chosen 4-foot square area. I like to use a garden fork to gently loosen the top 6 inches of soil without turning it over completely—this prevents bringing buried weeds to the surface. Mark the edges with wooden stakes or landscape paint to keep your work contained.
If you’re working in a garden bed, use a hoe to slice through grass roots in a grid pattern. This "solarization" method kills weeds by exposing them to sunlight. For lawn areas, lay down cardboard or thick layers of newspaper to smother grass for 4-6 weeks before planting.
✂️ Step 2: Loosen the Soil to the Right Depth
Use a broadfork or tiller to break up compacted soil to a depth of 8-12 inches. The goal is to create a fluffy, aerated layer—think of it like fluffing a pillow for your seeds. I work in small sections, about 2 feet by 2 feet, to avoid overworking the soil, which can create a dusty mess.
If your soil is heavy clay, mix in 2-3 inches of compost or aged manure to improve drainage and structure. For sandy soil, add 1 inch of peat moss or coconut coir to help retain moisture. Test the texture by squeezing a handful—it should hold together lightly but crumble easily when touched.
💧 Step 3: Level and Moisten the Soil
Rake the loosened soil to create an even, smooth surface. I use a leveling rake to remove any high spots or low dips—seeds need consistent contact with the soil to germinate evenly. For larger areas, a garden rake works well, but take your time to avoid creating ridges.
Water the bed thoroughly until the soil is deeply moist but not soggy. Stick your finger 2 inches into the soil—if it feels damp, you’re good to go. If it’s still dry, add another ½ inch of water. This step is critical: dry soil repels seeds, while overly wet soil can suffocate them.
☀️ Step 4: Protect and Prepare for Planting
Cover the prepared bed with a 2-inch layer of mulch or straw to prevent erosion and retain moisture. This also keeps weeds at bay while your seeds germinate. For fast-growing crops, you can skip mulch and plant immediately, but for slower seeds like carrots or onions, mulch helps maintain ideal conditions.
If you’re planting in spring or fall, consider covering the bed with black plastic or row covers for 2-3 weeks before planting. This warms the soil in cool weather or cools it in hot climates, giving seeds the perfect environment to sprout. Once you’re ready to plant, gently rake the mulch aside and create shallow furrows for your seeds.
Tips & tricks for perfect seed bed preparation
Here's what I've learned to help you create the ideal seed bed that gives plants the best possible start.
Soil Texture is Everything: The goal is that perfect loose, crumbly texture that holds together when squeezed but breaks apart easily. In Step 2, when you're loosening the soil to 8-12 inches, think of it like fluffing a pillow—you want air pockets for roots to spread. If your soil feels too dense after working it, add another 1 inch of compost and gently mix it in. This creates the perfect balance of aeration and moisture retention that seeds need to germinate quickly.
Work in Small Sections: I can't stress enough how important this is in Step 2. Trying to tackle the entire 4-foot square at once leads to overworked, dusty soil. Work in 2x2 foot sections and move to fresh soil when you notice the area getting dry or compacted again. This method also prevents you from accidentally compacting the soil you've already loosened with your feet or equipment.
Timing the Moisture Test: The finger test in Step 3 is critical, but timing matters too. Check moisture after watering, but wait 10-15 minutes first—this gives water time to penetrate evenly. If you check immediately, you might think the soil is dry when it's actually just the surface that needs more time. For clay soils, you might need to wait up to 30 minutes between waterings to let it absorb properly.
Mulch Strategy for Speed: While the 2-inch mulch layer in Step 4 is excellent for moisture retention, there's a faster trick for hot climates: use a thin layer of straw (just ½ inch) instead. This still protects from erosion while allowing more sunlight to warm the soil quickly—perfect if you're in a hurry to get seeds planted. For cooler climates, the thicker mulch helps maintain warmth.
Pro Tips for Prepare Seed Bed
- Here's what I've learned to help you create the ideal seed bed that gives plants the best possible start.
- Soil Texture is Everything: The goal is that perfect loose, crumbly texture that holds together when squeezed but breaks apart easily.
- Work in Small Sections: I can't stress enough how important this is in Step 2.
Frequently asked questions
Got questions about preparing the perfect seed bed?
You’re not alone! Here are answers to the most common concerns—from timing to troubleshooting—to help you get your lawn off to a flying start.
What’s the best time of year to prepare a seed bed?
The ideal window is early spring or late summer/early fall when soil is warm but not scorching. Avoid preparing beds in freezing temps or during peak summer heat (unless you’re in a mild climate). Cool-season grasses (like fescue) thrive with a fall prep, while warm-season grasses (like Bermuda) love spring. Pro tip: Test your soil’s moisture—it should feel like a damp sponge, not muddy or dry.
How long before planting should I prepare the seed bed?
Aim to finish prep 1–2 weeks before seeding to let the soil settle and any weeds resurface for easy removal. If you’re dealing with compacted clay or heavy soil, give yourself 3–4 weeks to break it up and amend it properly. Rushing this step can lead to poor seed-to-soil contact and uneven germination.
Can I use a rototiller instead of a rake or broadfork?
Yes, but use it wisely! A rototiller speeds up the process but can pulverize soil too finely, creating a crust that blocks airflow and water. For best results, till only the top 4–6 inches, then loosen the surface with a rake or hand fork. Save the tiller for larger areas—small patches are better done by hand.
What do I do if my seed bed looks uneven after tilling?
Don’t panic! Use a level rake or board to smooth out high/low spots. For stubborn dips, mix in a little compost or sand to fill them. Key rule: Your finished bed should have a 1–2% slope (just enough to drain water) with no clumps larger than a golf ball. Think “smooth as a pancake”—not bumpy!
Do I need to add fertilizer right when I prepare the seed bed?
Not necessarily! Start with a light application of compost or a balanced starter fertilizer (10-10-10) to feed microbes and young roots. Avoid heavy doses of nitrogen (like lawn fertilizer) at this stage—it can burn tender seedlings. Wait to apply seed-specific fertilizer right before or after planting for the best results.
Wrapping up and next steps
A well-prepared seed bed is the foundation of a thriving lawn—loose, nutrient-rich soil ensures fast root growth and lush greenery. By following these steps, you’ve set the stage for success, whether you’re reviving an old lawn or starting fresh! 🌱
Now’s the time to act: grab your tools, roll up your sleeves, and give your lawn the care it deserves. Next up? Plant your seeds or sod with confidence—your future lawn is waiting!