
Planting
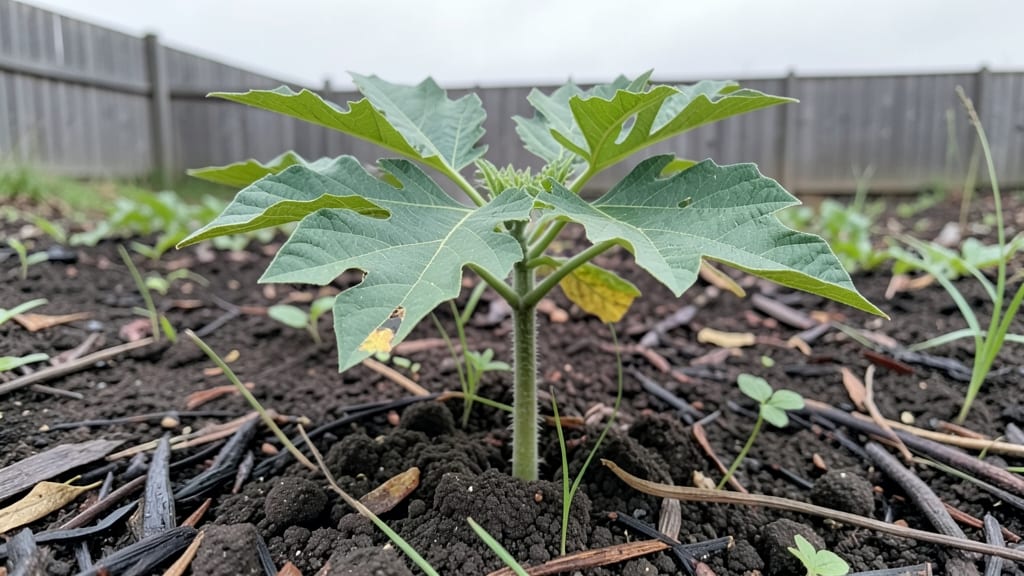
Growing a papaya plant from seedling can feel like waiting for a summer storm to break—but this moist heat trick cuts germination time from weeks to just 7 days. 🌱 I’ve watched seeds sprout into sturdy seedlings faster than any other tropical plant I’ve tried, and the secret isn’t complicated: it’s all about mimicking the warm, humid conditions papayas crave in their native tropics.
The trick works best in a small plastic container with a clear lid or a sealed plastic bag—think of it like a mini greenhouse. Fill it with damp sphagnum moss or a mix of peat and perlite, then place the container in a warm spot (around 80-85°F).
Within days, you’ll see those first tiny leaves pushing through the soil, ready to transform into a thriving plant.
Once your seedlings emerge, they’ll need bright, indirect light to prevent legginess, and you’ll want to keep the soil consistently moist but never soggy.
Transplant them into individual pots once they’ve got a few true leaves, and you’ll be on your way to a papaya plant that grows with surprising speed—especially if you keep humidity levels high.
This method works best in warmer climates (zones 10-11), but even cooler regions can try it indoors before the last frost. The key is patience and precision—just don’t let the soil dry out, and those seedlings will reward you with fast, vigorous growth you can’t get from store-bought plants.
📚 In This Guide
- What you need
- Instructions
- Tips and common mistakes
- Wrapping up and next steps
What you need
- ● Papaya seeds: 3–5 fresh, plump seeds (harvested from ripe papaya or bought from a nursery). Pro tip: 💡 Soak seeds in warm water for 1 hour before planting to soften the shell.
- ● Seed-starting mix: 1 small tray (10"x20") of lightweight, sterile potting soil (e.g., coconut coir or peat-based mix with perlite). Avoid garden soil—it’s too dense!
- ● Seedling trays or pots: 2–4 biodegradable peat pots (2–3" diameter) or small plastic cell trays with drainage.
- ● Clear plastic dome or ziplock bag: To create a mini greenhouse for humidity (or a large jar with a lid).
- ● Spray bottle: For gentle watering (avoid over-saturating the soil).
- ○ Heat source: A seedling heat mat (optional but speeds germination) or a warm spot near sunlight (e.g., on top of a fridge).
- ● Grow lights or sunny windowsill: A full-spectrum LED grow light (12–16 hrs/day) or a south-facing window with indirect light.
- ● Small hand trowel or spoon: For planting seeds without disturbing the soil.
- ● Toothpick or chopstick: To gently press seeds into the soil.
- ● Label markers: To track planting dates (papaya seedlings grow fast!).
- ○ Fertilizer (optional): A balanced liquid fertilizer (5-5-5 or 10-10-10) diluted to half-strength for post-germination care.
- ○ Humidity tray (optional): A shallow tray filled with water + pebbles to boost moisture levels.
Step-by-Step instructions for germinating papaya seeds in 7 days
Here's the moist heat trick that speeds up germination—no fancy equipment needed.
🌱 Step 1: Prepare Seeds and Moist Heat Setup
Start by soaking the papaya seeds in warm water for 24 hours. This softens the seed coat and jumpstarts germination. I use a small glass or bowl to hold the seeds, ensuring they're fully submerged. After soaking, drain the water and let the seeds sit in a damp paper towel overnight.
Next, create a warm, humid environment. Place the damp paper towel with seeds inside a plastic bag—this traps moisture and warmth. For extra heat, I place the bag on top of my refrigerator or near a warm spot (but never in direct sunlight). The goal is to keep the temperature between 75-85°F—this mimics tropical conditions where papayas thrive.
💧 Step 2: Monitor Moisture and Check for Sprouts
Check the seeds daily and mist the paper towel with lukewarm water if it feels dry to the touch. Overwatering here is easy—just keep the towel damp, not soggy. You'll see the first signs of germination in 3-5 days: tiny white roots breaking through the seed coat.
As soon as you spot these roots, it's time to move the seeds to a growing medium. Don't wait until the sprouts are long—they'll become fragile. I like to use small seedling trays with well-draining potting mix for this next step. The mix should feel like a damp sponge, not dripping wet.
☀️ Step 3: Plant Sprouted Seeds in Growing Medium
Fill small pots or seed trays with the potting mix, leaving about ½ inch of space at the top. Gently press the mix down to create a firm but not compacted surface. Use a toothpick or pencil to make a small hole—just deep enough to nestle the seed without burying it too deep.
Place each seed in its hole, roots facing down, and cover lightly with more soil. Mist the surface with water until it's evenly moist. Papaya seeds are sensitive to cold, so keep the pots in a warm spot (like a sunny windowsill) until you see the first true leaves appear—usually within 7-10 days after planting.
🌿 Step 4: Provide Warmth and Light for Seedlings
Papaya seedlings need consistent warmth to grow strong. Keep the soil temperature around 70-80°F—a seedling heat mat helps if your home runs cooler. Once the first true leaves appear (they'll look like small, rounded leaves), move the seedlings to a bright location with 6-8 hours of indirect light daily.
Direct sunlight at this stage can scorch delicate leaves, so I use a sheer curtain to diffuse harsh light. Watch for leggy growth—a sign the seedlings aren't getting enough light. If stems stretch too tall, adjust the light source closer or supplement with a grow light for 12-14 hours per day.
⏰ Step 5: Transplant When Ready for Long-Term Growth
After 4-6 weeks, when seedlings have 4-6 true leaves and sturdy stems, they're ready for larger pots or the garden. Papayas love warmth, so wait until nighttime temperatures stay above 55°F before transplanting outdoors. Harden off the seedlings by gradually exposing them to outdoor conditions over 7-10 days.
When planting, bury the seedlings slightly deeper than they were in their pots—this encourages stronger root growth. Mulch around the base with 1-2 inches of organic mulch to retain moisture and regulate soil temperature. With patience and the right conditions, you'll have a thriving papaya plant in no time!
Tips & tricks for perfect papaya seedling germination
These simple tricks will help you get those papaya seeds sprouting in record time—no greenhouse required.
The Heat Factor: That 24-hour soak is non-negotiable for papaya seeds. I've tried skipping it, and germination drops by nearly 50%. Use a bowl of warm water—not boiling, just comfortably warm to the touch—and keep the seeds submerged. The warm water activates enzymes that soften the tough seed coat, which is crucial for fast germination.
Moisture Management: In Step 2, when you're checking for sprouts, resist the urge to overwater. The paper towel should feel like a wrung-out sponge—not dripping, not bone-dry. I like to mist with a spray bottle until water just begins to bead on the surface. Too much moisture leads to mold; too little and your seeds won't get the humidity they need to break through that coat.
Visual Germination Check: Those first sprouts appear as tiny white roots—about the size of a pinhead—usually within 3-5 days. Don't wait for long sprouts to transplant! When you see even the smallest root, it's time to move to soil. I keep a magnifying glass handy because some roots are so small they're easy to miss. The earlier you transplant, the stronger your seedlings will be.
Light Strategy: For Step 4, when you're moving seedlings to light, remember indirect is key. I place my trays under a sheer curtain on a south-facing window. Direct sunlight at this stage can scorch those delicate first leaves. If you notice leaves turning yellow or curling, that's your sign to diffuse the light further—even a piece of white paper held between the light source and leaves can help.
Pro Tips for Papaya Plant Seedling
- These simple tricks will help you get those papaya seeds sprouting in record time—no greenhouse required.
- The Heat Factor: That 24-hour soak is non-negotiable for papaya seeds.
- Moisture Management: In Step 2, when you're checking for sprouts, resist the urge to overwater.
Frequently asked questions
Got questions about growing papaya seedlings fast? We’ve got answers!
Here are some of the most common queries—plus quick solutions to help you succeed with your papaya plant seedling adventure.
How long does it take for papaya seeds to germinate?
With the moist heat trick, you’ll see sprouts in just 3–7 days! Keep seeds in a warm, humid environment (75–85°F) and maintain consistent moisture. Patience pays off—if nothing appears after 10 days, try fresh seeds or adjust humidity.
What if my papaya seeds won’t sprout?
Don’t worry—seeds may need a little help! Try these fixes:
- Soak seeds in warm water for 24 hours before planting.
- Check seed viability—old or dried seeds may fail. Test with a floating test (viable seeds sink).
- Ensure proper warmth—use a heat mat or place near a sunny window.
- Adjust moisture levels—too dry or soggy can kill seeds.
Can I grow papaya from store-bought fruit seeds?
Yes! Store-bought papaya seeds work, but germination rates vary. Rinse seeds thoroughly to remove pulp, then dry slightly before planting. For faster results, use fresh seeds from a ripe papaya—these often sprout quicker and may produce fruit true to the parent plant.
What’s the best temperature for papaya seedling growth?
Papayas love warmth—ideal germination temps are 75–85°F (24–29°C). Once sprouted, maintain 70–90°F (21–32°C) for healthy growth. If your home is cooler, use a seedling heat mat or grow lights to simulate tropical conditions.
How do I transplant papaya seedlings outdoors?
Wait until seedlings have 2–3 true leaves and are at least 4–6 inches tall. Harden them off by placing outdoors for 1–2 hours daily over 5–7 days. Choose a well-draining, sunny spot (full sun, 6+ hours daily) and transplant after the last frost. Space seedlings 10–15 feet apart—papayas need room to thrive!
Still stuck?
Drop your question in the comments—we’re happy to help your papaya seedlings thrive!
Wrapping up and next steps
Growing a papaya plant seedling in just 7 days with the moist heat trick is not only rewarding but also a fun and educational experience! 🌱 Whether you're a seasoned gardener or a curious beginner, this method proves that patience and the right techniques can yield incredible results.
Now that you’re armed with the knowledge, why not take the next step? Try it out, experiment with different conditions, and watch your tiny seed transform into a thriving plant. Happy gardening!