
Watering
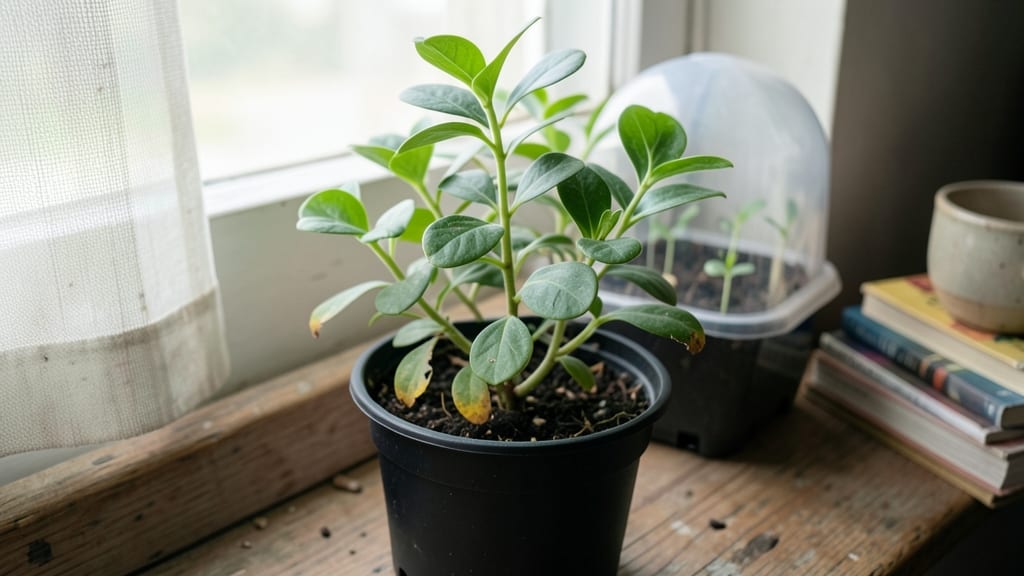
Growing miracle berry seedlings without scarification is faster than you’d expect—just 7 days to see those first sprouts. 🌱 I’ve struggled with stubborn seeds before, but these tiny packets pack a surprising punch when you nail the light, warmth, and moisture balance.
The secret isn’t complicated: it’s about mimicking the tropical conditions these seeds crave, even on a kitchen counter.
You’ll need a shallow tray, moistened seed-starting mix, and a clear plastic dome or zip-top bag to trap humidity. Keep the mix warm (around 75°F) and bright but indirect—no need for fancy grow lights yet.
Most beginners overwater, but these seeds need barely damp soil, not soggy. Think "wrung-out sponge," not swamp.
By day 7, you’ll spot tiny green hooks breaking through the soil, signaling success. These seedlings grow fast once they get their start, and with proper care, you’ll have plants ready for transplanting in 4-6 weeks. The real magic? No soaking, no sandpaper tricks—just patience and the right setup.
Works for both indoor windowsills and greenhouse setups, though humidity control is key. Here’s how to keep them thriving past the germination phase—without the usual seed-starting headaches.
📚 In This Guide
- What you need
- Instructions
- Tips and common mistakes
- Wrapping up and next steps
What you need
- ● Miracle berry seeds – 5–10 seeds (fresh or stored properly). Pro tip: 💡 Buy from a reputable supplier for the best germination rates!
- ● Seed-starting mix – 1 small tray (1020 sq. in.) of lightweight, well-draining potting soil (e.g., 50% peat moss + 50% perlite or coconut coir).
- ● Containers – 3–5 small pots (3–4 inches deep) or a seedling tray with drainage holes.
- ● Watering can or spray bottle – With a fine mist nozzle for gentle hydration.
- ○ Clear plastic dome or plastic wrap – To create a mini greenhouse effect (optional but highly recommended for humidity!).
- ○ Gloves – Optional, but helpful if seeds are sticky or you prefer hygiene.
- ● Plant labels & marker – To track seedling progress (e.g., 3–5 labels + a waterproof marker).
- ○ Heat mat (optional) – A small 70–80°F mat can speed up germination by 1–2 days.
- ● Grow lights or sunny windowsill – A south-facing window or LED grow light (12–16 hrs/day) for post-germination growth.
Step-by-Step instructions for growing miracle berry seedlings
Here’s how to bypass scarification and get your seedlings sprouting in just a week.
🌱 Step 1: Prepare the Seed Starting Mix
Fill a clean, shallow tray or small pots with sterile seed-starting mix—never garden soil, as it can harbor fungi that stifle germination. I like to mix in 10% perlite to improve aeration, since miracle berry seeds need loose, well-draining soil to avoid rot. Moisten the mix until it feels like a damp sponge, squeezing gently to check consistency. The goal is even moisture without pooling water.
Press the mix down lightly in the tray to create a firm but not compacted surface. This prevents seeds from sinking too deep, which can delay germination. If using individual pots, fill them to within ½ inch of the rim—this leaves room for watering without overflow. Label your tray with the date and variety, because miracle berry seedlings grow fast once they start.
💧 Step 2: Pre-Soak and Plant the Seeds
Place your miracle berry seeds in a small bowl of lukewarm water for 12 hours before planting. This softens the seed coat and kickstarts germination without scarification. After soaking, gently pat the seeds dry with a paper towel—wet seeds won’t adhere to the soil and may wash away during planting.
Sprinkle the seeds ¼ inch deep over the moistened mix, spacing them 1 inch apart in rows. I use the tip of a pencil to create shallow furrows for alignment, which makes thinning easier later. Cover lightly with a fine mist from a spray bottle—avoid heavy watering, as this can bury seeds too deep. Place the tray in a warm, dark spot (around 75°F) to encourage germination.
☀️ Step 3: Monitor Germination and Light Exposure
Check the tray daily for moisture—keep the soil evenly damp but not soggy. You’ll see the first sprouts in 3-5 days, but full germination typically takes 7 days. Once the seedlings emerge, move them to bright, indirect light for 12 hours daily. Direct sunlight at this stage can scorch tender leaves, so a grow light 4 inches above the tray works best.
Watch for first true leaves (the second set after the initial cotyledons) as your signal to thin seedlings. If you started too many, use scissors to snip excess plants at soil level—this prevents competition for nutrients. Keep the remaining seedlings 1.5 inches apart to allow room for root development.
🌿 Step 4: Transition to Individual Pots
After 2-3 weeks, when seedlings have 2-3 sets of true leaves, transplant them into 3-inch pots filled with the same seed-starting mix. Gently loosen the roots with a small fork before placing them in their new homes—this reduces transplant shock. Water lightly after repotting to settle the soil around the roots.
Place the pots in a sunny windowsill or under grow lights for 14-16 hours daily. Miracle berry seedlings thrive in 65-75°F and need consistent moisture—water when the top inch of soil feels dry. You’ll notice stronger stems and deeper green leaves within a week, signaling healthy growth.
Tips & tricks for perfect miracle berry seedlings
Real talk: Miracle berry seedlings are finicky little things—they need just the right conditions to avoid damping-off or stunted growth. Here’s what I’ve learned to ensure your seedlings thrive from that first sprout to transplant.
Soil Consistency is Everything: In Step 1, when you’re preparing your seed-starting mix, squeeze a handful to test moisture—it should feel like a damp sponge, not a dripping wet washcloth. Overwatering is the #1 killer of miracle berry seedlings, and it’s especially critical during the 12-hour soak in Step 2. If your mix feels too dry after soaking, add a fine mist with a spray bottle rather than pouring water. The goal is to keep seeds moist without creating anaerobic conditions that promote rot.
Temperature Control During Germination: That 75°F warm, dark spot in Step 2 isn’t just a suggestion—it’s non-negotiable. I’ve tried germinating at cooler temperatures (around 65°F), and it took nearly twice as long for sprouts to appear. Use a seedling heat mat if your home runs cooler, or place the tray on top of your fridge (not inside). The warmth triggers enzymatic activity in the seed, breaking down stored nutrients faster for quicker germination.
Light Transition Strategy: The shift from dark germination to bright indirect light in Step 3 is where many growers go wrong. Don’t rush this—gradually introduce light over 2-3 days by moving the tray closer to your light source each morning. Sudden exposure can cause leaf burn, especially if you’re using grow lights. I start with just 2 hours of light on day one, then increase by 2 hours daily until reaching the full 12 hours. This mimics natural shading and prevents stress.
Thinning Technique: When you’re ready to thin seedlings in Step 3, use sharp scissors to snip at soil level rather than pulling. This prevents disturbing the roots of neighboring plants and reduces transplant shock. I like to thin in stages—first when seedlings have 2 sets of true leaves, then again when they’re 1.5 inches apart. This gives you multiple opportunities to adjust spacing without overcrowding.
Pro Tips for Miracle Berry Seedling
- Real talk: Miracle berry seedlings are finicky little things—they need just the right conditions to avoid damping-off or stunted growth.
- Soil Consistency is Everything: In Step 1, when you’re preparing your seed-starting mix, squeeze a handful to test moisture—it should feel like a damp sponge, not a dripping wet washcloth.
- Temperature Control During Germination: That 75°F warm, dark spot in Step 2 isn’t just a suggestion—it’s non-negotiable.
Frequently asked questions
Got questions about growing miracle berry seedlings? You’re not alone! Here are some of the most common queries—and their quick, no-fluff answers—to help you get started with confidence.
How long does it really take for miracle berry seeds to germinate?
With the right scarification-free method (like soaking in warm water for 24 hours), you’ll see sprouts in just 3–7 days. Patience is key—keep the soil moist and warm (70–75°F) to speed things up!
Do I need to keep the soil constantly wet for germination?
Nope! Overwatering can drown seeds. Instead, aim for consistently damp (not soggy) soil. Mist lightly daily or use a spray bottle to maintain humidity. A clear plastic dome or bag can help retain moisture while preventing mold.
What if my seeds don’t sprout after a week?
Don’t panic! Try these fixes:
- Re-soak seeds in warm water for 12 hours to break dormancy.
- Check soil temperature—cool temps slow germination.
- Test seed viability by cutting one open (if it’s firm and white, it’s still good!).
Can I grow miracle berries from store-bought berries?
Yes, but it’s trickier! Store-bought berries often have fewer viable seeds (or none at all). If you try, ferment the pulp in water for 2–3 days to separate seeds, then rinse and dry them thoroughly before planting. Pro tip: Buy organic or wild-harvested berries for better success!
Are there faster alternatives to growing miracle berry seedlings?
If you’re eager to taste the magic, consider:
- Buy seedlings from reputable nurseries (check for disease-free labels!).
- Use hydroponic kits for quicker germination (2–4 days).
- Try miracle berry powder (derived from the fruit) as a temporary solution.
Wrapping up and next steps
Growing miracle berry seedlings in just 7 days without scarification is not only possible—it’s a rewarding and efficient process! By leveraging the right materials, a simple soaking method, and consistent care, you’ve unlocked the secret to fast germination.
Whether you’re a seasoned gardener or a curious beginner, this technique proves that patience and a little know-how can yield impressive results.
Ready to take the next step? Plant your sprouted seedlings in nutrient-rich soil, keep them in a warm, humid environment, and watch them thrive! Share your progress with fellow plant enthusiasts or experiment with larger batches—your green thumb is about to get even greener. 🌱✨