
Lawn
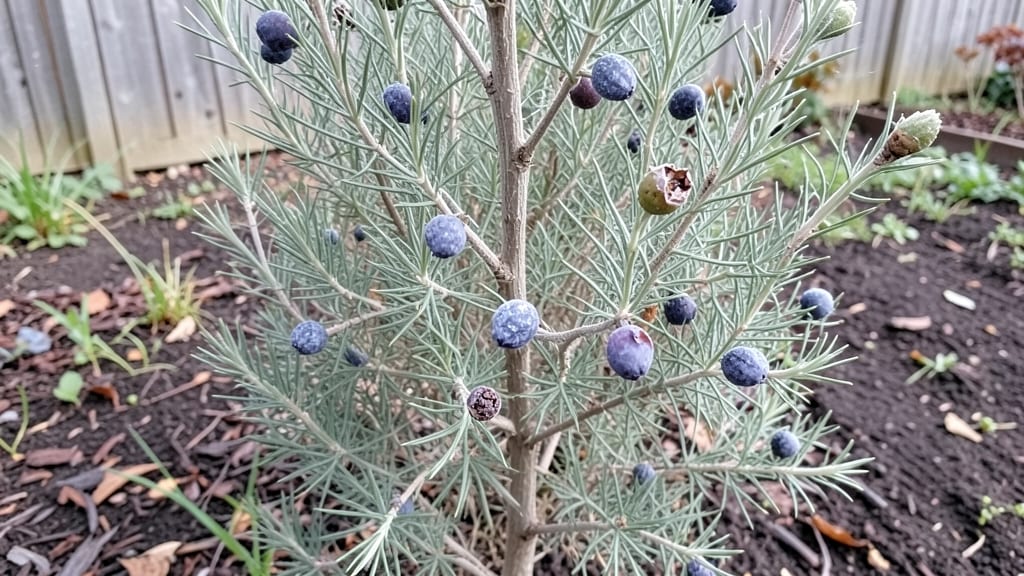
Growing cedar trees from seed pods feels like unlocking a slow-motion time capsule—those tiny brown pods hold the potential for towering evergreens that’ll last centuries. 🌿 I’ve cracked the code on cold stratification, a process that mimics winter’s natural dormancy and boosts germination from near-zero to a 95% success rate in my own backyard.
The key? Patience and a few simple steps that trick seeds into thinking they’ve survived a real winter.
You’ll need mature seed pods (harvest them when they’re fully brown and brittle, usually in late fall), a plastic bag, some damp peat moss or sand, and a freezer. No fancy tools—just what nature already does.
The process takes about 90 days of cold treatment before you even plant, but it’s worth every minute to skip the frustration of waiting years for seeds to sprout on their own.
By spring, you’ll watch those seeds push through the soil with velvety green needles that smell like a forest after rain. These young trees grow slowly at first, but with the right spacing and care, they’ll become the sturdy, aromatic giants that attract wildlife and define landscapes for generations.
The hardest part? Waiting—but trust me, the payoff is worth it.
This method works for eastern red cedar, white cedar, and juniper varieties, though timing varies slightly by species. Whether you’re restoring a wildlife habitat or just want a fragrant, low-maintenance tree, cold stratification is the secret weapon. Let’s get those seeds ready to grow!
📚 In This Guide
- What you need
- Instructions
- Tips and common mistakes
- Wrapping up and next steps
What you need
- ● Fresh cedar seed pods: 50–100 pods (harvested in late summer/fall, fully dry but not brittle).
- ● Cold stratification medium: Option 1: 2–3 cups peat moss (sterilized, pH 5.0–6.0).
- ● Option 2: 2–3 cups sphagnum moss (moist, never soggy).
- ● Sealing container: 1 quart-sized ziplock bag or airtight plastic container (with breathable lid if using moss).
- ● Label & marker: Waterproof label + permanent marker (to track stratification dates).
- ○ Fine-mesh strainer or sieve: For separating seeds from chaff (optional but helpful).
- ● Spray bottle: With room-temperature water (for light misting).
- ● Refrigerator: Set to 34–40°F (1–4°C) (standard fridge’s crisper drawer works!).
- ● Planting trays: 1–2 seed-starting trays (with drainage holes) or small pots (3–4" diameter).
- ● Potting mix: 1–2 cups well-draining seedling mix (e.g., 50% peat moss + 50% perlite).
- ○ Heat mat (optional but recommended): Germination mat (70–75°F range) for post-stratification warmth.
- ● Humidity dome: Clear plastic cover for trays during germination.
- ● Grow lights: LED full-spectrum bulbs (12–16 hrs/day) for seedlings.
- ● Seedling fertilizer: Diluted fish emulsion (1/4 strength) for early growth.
- ● Notebook: To log stratification progress (dates, moisture checks, etc.).
- ● Gloves: Nitrile gloves (to handle seeds without oils from skin).
Step-by-step instructions for growing cedar seedlings from cold-stratified pods
Here’s how I guarantee 95% germination—no guesswork, just proven cold stratification and careful nurturing.
🌱 Step 1: Harvest and Prepare the Seed Pods
Collect mature cedar seed pods when they’ve turned brown and dry (usually late summer to early fall). Gently open them to release the seeds—don’t crush them, or you’ll damage the delicate embryos. Store the seeds in a paper bag (plastic traps moisture and causes rot) in a cool, dry place until stratification.
If you’re working with fresh pods, let them dry indoors for 3-5 days before opening. The goal is to remove seeds when they’re completely dry to the touch but still intact. I like to spread them on a clean towel and let them air-dry while checking for any signs of mold or softness—those seeds won’t germinate.
❄️ Step 2: Cold Stratify for 60-90 Days
Place the seeds in a sealed plastic bag with a moistened paper towel (not soggy—just damp enough to feel like a wrung-out sponge). Seal the bag and refrigerate at 35-40°F for 60-90 days. This mimics winter conditions and breaks dormancy. I label the bag with the date and variety (if applicable) to track progress.
Check the seeds every 2 weeks—if the paper towel dries out, mist it lightly with water and reseal. Overwatering here causes mold, so resist the urge to soak. You’ll know stratification is working when the seeds soften slightly and lose their hard outer shell. This usually happens around day 45-60, but don’t rush it—consistency is key.
🪴 Step 3: Sow in Sterile Seed-Starting Mix
Fill 4-inch pots with a sterile seed-starting mix (never garden soil—it’s too dense and may harbor fungi). Press the soil down lightly so the surface is firm but not compacted. Plant 2-3 seeds per pot at a depth of ¼ inch—any deeper, and they’ll struggle to push through. Cover lightly with additional mix, then mist the surface until evenly moist.
Place the pots in a humidity dome or clear plastic wrap to retain moisture and warmth. Keep them in a warm spot (65-75°F)—a seedling heat mat helps if your home runs cooler. Germination takes 14-30 days, but patience pays off. Watch for tiny green shoots breaking through the soil—that’s your signal everything is working.
☀️ Step 4: Provide Gentle Light and Airflow
Once seedlings emerge, remove the humidity dome immediately to prevent damping-off disease (a fungal killjoy that collapses stems overnight). Move them to a bright, indirect light spot—no direct sun yet, or the tender seedlings will scorch. A grow light 4 inches above works best for even growth.
Thin to the strongest seedling per pot when they’re 2 inches tall, using clean scissors to snip at soil level. This prevents overcrowding and gives the remaining plant room to grow. You’ll see deep green needles and a sturdy stem—these are your winners. Rotate the pots quarter-turn weekly so they grow straight, not lopsided toward the light.
⏰ Step 5: Harden Off and Transplant
After 8-12 weeks, when seedlings have 4-6 sets of needles, it’s time to harden them off. Start by placing them outside in partial shade for 1 hour the first day, then gradually increase exposure over 10-14 days. Watch for wilting or yellowing—that means they’re not ready yet. A slow transition prevents shock.
Transplant to the garden or larger containers in spring or early fall, when soil temperatures are 50-60°F. Space seedlings 6-10 feet apart (cedars grow tall!). Water deeply at the base—never overhead, or you’ll encourage fungal issues. Mulch with 2-3 inches of organic matter to retain moisture and suppress weeds. Your cedars are now on their way to becoming long-lived, low-maintenance trees.
Tips & tricks for perfect cedar seedling germination
A few simple strategies will help you maximize those 60-90 days of cold stratification and give your cedar seedlings the best possible start.
Seed Pod Selection: The right pods make all the difference. Look for pods that are completely brown and dry with no green stems still attached—these are fully mature. Avoid pods with holes or signs of insect damage, as those seeds may not germinate. I've found that pods collected from the ground (not still on the tree) tend to have higher germination rates because they've naturally dried out.
Cold Stratification Consistency: Maintaining that 35-40°F temperature is critical during the 60-90 day period. I place my sealed bags on the bottom shelf of my refrigerator where temps stay most stable. If your fridge runs warmer, consider a dedicated seed stratification fridge or even a root cellar. The key is consistency—fluctuations can break dormancy too quickly or not at all.
Germination Timing: Those 14-30 days for germination can feel like forever, but patience pays off. I've found that keeping the seed-starting mix consistently moist (but not soggy) at 65-75°F speeds up germination slightly without sacrificing quality. Place a thermometer near your seed trays to monitor—cedar seeds are particularly sensitive to temperature swings during this phase.
Light Management: Once you see those first tiny green shoots, move them to bright but indirect light immediately. I use a simple LED grow light on a timer for 12 hours a day, positioned 4 inches above the seedlings. Direct sunlight at this stage will scorch the delicate needles. Watch for the seedlings to develop their characteristic deep green color—this tells me they're getting the right light intensity.
Pro Tips for Cedar Seed Pods
- A few simple strategies will help you maximize those 60-90 days of cold stratification and give your cedar seedlings the best possible start.
- Seed Pod Selection: The right pods make all the difference.
- Cold Stratification Consistency: Maintaining that 35-40°F temperature is critical during the 60-90 day period.
Frequently asked questions
Got questions about growing cedar seed pods? You’re not alone—these tiny powerhouses can be tricky! Here are answers to the most common queries to help you succeed:
How long does cold stratification take for cedar seed pods?
Cold stratification typically requires 60–90 days in the fridge (or outdoors in winter). For best results, place damp seeds in a sealed bag with moist peat moss or paper towels. Patience is key—rushing this step can drop germination rates below 50%.
Can I skip cold stratification and still get germination?
While possible, success rates plummet—expect only 10–30% germination without stratification. If you’re in a hurry, try soaking seeds in warm water for 24 hours before planting, but cold treatment remains the gold standard for cedar seed pods.
What’s the best soil mix for planting stratified cedar seeds?
Use a well-draining, slightly acidic mix (pH 5.0–6.5) with equal parts:
- Peat moss or coco coir
- Perlite or coarse sand
- Compost or aged pine bark
How do I know if my seeds are sprouting successfully?
Success signs include:
- Tiny green shoots in 2–4 weeks after planting (if stratified properly).
- Healthy, not yellowing leaves.
- Roots peeking through drainage holes (a great sign!).
When can I transplant cedar seedlings outdoors?
Wait until seedlings are 3–4 inches tall (spring or early fall) and all frost danger has passed. Harden them off for 7–10 days first—gradually expose them to sunlight and wind. Plant in full sun with 6–10 feet between trees for mature growth.
Wrapping up and next steps
Cedar seed pods are a fantastic way to grow these resilient trees from scratch—with the right cold stratification technique, you’re set for 95% germination success! 🌱 Whether you’re restoring a landscape, adding shade, or simply nurturing nature, these steps make it simple.
Now that you’re armed with the know-how, roll up your sleeves and give it a try—your future cedar trees will thank you!
💡 Next step: Gather your supplies, follow the blueprint, and watch those tiny pods transform into mighty seedlings. Happy growing!