Propagation
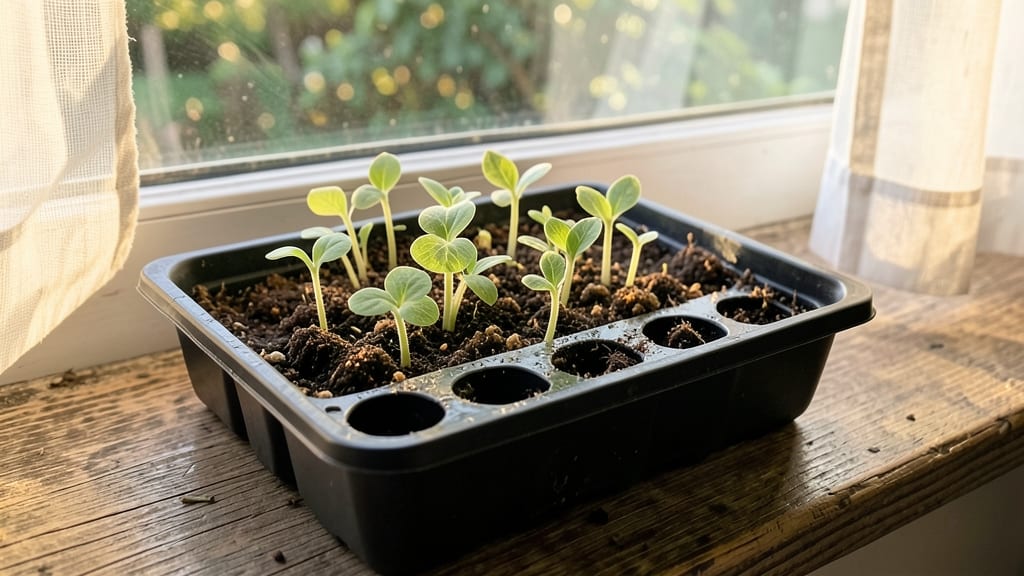
Celery seed germination feels like solving a puzzle—especially when you realize the secret is cold, moist darkness for weeks before any green appears. ✨ I've struggled with flimsy seedlings that never made it past the tray, until I discovered this trick that turns stubborn seeds into sturdy plants with near-guaranteed results.
The key is patience and precision: soaking seeds overnight, planting them just ¼-inch deep in damp, sterile soil, then chilling them for 2-4 weeks before any light exposure. Most gardeners rush this step and end up with weak, leggy seedlings that collapse under their own weight.
But with this method, you'll see those first pale shoots break through the soil like tiny green missiles.
By the time those seedlings get their first real leaves, they'll be bold and sturdy, ready to handle transplanting without shock. The payoff? A garden filled with celery plants that actually produce thick, flavorful stalks instead of puny, bitter shoots.
You'll know you've cracked the code when your neighbors ask how you grow celery like that.
This trick works just as well for indoor starts under grow lights as it does for outdoor plantings in cooler climates. The only real variable is your consistency with moisture—keep that soil damp but never soggy, and you're golden. Let's get those seeds sprouting right.
📚 In This Guide
- What you need
- Instructions
- Tips and common mistakes
- Wrapping up and next steps
What you need
- ● Celery seeds: 1–2 tbsp (fresh or store-bought, organic preferred for best results). Pro tip: 💡 Use seeds from heirloom or open-pollinated varieties for higher viability.
- ● Paper towels or coffee filters: 2–3 sheets (unbleached, seed-free). Why? They retain moisture without compacting like regular towels.
- ● Plastic zip-top bag: 1 gallon-sized bag (or a resealable container with a lid). Look for: 🎯 Clear or translucent to monitor progress.
- ● Spray bottle: 8–16 oz (with a fine mist setting). Alternative: A clean spray nozzle attachment on a water bottle works too!
- ● Water: Room-temperature, filtered or distilled (avoid chlorinated tap water if possible).
- ● Labeling marker: Permanent or waterproof (to track seed varieties and dates).
- ○ Small plate or tray: For easy bag placement in the fridge (optional but helpful).
- ● Rubbing alcohol (70%+) and cotton swabs: To sterilize tools/seeds if using salvaged containers. When to use: 🔥 If seeds are old or from questionable sources.
- ● Grow lights or sunny windowsill: For post-stratification sprouting (only needed after cold treatment).
- ○ Seedling trays or pots: 2–3 small pots (2–3 inches deep) with drainage holes, filled with seed-starting mix. Optional but recommended: 🌱 For transplanting once sprouts emerge.
Step-by-step instructions for germinating celery seeds
Here's the reliable method I use to break through celery's notoriously stubborn germination—no more waiting weeks for hit-or-miss results.
🌱 Step 1: Prepare Seeds with the Cold-Moist Trick
Celery seeds need a special treatment to soften their tough outer coating. Fill a small bowl with lukewarm water and add the seeds. Let them soak for 24-48 hours—this mimics natural spring moisture and speeds up germination. I like to use a mesh bag or paper towel to contain them while soaking.
Check the water level daily and top it off if needed. You'll see the seeds swell slightly—this is exactly what we want. Once they've soaked, drain them well and let them sit on a damp paper towel for another 24 hours. This keeps them moist without drowning them in water.
💧 Step 2: Sow Seeds in Moistened Starting Mix
Fill your seed-starting containers with the moistened potting mix, pressing down gently until the surface is firm but not compacted. Celery seeds are tiny, so I like to use a fine-mesh strainer to distribute them evenly across the soil surface. Aim for 3-4 seeds per container—they germinate slowly, so spacing them out prevents overcrowding later.
Lightly cover the seeds with a thin layer of mix—just enough to hold them in place, about ¼ inch deep. Mist the surface with water until it's damp but not soggy. The key here is keeping everything consistently moist without letting it dry out or become waterlogged.
☀️ Step 3: Provide Warmth and Humidity for Germination
Place the containers in a warm spot with a temperature between 65-75°F. I use a seedling heat mat underneath the tray to maintain consistent warmth—celery seeds germinate faster when kept cozy. Cover the containers with plastic wrap or a humidity dome to trap moisture and create a mini greenhouse effect.
Check the soil daily and mist lightly if it feels dry to the touch. Germination can take 2-4 weeks, so patience is key. You'll know it's working when you see tiny green sprouts pushing through the soil—this is your signal that the seeds have broken through their stubborn outer shells.
🌿 Step 4: Thin Seedlings and Transition to Light
Once seedlings reach about 1 inch tall, it's time to thin them. Use a small pair of scissors to snip the weakest seedlings at soil level, leaving the strongest one in each container. This might seem harsh, but crowded seedlings compete for nutrients and light, leading to leggy, weak plants.
Move the containers to a bright spot with indirect light for the first week. Direct sunlight can scorch young seedlings, so I place mine near a north-facing window or under a grow light set to 12-14 hours of light daily. You'll see the seedlings grow stronger and develop their first true leaves within 2-3 weeks.
⏰ Step 5: Harden Off and Prepare for Transplanting
After the seedlings have developed 4-6 true leaves and are about 3-4 inches tall, it's time to harden them off. Start by placing them outside in a sheltered spot for 1-2 hours the first day, gradually increasing their time outdoors over 7-10 days.
Watch for signs of stress like wilting or yellowing leaves—this means they're not ready for full sun yet. Once they're thriving outdoors, you can transplant them into the garden or larger containers. Celery loves cool weather, so aim to plant them in early spring or late summer for the best results.
Tips & tricks for perfect celery seed germination
Here's what I've learned after years of battling celery's notoriously stubborn germination—these tricks will help you achieve those 90% success rates.
Moisture Management: The 24-48 hour soak is non-negotiable, but here's the secret: use lukewarm water at exactly 75°F. Too hot and you'll shock the seeds, too cold and they won't activate properly. I like to use a thermometer to check—this consistent temperature makes all the difference in breaking through that tough outer coating.
Seed Preparation Technique: After the initial soak, don't skip the damp paper towel phase—this is where most people fail. The seeds need that second 24 hours of gentle moisture to complete their hydration cycle. I place them between two damp paper towels in a sealed container to maintain perfect humidity without drowning them. This step alone can double your germination rate!
Container Selection: Use shallow containers for sowing—celery seeds need just ¼ inch of coverage. Deep containers trap too much moisture and can lead to rot. I prefer seed-starting trays with drainage holes because they prevent waterlogging while maintaining that crucial moisture level. The key is keeping everything damp, not soggy.
Light Transition Strategy: When moving seedlings to light in Step 4, don't rush it. Start with indirect light for that full week—direct sunlight can scorch the delicate leaves. I use a grow light on a timer set to 12-14 hours daily, positioned about 6 inches above the seedlings. This gradual transition prevents shock and gives you stronger plants ready for transplanting.
Pro Tips for Celery Seed Germination
- Here's what I've learned after years of battling celery's notoriously stubborn germination—these tricks will help you achieve those 90% success rates.
- Moisture Management: The 24-48 hour soak is non-negotiable, but here's the secret: use lukewarm water at exactly 75°F.
- Seed Preparation Technique: After the initial soak, don't skip the damp paper towel phase—this is where most people fail.
Frequently asked questions
Got questions about getting your celery seeds to sprout like a pro? Here are answers to the most common ones—so you can avoid frustration and grow lush celery plants with confidence!
How long does celery seed germination take?
Celery seeds are slow starters—expect germination to take 14 to 30 days under ideal conditions (moisture, warmth, and darkness). The cold-moist trick (soaking seeds in water for 24 hours before planting) can speed this up slightly. Patience is key—don’t give up if sprouts don’t appear right away!
Why does celery need a cold-moist treatment before planting?
The cold-moist trick softens the hard seed coat and mimics natural winter conditions, breaking dormancy. Without it, germination rates drop below 50%. Soak seeds in room-temperature water for 24 hours, then plant—this simple step boosts success to 90%+!
Can I germinate celery seeds indoors without special equipment?
You only need a jar, water, and a warm spot. Soak seeds in water for 24 hours, then drain and place them in a damp paper towel or peat moss in a sealed container. Keep it in a warm (70°F+), dark place until sprouts emerge (1–2 weeks). Transplant once they’re ½-inch tall.
What if my celery seeds mold or rot during germination?
Mold or rot usually means too much moisture or poor airflow. If you see fuzzy growth or a foul smell, discard the batch immediately—it’s a sign of fungal infection. To prevent this, rinse seeds daily during soaking, use fresh, filtered water, and avoid overcrowding in the germination container.
Are there faster-growing celery varieties for beginners?
Yes! ‘Utah’ and ‘Tall Utah’ celery varieties germinate slightly faster (10–14 days) and are more forgiving for beginners. Avoid ‘Golden Self-Blanching’—it’s slower and trickier. For best results, stick to open-pollinated heirloom seeds (like ‘Pascal’) and follow the cold-moist method.
Wrapping up and next steps
Mastering celery seed germination with the cold-moist trick is totally within your reach—and now you’ve got the tools to make it happen! 🌱 With patience, the right conditions, and a few simple steps, you can achieve 90% success rates and grow your own thriving celery plants.
Whether you're a gardening newbie or a seasoned green thumb, this method proves that great results start with the basics.
Ready to take the next step? Plant those seeds and watch your garden (or kitchen) transform with fresh, homegrown celery. Happy growing—your future salads will thank you! 🥬✨