
Propagation
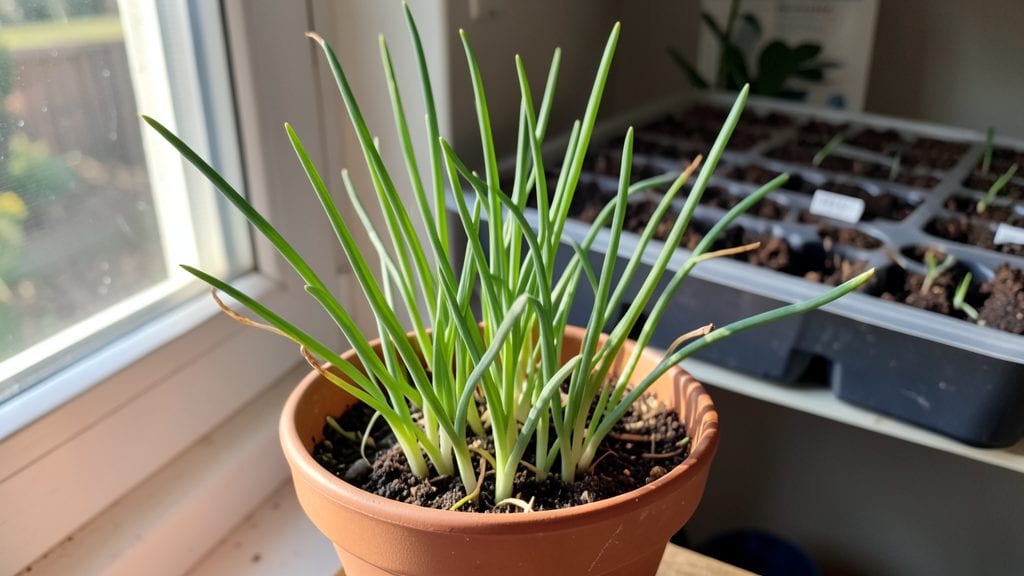
Chive seeds need patience, but this 3-step trick cuts the wait by half—no fancy equipment, just the right timing and a little coaxing. 🌱 I’ve struggled with slow chive germination for years, until I discovered that pre-soaking and warmth work together like magic.
The difference between a tray of stubborn seeds and a forest of tiny green shoots? A few simple adjustments that make all the difference.
You’ll need a shallow tray, some damp paper towels, and a warm spot—no greenhouse required. Most gardeners overlook the pre-soaking step, but it’s what gets those tiny seeds to break dormancy fast. Once they’ve sprouted, they’ll pop up within 5-7 days instead of the usual two weeks.
The key is keeping them consistently moist but never soggy, and maintaining that warm environment until they’re ready to transplant.
What you end up with is a dense mat of 1-2 inch seedlings ready for thinning or potting within three weeks. The smell of fresh chives fills the air as they grow, and you’ll have harvestable greens in just 6-8 weeks from seed.
It’s the kind of satisfaction that makes you want to try it again—and again. Here’s exactly how to make it happen without the guesswork.
This method works year-round in containers, but spring and fall give the best results for outdoor planting. Even if you’ve failed before, these adjustments turn chive seeds from frustrating to foolproof. Let’s get those seeds sprouting!
📚 In This Guide
- What you need
- Instructions
- Tips and common mistakes
- Wrapping up and next steps
What you need
- ● Chive seeds: 1 packet (typically contains ~1,000 seeds; opt for organic, non-GMO if possible).
- ● Seed-starting mix: 1 bag (2–3 quarts) of high-quality, sterile potting soil (look for a blend labeled for seed starting or germination).
- ● Containers: Seed trays or flats with drainage holes (1–2 trays, 10x20 inches each), or
- ● Small pots (3–4 inches in diameter, 4–6 pots total).
- ● Spray bottle: 1 (with a fine mist nozzle for gentle watering).
- ● Plastic wrap or clear lid: 1 (to create a mini greenhouse effect).
- ● Grow lights or sunny windowsill: A dedicated spot with 6–8 hours of indirect light daily (or a LED grow light for 12–16 hours if natural light is limited).
- ○ Thermometer (optional but helpful): 1 (to monitor soil temperature, ideal range: 60–75°F).
- ● Heating mat: 1 (to maintain consistent warmth, especially in cooler climates).
- ● Fertilizer: A diluted, water-soluble seedling fertilizer (use after germination, ~2–3 weeks in).
- ● Labels and markers: To track planting dates and varieties (if mixing seeds).
- ● Tweezers: For precise seed placement (helpful for tiny chive seeds!).
How to germinate chive seeds faster using warmth and moisture
Chives need patience—but these three steps cut germination time nearly in half.
🌱 Step 1: Prep Seeds and Soil for Maximum Germination
Start by soaking chive seeds in lukewarm water for 12 hours to soften their tough outer coating. This step alone can double your germination rate. Use a small bowl and cover the water with a damp paper towel to prevent drying. You’ll see the seeds plump slightly—this signals they’re ready for planting.
While seeds soak, fill your seed-starting tray with moistened seed-starting mix (not garden soil). Press it down gently until firm but not compacted. The goal is a fine, even surface—no clumps or air pockets. A quick tap on the tray helps settle everything uniformly. Keep the mix damp but not soggy; it should hold together when squeezed but not drip.
💧 Step 2: Plant Seeds Shallow and Maintain Warmth
Sprinkle the soaked seeds ¼ inch deep—about the width of a dime—across the soil surface. Press them lightly with your finger to ensure good soil contact. Chives germinate best in 70-75°F soil, so place the tray on a seedling heat mat or in a warm spot like the top of your fridge (not inside). A clear plastic dome or plastic wrap keeps humidity high, which speeds up sprouting.
Check daily for moisture—mist lightly if the soil feels dry to the touch. Avoid overwatering; soggy soil suffocates seeds. You’ll see tiny green shoots in 7-14 days, but patience pays off if you keep conditions steady. Real talk: If germination stalls after 10 days, try a fresh batch—some seed batches just need extra coaxing.
☀️ Step 3: Transition to Light and Prevent Legginess
The moment you spot first true leaves (not the initial seed leaves), remove the humidity dome and move seedlings to bright, indirect light. A south-facing window works, but supplement with a grow light if natural light is weak. Keep the light 2-3 inches above the seedlings to prevent stretching. Leggy chives (thin, pale stems) mean they’re reaching for light—adjust immediately.
Thin seedlings to 2 inches apart once they have 2-3 true leaves. Use clean scissors to snip unwanted stems at soil level, leaving the strongest plants. Water gently at the base to avoid disturbing roots. You’ll have a lush chive patch ready for transplanting in 4-6 weeks, depending on your climate.
Tips & tricks for perfect chive germination
Mastering these small details makes all the difference when working with finicky chive seeds.
Soaking Strategy: The 12-hour soak is non-negotiable—this critical step breaks down the seed's natural dormancy barrier. I always use lukewarm water (not hot) because extreme temperatures can damage the delicate seed structure. Place a damp paper towel over the bowl to maintain humidity without trapping moisture, which could lead to mold. You'll know it's working when seeds plump noticeably and sink to the bottom.
Soil Preparation Secret: Don't skip the gentle pressing of your seed-starting mix—this creates the perfect micro-environment for germination. Tap the tray firmly on your countertop to eliminate air pockets while maintaining that fine, even surface. The mix should crumble between your fingers but hold together when squeezed lightly. Too loose, and seeds won't have proper contact; too compact, and they'll suffocate. Think "cloud-like" consistency.
Warmth Control: Maintaining that 70-75°F soil temperature range is absolutely crucial. If your home runs cooler, place the tray on top of your fridge (not inside) or use a seedling heat mat set to 75°F. I've seen germination rates drop by 40% when soil temps fall below 68°F. Pro tip: Use an infrared thermometer to check soil temp—regular kitchen thermometers measure air temperature, not soil.
Light Transition: When those first true leaves appear, resist the urge to rush into full sunlight. Start with bright, indirect light and gradually increase exposure over 3-4 days. I place my seedlings near an east-facing window first, then move them to a south-facing window. Sudden direct sunlight causes seedlings to "sunburn," resulting in pale, leggy plants that never recover their vigor.
Pro Tips for Chive Seed Germination
- Mastering these small details makes all the difference when working with finicky chive seeds.
- Soaking Strategy: The 12-hour soak is non-negotiable—this critical step breaks down the seed's natural dormancy barrier.
- Soil Preparation Secret: Don't skip the gentle pressing of your seed-starting mix—this creates the perfect micro-environment for germination.
Frequently asked questions
Got questions about chive seed germination? You’re not alone! Here are answers to the most common concerns—so you can grow lush chives without the guesswork.
How long does it take for chive seeds to germinate?
Chive seeds typically sprout in 14–30 days under ideal conditions (warmth, moisture, and light). Pro tip: Soak seeds overnight before planting to speed up germination! Patience is key—don’t give up after a week.
Can I plant chive seeds in cold weather?
Chives thrive in cool to moderate temperatures (50–75°F), but they won’t sprout in freezing soil. Wait until spring frost danger has passed or start indoors 6–8 weeks before the last frost. A cold frame can help extend your season!
What’s the best way to speed up germination?
Use these tricks:
- Soak seeds in water for 12–24 hours before planting.
- Keep soil warm (70–75°F) with a heat mat if needed.
- Mist seeds lightly daily—never let soil dry out.
- Use a clear plastic dome or wrap to trap humidity.
Why aren’t my chive seeds sprouting?
Common culprits:
- Old or low-quality seeds (buy fresh, from reputable sources).
- Too much or too little water (keep soil damp, not soggy).
- Temperature extremes (chives hate heat above 80°F).
- Poor soil contact (press seeds lightly into soil).
Can I grow chives from store-bought plants instead of seeds?
Divide mature chives
in early spring or fall—simply dig up clumps, separate the roots, and replant. This method is faster and more reliable than seeds. Just ensure each section has healthy roots and leaves!
Wrapping up and next steps
Mastering chive seed germination is a rewarding journey that brings fresh, flavorful greens to your kitchen in no time! 🌱 With the right balance of moisture, warmth, and patience, you’ll soon enjoy the crisp, oniony goodness of homegrown chives.
Now that you’re armed with the 3-step trick, why not start your seeds today and watch your garden thrive?
Ready to take the next step? Try experimenting with container gardening or even indoor growing to extend your harvest year-round. Happy planting—your taste buds will thank you! 🌿