
Planting
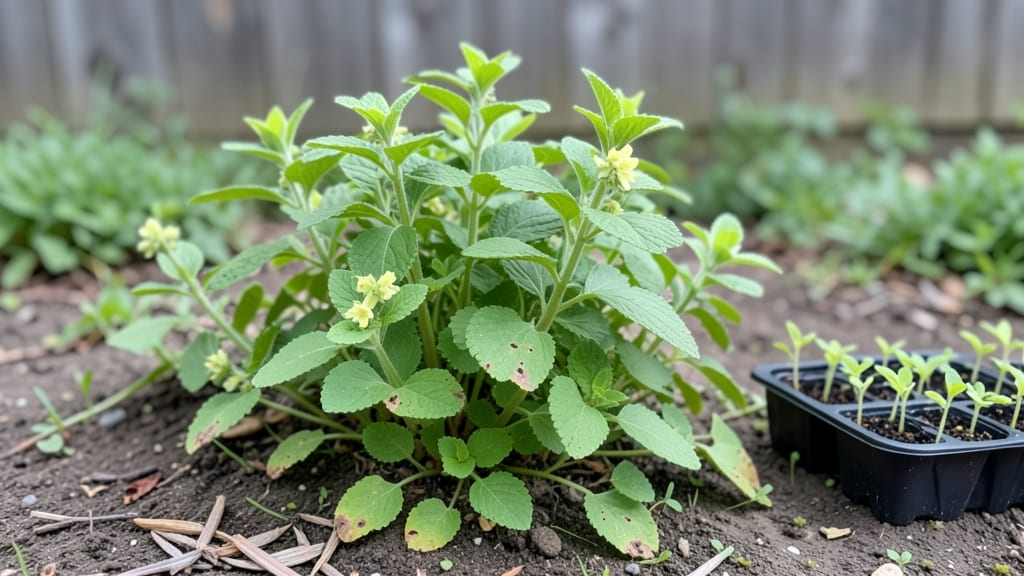
Growing this melissa plant from seeds unlocks fragrant lemon balm that’s cheaper, fresher, and far more potent than anything store-bought—if you give those tiny seeds the patience (and perfect conditions) they deserve. 🌱 break through soil and grow into lush, lemon-scented plants in just six weeks.
The secret isn’t complicated: start seeds indoors 4-6 weeks before your last frost, using a well-draining seed-starting mix and keeping them warm (around 70°F). Plant them ¼ inch deep in small pots, and they’ll germinate in 10-20 days if kept consistently moist.
Once seedlings have 2-3 true leaves, transplant them outdoors after hardening off, spacing them 18-24 inches apart in partial shade.
By midsummer, you’ll have a thriving patch of lemon balm with bright green, serrated leaves that release a citrusy aroma when crushed. Use it fresh in teas, as a pest-repelling companion plant, or even as a natural stress reliever—just rub a leaf between your fingers for an instant mood boost.
The best part? It spreads easily, so you’ll have plenty to share (or give away to neighbors who’ll envy your garden).
Watch for leggy seedlings if light is too weak, and thin crowded plants to prevent disease. With the right care, your lemon balm will reward you with years of growth, returning stronger each spring. Ready to grow yours?
📚 In This Guide
- What you need
- Instructions
- Tips and common mistakes
- Wrapping up and next steps
What you need
- ● Melissa plant seeds: 10–20 seeds (or a small packet for beginners). Look for organic, non-GMO seeds for best results.
- ● Seed-starting containers: 2–4 small pots (3–4 inches deep) with drainage holes or a seed tray with individual cells.
- ● Potting mix: 1–2 bags of high-quality, well-draining seed-starting mix (avoid garden soil—it’s too dense!).
- ● Watering can or spray bottle: For gentle hydration (overwatering is the #1 enemy of seedlings!).
- ● Grow lights or sunny windowsill: A south-facing window (6+ hours of sunlight daily) or a grow light (12–16 hours/day for indoor starts).
- ○ Gloves: Protect your hands from prickly stems (optional but recommended!).
- ● Plant labels: Small markers or sticks to track varieties (especially useful if growing multiple herbs).
- ● Humidity dome or plastic wrap: Keeps seeds moist while germinating (place a clear bag over pots or use a mini greenhouse).
- ● Fertilizer: A balanced, water-soluble fertilizer (5-10-5 ratio) for when seedlings sprout (dilute to half-strength!).
- ● Transplanting supplies: Larger pots (6+ inches) or garden bed prepared with compost if moving outdoors.
- ● Pruning shears: For trimming leggy growth (encourages bushier plants!).
Step-by-Step instructions for growing melissa from seed
Here's how to cultivate this lemon-scented herb from scratch—ready for harvest in just six weeks.
🌱 Step 1: Prepare Containers and Seed Starting Mix
Fill four 3-inch deep biodegradable pots with a light, airy seed-starting mix. I press the soil down gently to remove air pockets but avoid compacting it—melissa roots need room to breathe. Moisten the mix until it's damp to the touch but not soggy, like a wrung-out sponge.
Melissa seeds germinate best in warm conditions, so place your pots on a seedling heat mat set to 70-75°F. If you don't have one, a sunny windowsill above a heating vent works too. The key is consistency—fluctuating temperatures slow germination dramatically.
🌱 Step 2: Sow Seeds at Proper Depth and Spacing
Scatter 2-3 seeds per pot on the soil surface, since melissa seeds are tiny and benefit from light for germination. Press them in just enough to make contact—no need to bury them. I use a toothpick to create tiny divots if needed, but most seeds will stick with gentle finger pressure.
Cover the pots loosely with plastic wrap to retain moisture and warmth. Check daily for condensation—if you see water droplets forming, remove the wrap for 30 minutes to prevent fungal growth. Germination typically takes 14-21 days, so patience is key here.
☀️ Step 3: Provide Bright, Indirect Light After Germination
Once seedlings emerge, remove the plastic wrap immediately to prevent damping-off. Place them under grow lights or in a south-facing window where they'll receive 6-8 hours of bright, indirect light daily. You'll notice leggy growth if the light is insufficient—this means the seedlings are stretching toward any available light source.
Rotate the pots a quarter turn daily so plants grow straight rather than leaning. When seedlings develop their second set of true leaves (not the initial seed leaves), thin to the strongest plant per pot. Use clean scissors to snip unwanted seedlings at soil level—never pull them, which disturbs roots.
💧 Step 4: Water and Fertilize for Strong Growth
Water when the top inch of soil feels dry, using room-temperature water to avoid shocking the roots. I water from the bottom by placing pots in a shallow tray of water for 10 minutes—this encourages deep root growth. Always empty excess water afterward to prevent root rot.
After 4 weeks, when plants show 4-5 sets of leaves, begin fertilizing with a balanced liquid fertilizer diluted to half strength. Melissa responds well to regular feeding but can develop weak growth if over-fertilized—stick to the every-2-weeks schedule.
✂️ Step 5: Harvest and Encourage Bushy Growth
You can begin harvesting leaves when plants reach 6-8 inches tall, typically around 6-8 weeks from sowing. Pinch back the tips of stems to encourage bushier growth—this simple step prevents leggy plants and increases your harvest yield. Always cut just above a leaf node to promote new growth.
For continuous harvests, pinch back stems every 4-6 weeks throughout the growing season. Melissa thrives in USDA zones 5-9 and can be grown as an annual or overwintered indoors. The more you harvest, the more it grows—just avoid cutting more than one-third of the plant at a time.
Tips & tricks for perfect melissa seedlings
Growing melissa from seed is one of those rewarding projects where small details make all the difference between healthy plants and disappointing failures.
Temperature Consistency: The 70-75°F range during germination is non-negotiable for melissa seeds. I learned this the hard way after trying to grow them in my cool basement—germination took twice as long and many seeds never sprouted. If you don't have a heat mat, try placing pots on top of your refrigerator or near a sunny window with consistent warmth. Fluctuations below 65°F can stall germination completely.
Light Strategy: Those critical 6-8 hours of bright, indirect light in Step 3 are where most beginners go wrong. I recommend supplementing natural light with a simple LED grow light if your windowsill isn't bright enough. You'll know you're doing it right when seedlings grow upright rather than stretching toward the light—this leggy growth is a classic sign of insufficient light. Rotate your pots daily to prevent leaning, even if it seems like a small detail.
Watering Technique: The bottom-watering method for 10 minutes works wonders because it encourages deep root development rather than shallow surface roots. What I've found works best is using a shallow tray with about an inch of water—this gives roots plenty of time to absorb moisture without becoming waterlogged. Always empty excess water after 10 minutes to prevent root rot, which can be fatal to young seedlings.
Harvest Timing: Waiting until plants reach 6-8 inches before your first harvest is crucial—cutting too early stunts growth. I've seen beginners harvest at just 4 inches, only to watch their plants struggle to recover. When harvesting, always cut just above a leaf node using clean scissors. This simple technique encourages new growth from that exact spot while preventing damage to the stem.
Pro Tips for Melissa Plant Seeds
- Growing melissa from seed is one of those rewarding projects where small details make all the difference between healthy plants and disappointing failures.
- Temperature Consistency: The 70-75°F range during germination is non-negotiable for melissa seeds.
- Light Strategy: Those critical 6-8 hours of bright, indirect light in Step 3 are where most beginners go wrong.
Frequently asked questions
Got questions about growing melissa plant seeds? You’re not alone! Here are some of the most common queries—plus quick, no-fuss answers to help you grow this fragrant herb like a pro.
How long does it take for melissa seeds to germinate?
Melissa seeds can take anywhere from 14 to 30 days to sprout, depending on warmth (65–75°F is ideal) and moisture. Patience is key! Keep the soil consistently damp and cover seeds lightly with soil to encourage faster germination. If you’re eager for results, consider starting with cuttings or nursery plants instead.
Can I grow melissa indoors, and what’s the best light setup?
Melissa thrives indoors with bright, indirect light (a south-facing window or grow lights work best). If leaves look pale or leggy, it’s a sign of insufficient light. Use a grow light 12–14 hours daily for optimal growth. Just avoid harsh direct sun, which can scorch the delicate foliage.
Why aren’t my melissa seeds sprouting? Troubleshooting tips!
If your seeds aren’t germinating, check these common issues:
- Cold soil: Melissa loves warmth—keep soil above 60°F.
- Too dry: Seeds need consistent moisture (mist daily or use a humidity dome).
- Old seeds: Store-bought seeds lose viability over time (plant fresh seeds for best results).
- Poor soil: Use well-draining potting mix with compost for nutrients.
Is melissa easy to grow from seed, or should I buy a starter plant?
While melissa can be grown from seed, it’s slower and less reliable than propagating from cuttings or buying a young plant. Seeds often struggle with slow germination and inconsistent growth. For faster, fragrant results, opt for a nursery starter—you’ll enjoy lemon balm tea in half the time!
Will melissa attract bees or pests? How do I protect my plants?
Melissa is bee-friendly (great for pollinators!) but can also attract aphids if overcrowded. To keep pests at bay:
- Space plants 12–18 inches apart for airflow.
- Spray with neem oil if you spot aphids.
- Avoid overwatering—wet foliage invites fungal issues.
Wrapping up and next steps
Growing melissa plant seeds is a rewarding journey that brings fragrant joy to your garden in just six weeks! 🌱 Whether you're drawn to its lemony scent, culinary uses, or natural remedies, these easy-to-grow herbs thrive with minimal effort.
With the right soil, sunlight, and care, you’ll soon be harvesting fresh leaves for teas, cooking, or even homemade perfumes.
Ready to dive in? Start by gathering your supplies and follow the steps above—your fragrant oasis is just a few seeds away! What will you create with your homegrown melissa? 😊