
Lawn
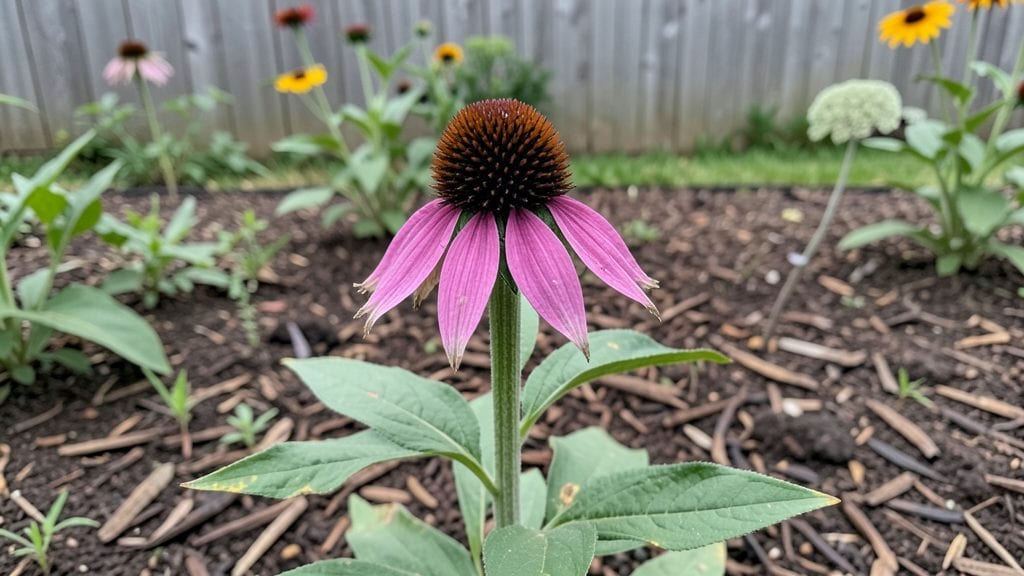
Coneflower seed heads are nature’s hidden treasure chest—packed with seeds for next year’s garden and a vital food source for birds and bees. 🌻 I’ve learned the hard way that cutting them too early means wasted potential, but leaving them too long can turn your garden into a bird buffet before you’re ready to replant.
Harvesting at the right stage—when the seed heads turn brown and papery—is the key. You’ll need sharp pruners, a paper bag for collection, and a dry, dark spot for storage. This simple method ensures you’ll have fresh coneflowers blooming for years without buying new seeds.
By saving these seed heads, you’re not just stocking your garden—you’re creating a year-round food source for pollinators. The dried blooms also make stunning winter arrangements, so you’re not losing beauty even after the growing season ends.
Whether you’re a pollinator enthusiast or just love the look of coneflowers, this dry-and-save technique works for any garden size. Let’s turn those spent blooms into next year’s foundation—without the guesswork.
📚 In This Guide
- What you need
- Instructions
- Tips and common mistakes
- Wrapping up and next steps
What you need
- ● Mature coneflower seed heads (fully brown/dry, late summer/fall harvest): At least 5–10 healthy heads per variety (more = better diversity!)
- ● Choose disease-free plants (no spots, mold, or wilting)
- ● Pruning shears or sharp scissors (clean, sterilized with rubbing alcohol)
- ● Paper bags or breathable mesh bags (1–2 per variety; brown paper works best for airflow)
- ● Pencil or label tags + permanent marker (to note variety/date)
- ● Dry, shaded storage area (cool, 50–70°F, low humidity; garage, shed, or indoor shelf)
- ○ Glove (optional but recommended—coneflower stems can be prickly!)
- ● Seed-saving envelope (for long-term storage; Mylar bags with silica packets extend viability to 2–3 years)
- ● Fan or dehumidifier (speeds up drying if humidity is high)
- ● Cardboard egg cartons or small containers (for organizing tiny seeds before bagging)
- ● Notebook (track varieties, harvest dates, and germination notes for next-level gardening)
Step-by-Step instructions for harvesting and saving coneflower seed heads
Preserving coneflower seed heads is easier than it looks—just follow these steps to ensure healthy seeds for next year's garden.
🌿 Step 1: Wait Until Seed Heads Fully Mature
Leave the seed heads on the plant until they turn a deep brown and begin to split open naturally. This usually happens in late fall or early winter, depending on your climate. You'll know they're ready when the outer petals dry out and the center fluff starts to release tiny seeds. Avoid harvesting too early—immature seeds won't germinate properly.
If birds or squirrels start nibbling on the seed heads, cover them with a lightweight mesh bag to protect the seeds. This is a common issue, so act fast once you see signs of interest. The goal is to let nature do its work while keeping the seeds safe until they're fully mature.
✂️ Step 2: Cut and Prepare the Seed Heads
Use clean, sharp pruners to snip the dried seed heads from the stems, leaving about 1-2 inches of stem attached. This extra length helps stabilize the seed heads during drying. Place them in a single layer on a dry, well-ventilated surface, like a cardboard box or mesh screen. Avoid stacking them—proper airflow is key to preventing mold.
Find a warm, dry spot indoors, away from direct sunlight or heat sources. A garage, basement, or even a sunny windowsill works well. The seed heads need to dry completely, which can take 2-4 weeks. You'll know they're ready when the seeds rattle inside when shaken gently. If they feel damp or sticky, they need more drying time.
💧 Step 3: Separate Seeds from Chaff
Once fully dried, gently rub the seed heads between your hands or use a fork to break them apart. The seeds will separate from the dried chaff, making it easy to collect them. Place a large bowl or tray beneath the seed heads to catch the seeds as they fall. Be patient—this step can be a bit messy, but it’s worth it for fresh seeds.
Use a fine-mesh sieve or sifter to remove any remaining chaff or debris. Discard the larger pieces of dried plant material and keep only the small, dark seeds. Store the seeds in a labeled paper envelope or small glass jar. Labeling is crucial—write the coneflower variety and the year harvested to avoid confusion later.
🪴 Step 4: Store Seeds Properly for Germination
Place the labeled envelope or jar in a cool, dark, and dry location, like a pantry or refrigerator. Coneflower seeds can remain viable for up to 2 years if stored correctly. Avoid plastic containers—they trap moisture and can cause mold. A paper envelope or breathable fabric bag works best for long-term storage.
Before planting next year, check the seeds for signs of moisture or pests. If they look dry and smell fresh, they’re ready to go. Plant them in well-draining soil, about ¼ inch deep, and keep the soil moist until germination. You’ll see new coneflowers blooming in just a few months—worth the wait!
Tips & tricks for perfectly preserved coneflower seed heads
Saving coneflower seeds for next year’s garden is all about patience and precision. Here’s how to avoid common pitfalls and maximize your seed yield.
Timing is Everything: The deep brown color and natural splitting of the seed heads in Step 1 are your best indicators of readiness. I’ve learned the hard way that harvesting too early means seeds won’t germinate—wait until you see those tiny seeds beginning to release from the center. If you’re in doubt, leave them on the plant an extra week. The seeds need that final maturation phase to develop properly.
Protect Them from Pests: Birds and squirrels have a knack for finding seed heads before you do. Once you notice nibbling, act fast by covering the seed heads with lightweight mesh bags. I keep a few of these bags on hand specifically for this purpose—trust me, it’s worth the small investment to save your seeds. The bags allow airflow while keeping critters out.
Drying Done Right: The 2-4 week drying period in Step 2 can feel like an eternity, but rushing it leads to moldy seeds. Place your seed heads in a single layer on a mesh screen or cardboard box where they can dry evenly. I’ve found that a warm, dry spot like a basement or garage works better than direct sunlight, which can overheat and damage the seeds. Test for readiness by giving them a gentle shake—if they rattle, they’re ready!
Labeling Matters: Skipping the labeling step in Step 3 is a rookie mistake. I’ve seen gardeners mix up varieties, leading to confusion when planting time comes. Write the coneflower type and harvest year directly on the envelope or jar. You’ll thank yourself next spring when you’re ready to replant. For extra organization, use different colored labels for each variety.
Pro Tips for Coneflower Seed Heads
- Saving coneflower seeds for next year’s garden is all about patience and precision.
- Timing is Everything: The deep brown color and natural splitting of the seed heads in Step 1 are your best indicators of readiness.
- Protect Them from Pests: Birds and squirrels have a knack for finding seed heads before you do.
Frequently asked questions
Got questions about saving and using coneflower seed heads? You’re not alone! Here are some of the most common queries—plus quick, expert-backed answers to help you master the dry-and-save method like a pro.
When is the best time to harvest coneflower seed heads?
Harvest seed heads once they’ve fully dried on the plant—usually late summer to early fall (August–October, depending on your climate). Look for brown, papery petals and plump, dry seed cones. Avoid harvesting too early; immature seeds won’t store well. Pro tip: Wait until frost threatens to nudge them along!
How long do dried coneflower seed heads last for storage?
Properly dried and stored seed heads stay viable for 1–2 years in a cool, dry place (like a paper envelope or breathable bag). For longer storage, seal in an airtight container with a damp paper towel to maintain humidity—just check for mold monthly. Troubleshoot: If seeds sprout too soon, your storage is too warm or humid!
Can I plant coneflower seeds directly from dried seed heads?
Yes! Simply crush the dried seed head to release seeds, then scatter them on prepared soil (spring or fall). For easier handling, rub the head between your palms over a tray or paper. No need to clean—just sow! Bonus: Direct sowing mimics nature and attracts pollinators faster.
What if my coneflower seed heads don’t produce seeds?
Missing seeds? Check for these culprits:
- No pollinators: Coneflowers need bees/butterflies. Plant companion flowers (like milkweed) to boost visitors.
- Over-fertilizing: Too much nitrogen = fewer seeds. Use low-phosphorus fertilizer instead.
- Disease/pests: Fungal spots or aphids can damage blooms. Remove affected plants and treat with neem oil if needed.
Fix: Hand-pollinate by transferring pollen with a paintbrush if pollinators are scarce!
Are there alternatives to drying seed heads for propagation?
If drying isn’t your style, try:
- Division: Split mature clumps in early spring—each section grows into a new plant.
- Cutting roots: Dig up roots in fall, cut into 2-inch pieces, and replant.
- Transplant seedlings: If you spot tiny coneflowers sprouting nearby, relocate them to your garden.
Best for beginners: Division is foolproof and preserves the parent plant’s traits!
Wrapping up and next steps
Coneflower seed heads are a gardener’s secret weapon for a low-cost, high-impact pollinator paradise! By mastering the dry-and-save method, you’ll not only save money but also support local ecosystems—one seed at a time. 🌻
Ready to level up your garden? Start small this season: collect, dry, and store just a few seed heads, then watch your pollinator friends thrive next year. Your future blooms—and bees—will thank you!
Next step: Grab those dried seed heads and get saving—your garden’s future starts now! ✨