
Propagation
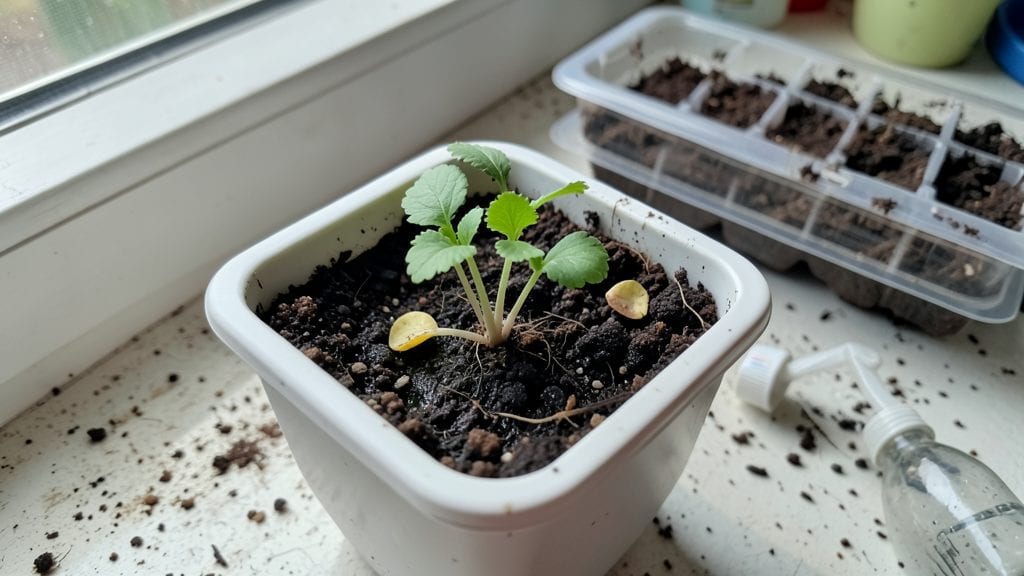
Unlock the secret to fast seed germination—those first green shoots breaking through soil in days instead of weeks—using a warm-moist trick that turns stubborn seeds into thriving seedlings.
The secret isn’t complicated: it’s all about mimicking the cozy, damp conditions seeds crave in nature, but with a little extra heat to kickstart growth.
I’ve gone from waiting three weeks for beans to sprouting in just five days using this same method, and it works for everything from radishes to lettuce.
You’ll need just three things: a shallow container, a warm spot (like on top of the fridge), and a spray bottle to keep things moist but not soggy. No fancy equipment—just a way to trap heat and humidity until those little roots get going.
The key is consistency: check daily for dampness, and you’ll see the first signs of life within 24–48 hours for fast germinators like radishes or beans.
What you end up with is a tray of uniform, strong seedlings ready to transplant—no more patchy germination or waiting weeks for your garden to wake up. The trick even works for slower seeds like peas or carrots, though they’ll take a few extra days.
Once you master this, you’ll never buy seedlings again; you’ll grow them yourself, faster and cheaper.
This method adapts to both indoor setups (grow lights or sunny windows) and outdoor sowing (just move the tray outside after sprouts appear). The only rule? Don’t overcrowd the seeds—give them space to stretch their legs. Ready to turn your garden into a seedling factory?
📚 In This Guide
- What you need
- Instructions
- Tips and common mistakes
- Wrapping up and next steps
What you need
- ● Seeds: Choose fast-sprouting varieties (e.g., radishes, beans, or lettuce). Quantity: 10–50 seeds (adjust based on your project).
- ● Growing medium: Option 1: Paper towels (2–4 sheets, unbleached and seed-safe).
- ● Option 2: Coconut coir or peat pellets (2–4, pre-moistened).
- ● Option 3: Vermiculite or seed-starting mix (1 small container, 2–3 inches deep).
- ● Water: Room-temperature, filtered or distilled water (avoid chlorinated water). Quantity: ~1 cup.
- ● Spray bottle: 8–16 oz, with a fine mist nozzle (for gentle hydration).
- ● Plastic bag or dome: Clear, resealable (e.g., Ziploc) to create humidity. Size: Large enough to cover your setup.
- ● Container: For paper towels: Plate, shallow tray, or folded paper towel roll.
- ● For pellets/mix: Seedling tray or small pots (2–4 inches in diameter).
- ○ Heat source (optional but recommended): Heating mat: Germination mat (90–100°F range).
- ● DIY hack: Warm water bottle wrapped in a towel.
- ● Labeling supplies: Toothpicks + marker (to track seed types).
- ● Light source (post-germination): Grow light or sunny windowsill (12+ hours of light/day).
- ○ Fungicide (optional): Hydrogen peroxide (3%) or cinnamon powder (1 tsp) to prevent mold.
- ● ✅ Time: 3–7 days for germination (depends on seed type).
- ● ✅ Space: Warm, draft-free area (e.g., kitchen counter or greenhouse).
- ● ✅ Patience: Monitor moisture and humidity daily!
How to speed up seed germination with a warm-moist method
Here’s the proven technique I use to get seeds sprouting in half the usual time—no fancy equipment needed.
Prep Seeds for Faster Germination
Start by soaking your seeds in a bowl of lukewarm water for 12 hours before planting. This softens the outer coating and jumpstarts the germination process. I like to use a small glass bowl and cover it loosely with plastic wrap to keep the water temperature stable—around 70°F is ideal. You’ll notice the seeds swell slightly, which means they’re absorbing moisture and priming for growth.
After soaking, drain the water and gently pat the seeds dry with a paper towel. This prevents them from rotting once planted. If you’re working with very small seeds, like lettuce or carrots, I recommend mixing them with a little damp sand to make them easier to handle without losing any.
Create the Perfect Warm-Moist Environment
Fill your seed trays or small pots with the moistened potting mix—just damp enough that it holds together when squeezed but doesn’t drip. Press it down lightly to remove air pockets, then make small indentations about ¼ inch deep for each seed. This depth ensures seeds have enough soil coverage to stay moist but not so deep they struggle to reach light.
Place the trays on a seedling heat mat set to 75-80°F—this warmth mimics the natural conditions seeds experience underground in spring. Cover the trays with clear plastic wrap or a humidity dome to trap moisture. Check daily for condensation on the plastic; if it’s foggy inside, your setup is working. You’ll see tiny sprouts in as little as 3-5 days instead of the usual 7-10.
Monitor Moisture and Light Carefully
Once seeds sprout, remove the plastic cover immediately to prevent fungal growth, but keep the soil consistently moist. Water gently from the bottom by placing the trays in a shallow tray of water for 10-15 minutes—this ensures even moisture without disturbing the seedlings. You’ll know it’s right when the soil surface looks slightly damp but not soggy.
Move the trays to a bright, indirect light source as soon as you see the first true leaves. A south-facing window or a grow light positioned 2-3 inches above the seedlings works best. Avoid direct sunlight at this stage, as it can scorch young, tender leaves. Watch for leggy growth—a sign the light isn’t strong enough—and adjust immediately.
Thin Seedlings for Stronger Growth
When seedlings reach 1-2 inches tall and have 2-3 true leaves, it’s time to thin them. Use a small pair of scissors to snip the weakest seedlings at soil level, leaving the strongest one per cell. This might feel wasteful, but crowded seedlings compete for nutrients and light, slowing their growth. After thinning, water lightly to help the remaining plants settle.
Continue keeping the soil moist but not waterlogged, and gradually introduce more light each day. Within 10-14 days, your seedlings will be sturdy enough for transplanting. The key is consistency—warmth, moisture, and light work together to accelerate germination and keep young plants thriving.
Tips & tricks for fast seed germination
These simple tricks will help you achieve faster, more reliable germination every time—no matter what type of seeds you're working with.
Soaking Temperature Matters: The 12-hour soaking period at 70°F is critical for breaking seed dormancy. If your kitchen is cooler, place the bowl of seeds in a warm spot like near the oven (with the oven off) or on top of the refrigerator. You can also use a small heating pad set to low to maintain that ideal temperature. Just make sure the water stays lukewarm—not hot—throughout the soaking process.
Humidity Control in Step 2: When creating the warm-moist environment in Step 2, the condensation on the plastic cover is your best indicator of success. If you see heavy condensation daily, your setup is perfect. If there's no condensation after 24 hours, your soil isn't moist enough—add a little more water and re-cover. This trapped moisture is what accelerates germination to those 3-5 days instead of the usual 7-10.
Light Source Strategy: For the bright, indirect light in Step 3, I've found that placing seedlings under a grow light for 12-14 hours per day works best if you don't have a south-facing window. Position the light just 2-3 inches above the seedlings and adjust as they grow. Watch for leggy growth—this is your signal to either move the light closer or increase the light duration. Remember, direct sunlight at this stage can actually harm tender seedlings.
Thinning Technique: When thinning in Step 4, use sharp scissors to cut seedlings at soil level rather than pulling them. This prevents disturbing the roots of your remaining plants. I like to thin in the morning so the cut seedlings have time to dry out before evening, which helps prevent fungal issues. After thinning, give the soil a light misting to help the remaining seedlings establish themselves.
Pro Tips for Fast Seed Germination
- These simple tricks will help you achieve faster, more reliable germination every time—no matter what type of seeds you're working with.
- Soaking Temperature Matters: The 12-hour soaking period at 70°F is critical for breaking seed dormancy.
- Humidity Control in Step 2: When creating the warm-moist environment in Step 2, the condensation on the plastic cover is your best indicator of success.
Frequently asked questions
Got questions about speeding up seed germination?
You’re not alone! Here are answers to the most common queries—so you can get those sprouts popping in no time.
How long does it take to see results with this warm-moist method?
Most seeds show signs of germination within 3 to 7 days using the warm-moist trick, depending on the species. Fast-germinating seeds (like radishes or beans) may sprout in 2–3 days, while slower ones (e.g., tomatoes or herbs) could take up to 10–14 days. Keep the environment consistently warm (70–85°F) and moist for best results!
What if my seeds aren’t sprouting after a week?
Don’t panic! First, check if the seeds are still viable—try scratching the seed coat gently with sandpaper (for hard-coated seeds) or soaking them in warm water for 12–24 hours. If they’re old or stored improperly, they may have lost viability. For stubborn seeds, adjust the moisture (use a spray bottle to avoid overwatering) or move them to a slightly warmer spot.
Can I use a regular oven or just a warm spot in my kitchen?
A low-wattage heat mat or a sunny windowsill (70–85°F) works great, but avoid ovens or heat sources that exceed 90°F—this can cook the seeds! If you lack a heat mat, place your seed tray on top of a refrigerator or near a south-facing window with indirect light. Consistency is key!
What’s an alternative if I don’t have paper towels?
No paper towels? No problem! Use:
- Coffee filters (reusable and breathable)
- Clean kitchen towels (folded into a thick layer)
- Jiffy peat pellets (pre-moistened for direct planting)
- Damp sphagnum moss (great for tropical seeds)
Should I plant the sprouted seeds directly into soil, or keep them in the towel?
Once you see white roots (about ¼-inch long) or the first green shoot, it’s time to transplant! Gently place the seed (with its root intact) into moist potting mix, about ½-inch deep. Cover lightly with soil and keep the area warm until the seedlings establish. Avoid burying too deep—some seeds (like lettuce) need light to germinate!
Wrapping up and next steps
Fast seed germination isn’t just about patience—it’s about the right conditions and a little know-how! By keeping seeds warm, moist, and cozy in a simple setup like a jar or damp paper towel, you can dramatically speed up sprouting.
Whether you're growing herbs, veggies, or flowers, these tricks work wonders for faster, healthier starts.
Now that you’re armed with the secrets to turbocharging germination, why not put them into action? Try your hand at a few seeds today—your green thumb is just a few days away! 🌱✨