
Watering
Growing foxglove seedlings from seed means reliable blooms next year—but only if you crack the cold stratification code. ✨ I’ve struggled with floppy, weak seedlings until I learned the exact timing and conditions these picky plants need to break dormancy.
The difference between success and disappointment often comes down to a few key steps most gardeners overlook.
You’ll need a few simple supplies: a plastic bag, some damp peat moss or paper towels, and a refrigerator with a crisper drawer. The process mimics winter’s chill, tricking seeds into thinking they’ve survived a cold season.
Most people skip this step and end up with seedlings that bolt too fast or never bloom. My first batch after proper stratification produced tall, sturdy plants by early spring—nothing like the sad, leggy failures before.
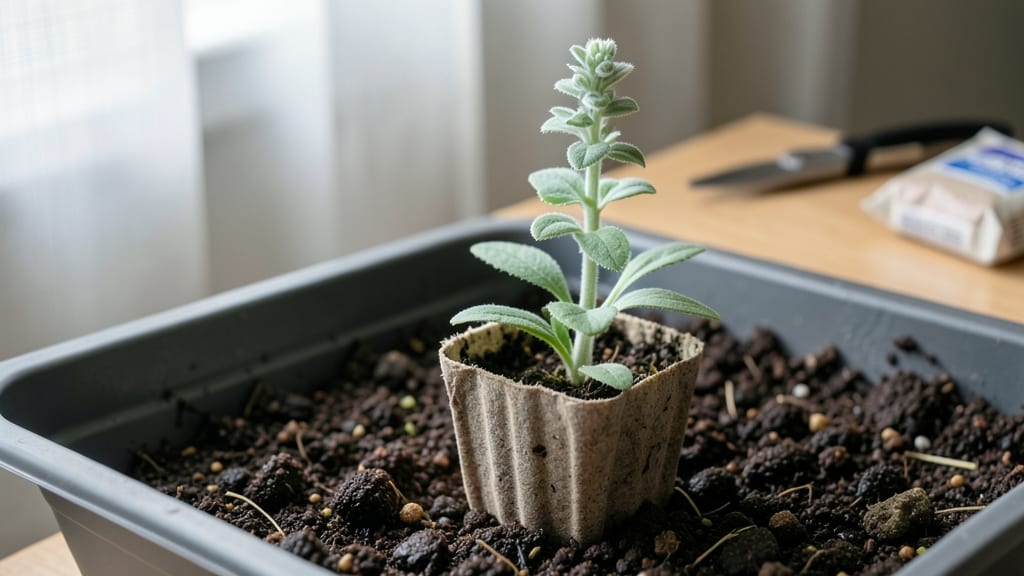
Once the seeds sprout, you’ll watch them grow into velvety green seedlings with thick stems ready for transplanting. The key is patience: rushing the process leads to weak plants that flop over or struggle to establish roots.
With the right care, you’ll have strong foxglove seedlings that thrive when moved to the garden, setting the stage for showstopping blooms the following summer.
This method works for all foxglove varieties, from classic bells to dwarf types, and adapts to different climates. Whether you’re a beginner or a seasoned gardener, these steps will give you the confidence to grow foxglove from seed every time. Let’s get those seeds started right!
📚 In This Guide
- What you need
- Instructions
- Tips and common mistakes
- Wrapping up and next steps
What you need
- ● Fox glove seeds: 1 packet (50-100 seeds) – choose a variety like Digitalis purpurea (common foxglove) for vibrant blooms.
- ● Seed-starting mix: 1 bag (1 quart) – lightweight, sterile, and well-draining (e.g., Pro-Mix or coco coir blend).
- ● Containers: 4-6 small pots (3-4 inches deep) or a seed tray with cells.
- ● 1 plastic bag or airtight container (for stratification).
- ● Cold stratification setup: Refrigerator (set to 35–40°F) or a cold frame.
- ● Moistened paper towels or peat moss (for seed pre-treatment).
- ● Watering can or spray bottle: with a fine mist nozzle.
- ● Grow lights or sunny windowsill: (6+ hours of light daily).
- ● Plant labels: to track varieties (e.g., wooden sticks or plant markers).
- ● Humidity dome or plastic wrap: to retain moisture during germination.
- ● Fertilizer: balanced liquid fertilizer (5-5-5 or 10-10-10, diluted to half-strength) for post-stratification growth.
- ○ Heat mat (optional): if your home is chilly (💡 Pro Tip: Keeps soil warm for faster germination!).
- ● Pruning shears: for transplanting seedlings later.
Step-by-Step instructions for cold stratifying fox glove seeds
Here's my foolproof method for breaking dormancy and ensuring robust seedlings next spring.
🌱 Step 1: Harvest and Prepare Mature Seeds
Collect fully ripe fox glove seed pods—they'll turn from green to tan and split open naturally. Gently remove the seeds and let them dry for 2-3 days in a warm, dry place. This drying step prevents rot during stratification. I spread them on a paper towel in a single layer, turning them daily to ensure even drying.
Once dry, store the seeds in a sealed container at 35-40°F for 3-4 weeks. This initial cold treatment mimics winter conditions and kickstarts germination. Real talk: Skipping this step results in seeds that either rot or take months to sprout—if they sprout at all.
⏰ Step 2: Stratify Seeds in Moist Sand or Perlite
Mix equal parts moistened sand and perlite in a shallow container. The moisture should feel like a damp sponge—not dripping, but consistently damp. Place the fox glove seeds ½ inch deep in the mix, spacing them 1 inch apart. This prevents overcrowding and fungal issues later.
Cover the container loosely with plastic wrap and refrigerate for 8-12 weeks. Check monthly to ensure the mix remains moist; if it dries out, mist lightly with water. You'll see tiny roots forming after 4-6 weeks—that's your signal the stratification is working. This cold period is critical; fox glove seeds won't germinate without it.
☀️ Step 3: Sow Stratified Seeds in a Controlled Environment
After stratification, plant the seeds ¼ inch deep in a sterile seed-starting mix. Use small pots or a seed tray with drainage holes to prevent waterlogging. I like to label each pot with the date—fox glove seedlings take 10-12 weeks to mature enough for transplanting.
Place the pots in a bright, indirect light spot (like a north-facing window) or under a grow light set to 12-14 hours daily. Keep the soil consistently moist but never soggy. You'll notice the first true leaves—small, rounded, and deep green—emerge in 3-4 weeks. This is when you can gradually introduce more light.
🌿 Step 4: Harden Off and Transplant Seedlings
Once seedlings have 4-6 true leaves and are 3-4 inches tall, begin hardening them off. Move the pots outdoors to a shaded, sheltered spot for 1 hour daily, increasing the time by 1 hour each day until they can tolerate full sun. This process takes 7-10 days and prevents transplant shock.
Transplant the seedlings into their permanent location in early spring, after the last frost date. Space them 12-18 inches apart in well-draining soil with full sun to partial shade. Water deeply at the base to encourage root establishment. Mulch around the base to retain moisture and suppress weeds—fox glove seedlings thrive with consistent soil moisture but hate soggy roots.
Tips & tricks for perfect fox glove seedling stratification
These little-known details make all the difference between seeds that sprout and seeds that disappoint.
Storage Temperature Precision: That 35-40°F range in Step 1 is non-negotiable—any warmer and you risk premature germination, any cooler and you delay the process indefinitely. I use my refrigerator's crisper drawer (set to 38°F) for consistent results. If your fridge doesn't have precise controls, place the container on the bottom shelf where temps are most stable. The goal is to mimic natural winter conditions without freezing the seeds—think of it as a controlled winter in your kitchen.
Moisture Management During Stratification: The 8-12 week refrigeration period in Step 2 requires vigilance. I check moisture levels weekly by pressing my finger into the sand-perlite mix—it should feel like a damp sponge, not wet cement. If it dries out, mist lightly with water and return to the fridge immediately. Too much moisture causes rot; too little halts root development. This is where most gardeners fail—consistency is key, not perfection.
Light Transition Strategy: When you move seedlings to grow lights in Step 3, ramp up gradually over 5-7 days. Start with 4 hours of light daily and increase by 1 hour every 2 days until reaching 12-14 hours. This mimics natural day length changes and prevents shock. I use a simple LED grow light on a timer—fox glove seedlings respond better to gradual light increases than sudden exposure to full spectrum lighting.
Harden Off with Purpose: The 1-hour daily outdoor exposure in Step 4 isn't just about acclimation—it's about testing their resilience. I watch for wilting as the key indicator. If leaves show any sign of stress after 3 hours of exposure, I reduce time and space. This gradual process builds their cell walls, preparing them for the rigors of outdoor growing conditions. Think of it as seedling boot camp where only the strongest survive.
Pro Tips for Fox Glove Seedling
- These little-known details make all the difference between seeds that sprout and seeds that disappoint.
- Storage Temperature Precision: That 35-40°F range in Step 1 is non-negotiable—any warmer and you risk premature germination, any cooler and you delay the process indefinitely.
- Moisture Management During Stratification: The 8-12 week refrigeration period in Step 2 requires vigilance.
Frequently asked questions
What is cold stratification, and why do fox glove seeds need it?
Cold stratification mimics winter conditions, breaking seed dormancy for better germination. Fox glove (Digitalis) seeds often require 4–8 weeks of cold, moist treatment (like refrigeration) to sprout reliably. Without it, seeds may stay dormant or sprout unevenly. Think of it as a "wake-up call" for your seeds!
How long does it take for fox glove seedlings to germinate after stratification?
After cold stratification, germination typically takes 2–6 weeks at 65–75°F (18–24°C). Keep soil consistently moist (not soggy) and patient—some seeds may take longer, especially in cooler rooms. Pro tip: Label trays with the stratification date to track progress!
Can I grow fox glove seedlings indoors without a greenhouse?
Use a south-facing window or a grow light (12–14 hours/day) to supplement weak sunlight. Start seeds in small pots or trays with well-draining soil, and maintain humidity with a plastic dome or misting. Transplant outdoors after the last frost when seedlings are 3–4 inches tall.
My fox glove seedlings look leggy or weak—what’s wrong?
Leggy seedlings usually mean too little light or overcrowding. Move them closer to a bright window or under grow lights, and thin seedlings to 1 inch apart to reduce competition. If soil is dry, water gently at the base to avoid stem damage. Pro tip: Fertilize lightly with a diluted seedling formula after true leaves appear!
Are fox glove seedlings toxic to pets or kids?
Yes!
All parts of fox glove (leaves, stems, flowers) contain cardiac glycosides, which are highly toxic if ingested. Keep seedlings out of reach of pets and children. Wear gloves when handling plants, and wash hands thoroughly afterward. If exposure occurs, contact a vet or poison control immediately.
Wrapping up and next steps
Growing fox glove seedlings with cold stratification is your ticket to vibrant, reliable blooms next year! By following the right steps—from gathering materials to monitoring moisture and light—you’re setting your plants up for success. Don’t let hesitation hold you back: this method is beginner-friendly and packed with rewards.
Ready to take the next step? Start your seedlings now—and in just a few months, you’ll be admiring those iconic bell-shaped flowers. Share your progress or explore more gardening tips to keep your green thumb thriving! 🌱