Tools
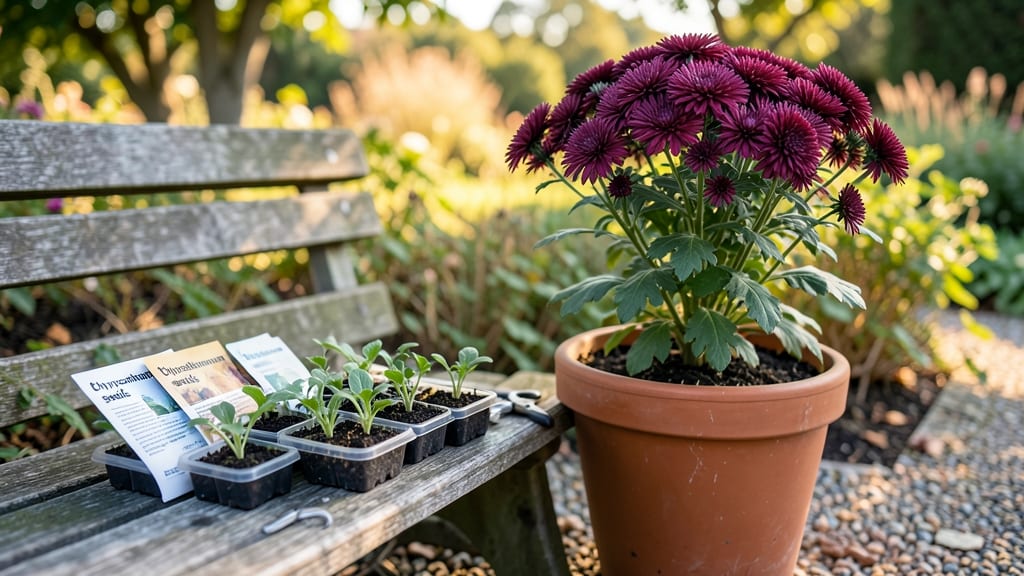
Growing garden chrysanthemum seeds from scratch gives you hardy plants that thrive in cooler weather when many flowers fade. ✨ I’ve started dozens of varieties, and the key to success lies in patience—these seeds need just the right conditions to break dormancy and sprout reliably.
You’ll need cold frames or a sunny windowsill for early starts, well-draining soil mix, and a spray bottle for gentle watering. Most garden types germinate in 10-21 days, but some stubborn varieties take up to 30 days—don’t give up too soon.
The payoff comes when your seedlings develop those signature deep green leaves, ready for transplanting in early spring.
Once outdoors, these cold-resistant types reward you with bold blooms from early fall through frost, often reblooming in spring if pruned back. The secret? Planting at the right time—too early and they bolt; too late and they struggle to establish before winter.
With the right variety, you’ll have cuttings for arrangements or garden beds that stay vibrant when other flowers quit.
Works for both garden and florist types, though garden varieties handle heat and humidity better. Start seeds 8-10 weeks before last frost, and you’ll have a head start on neighbors still waiting for nursery plants. Here’s how to make it foolproof the first time around.
📚 In This Guide
- What you need
- Instructions
- Tips and common mistakes
- Wrapping up and next steps
What you need
- ● Garden chrysanthemum seeds (choose cold-hardy varieties like 'Ruby Mound' or 'Bonanza'): Quantity: 10–20 seeds (enough for a small patch or container garden)
- ● Specification: Certified organic or heirloom seeds for best results
- ● Seed-starting trays or biodegradable pots: Quantity: 1–2 trays (or 12–24 small pots, 2–3 inches deep)
- ● Specification: Drainage holes required
- ● Seed-starting mix: Quantity: 1–2 cubic feet (sterilized, lightweight potting mix)
- ● Spray bottle or watering can (with a fine mist nozzle)
- ● Plastic wrap or humidity dome (to retain moisture)
- ● Grow lights or sunny windowsill (6–8 hours of light daily)
- ● Garden soil or containers (for transplanting): Specification: Well-draining, slightly acidic to neutral soil (pH 6.0–7.0)
- ● Fertilizer (balanced, 10-10-10 or organic options like compost)
- ● Gloves and hand trowel (for gentle handling)
- ● Heating mat (to speed up germination in cooler climates)
- ● Plant labels (to track varieties and planting dates)
- ● Mulch (straw or shredded leaves to protect seedlings from frost)
- ● Insect netting (to shield young plants from pests)
- ● Pruning shears (for shaping mature plants)
Step-by-Step instructions for growing cold-hardy chrysanthemums from seed
Here’s how I grow hardy chrysanthemums that bloom reliably through fall and even survive light frosts.
🌱 Step 1: Start Seeds Indoors 8-10 Weeks Before Last Frost
Fill 4-inch seedling trays with sterile seed-starting mix—chrysanthemums hate soggy soil, so mix in 20% perlite to improve drainage. Moisten the mix until it’s damp but not dripping, then press it down lightly to remove air pockets. Chrysanthemum seeds are tiny, so I use a toothpick to create shallow furrows (¼ inch deep) in the soil.
Space seeds ½ inch apart in the furrows and cover them with a thin layer of mix—just enough to obscure their color. Mist the surface with lukewarm water until evenly moist, then cover the tray with clear plastic wrap to retain humidity. Place the tray in a warm spot (70-75°F)—a seedling heat mat works best. Germination takes 7-14 days, but don’t be tempted to water again until the soil feels dry to the touch.
☀️ Step 2: Provide Bright Light and Prevent Leggy Growth
The instant seedlings emerge, remove the plastic wrap and move them to a south-facing window or under grow lights for 14-16 hours of light daily. Chrysanthemums stretch toward light when they’re undersized, and leggy seedlings never recover. You’ll know your light is sufficient when seedlings develop compact, dark green leaves spaced ½ inch apart—not the pale, spindly stems that signal weak growth.
Once the first true leaves (not the initial cotyledons) appear, fertilize lightly with a half-strength balanced fertilizer (10-10-10). Over-fertilizing now will burn tender roots. Rotate the trays quarter-turn daily so seedlings grow straight instead of leaning toward the light. If you notice yellowing lower leaves, it’s a sign of overwatering—let the soil dry out slightly between waterings.
🪴 Step 3: Harden Off and Transplant After Frost Risk Passes
About 2 weeks before your last frost date, start hardening off seedlings by placing them outside in a sheltered, shaded spot for 1-2 hours the first day. Gradually increase exposure over 10-14 days, moving them to morning sun first before introducing afternoon heat. Chrysanthemums are tough, but sudden cold snaps can stunt growth—watch for wilting or purple-tinged leaves, which signal stress.
Transplant seedlings 4-6 weeks before your first fall frost into prepared garden beds. Space them 12-18 inches apart in well-draining soil amended with 2 inches of compost. Dig holes twice as wide as the root ball to encourage root spread, then water deeply to settle the soil. Mulch around the base with 2 inches of straw to retain moisture and protect roots from temperature swings.
✂️ Step 4: Pinch Back and Deadhead for Prolonged Blooms
When seedlings reach 4-6 inches tall, pinch back the top set of leaves to encourage bushier growth. This step is critical—skipping it results in tall, weak stems that flop under flower weight. After pinching, fertilize again with a low-nitrogen formula (5-10-10) to promote flowering. Chrysanthemums respond well to monthly feedings through the growing season, but avoid late-season nitrogen—it delays blooming.
Deadhead spent blooms weekly by snipping stems back to the nearest set of leaves. This redirects the plant’s energy into producing new flowers instead of setting seed. In fall, when temperatures drop below 40°F at night, chrysanthemums enter dormancy. Cut back stems to 2 inches tall, apply a 3-inch layer of mulch, and leave the plants in place—they’ll often regrow in spring with minimal care.
Tips & tricks for perfect cold-hardy chrysanthemum growth
Mastering these cold-resistant varieties takes patience and precision—here's what I've learned to ensure robust, frost-tolerant blooms every season.
Soil Preparation Secret: The 20% perlite mix in Step 1 isn't just about drainage—it prevents the compacted soil chrysanthemums dislike. I go a step further by adding 1 part coarse sand to the mix for even better aeration. This creates the loose, well-draining environment these plants crave, especially when combined with the ¼-inch deep furrows for those tiny seeds.
Lighting Strategy: Those critical 14-16 hours of light daily in Step 2 are non-negotiable, but here's the pro move: position your grow lights 6-8 inches above seedlings and adjust height as they grow. I use a simple ruler to maintain this distance—any closer and you'll scorch the delicate leaves, any farther and you risk leggy growth. The goal is even, diffuse light that promotes those compact, dark green leaves spaced ½ inch apart.
Hardening Off Hack: When you start the 1-2 hour daily outdoor exposure in Step 3, I recommend placing seedlings on a shaded porch or under a sheer curtain during those first few days. This gradual transition protects them from sudden temperature swings while still letting them acclimate. Watch for those purple-tinged leaves—they're your warning sign to slow down the process if your area experiences unexpected cold snaps.
Transplant Timing: The 4-6 weeks before first fall frost window in Step 3 is perfect, but here's the key: check your local 10-day forecast before transplanting. If nighttime temps are predicted to drop below 40°F within that window, delay by a week. Chrysanthemums can handle light frosts, but they won't establish strong roots if shocked by sudden cold. The 2 inches of straw mulch helps, but prevention is better than cure.
Pro Tips for Garden Chrysanthemum Seeds
- Mastering these cold-resistant varieties takes patience and precision—here's what I've learned to ensure robust, frost-tolerant blooms every season.
- Soil Preparation Secret: The 20% perlite mix in Step 1 isn't just about drainage—it prevents the compacted soil chrysanthemums dislike.
- Lighting Strategy: Those critical 14-16 hours of light daily in Step 2 are non-negotiable, but here's the pro move: position your grow lights 6-8 inches above seedlings and adjust height as they grow.
Frequently asked questions
Got questions about growing garden chrysanthemum seeds?
You’re not alone! Here are answers to the most common queries to help you cultivate vibrant blooms with confidence.
When is the best time to plant garden chrysanthemum seeds?
For cold-hardy varieties, start seeds indoors 8–10 weeks before your last frost date (typically March–April in most climates). Transplant seedlings outdoors after soil warms to 50°F (10°C)—usually late spring or early summer. If planting directly outdoors, wait until after the last frost (late spring/early summer) for best results.
Can I grow chrysanthemums from seed in cold climates?
Many garden chrysanthemums are cold-resistant and thrive in USDA Zones 3–9. Choose hardy varieties like ‘Rubens’ or ‘Daisy’ and sow seeds early. For extra protection, use row covers or mulch heavily in fall. Some varieties even regrow from roots in spring!
Why aren’t my chrysanthemum seeds germinating?
Seeds need consistent moisture, warmth (70–75°F or 21–24°C), and light to sprout. Try these fixes:
- Keep soil moist but not soggy—use a spray bottle.
- Place trays on a seedling heat mat or in a sunny windowsill.
- Ensure seeds aren’t buried too deep (¼ inch max).
- Test seed viability—soak in water for 24 hours; floating seeds may be old.
How do I get chrysanthemums to rebloom every year?
To encourage year-round blooms, deadhead spent flowers regularly (pinch off dead blossoms). In fall, cut back stems to 6 inches and mulch heavily. Fertilize lightly in early spring with balanced 10-10-10 formula. Some perennials self-seed—thin seedlings to avoid overcrowding!
Are there alternatives to growing from seed?
Yes! For faster results, try:
- Transplants: Buy nursery-grown seedlings in spring (hardier than seeds).
- Division: Split mature clumps in early spring for free plants.
- Cuttings: Root stem cuttings in water or soil (great for propagating favorites).
Wrapping up and next steps
Growing garden chrysanthemum seeds is a rewarding way to add vibrant, cold-resistant color to your space—no matter the season! 🌸 With the right varieties and a little care, you can enjoy blooms from spring through winter.
Whether you're a beginner or a seasoned gardener, these hardy plants offer endless creativity for borders, containers, or even cut flowers.
Ready to dive in? Start by choosing your seeds and sketching a simple planting plan. Then, grab your tools and get growing—your garden’s next masterpiece is just a seed away! 🌱