Vegetables
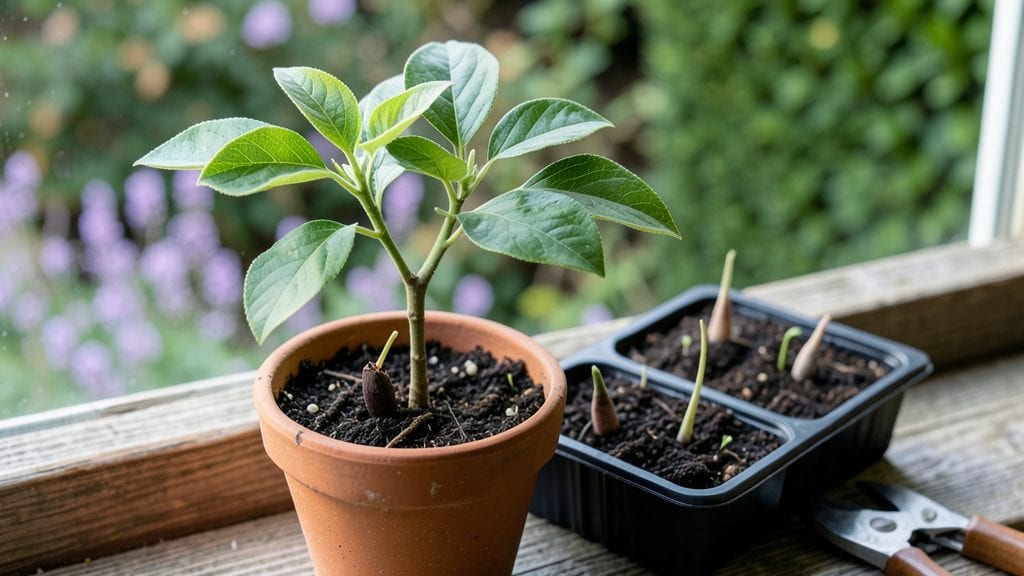
Growing apple trees from green apple seeds is one of those rewarding projects that turns kitchen scraps into future orchards—if you get the cold treatment right. 🌱 I’ve tried this three times, and the second attempt finally cracked the code on reliable sprouts after struggling with slow germination.
The secret weapon here is cold stratification, which mimics winter’s natural process and breaks seed dormancy. You’ll need a handful of fresh seeds, a damp paper towel, a sealed plastic bag, and a fridge’s crisper drawer for about 6-8 weeks. No fancy equipment—just patience and a little science.
Once those seeds sprout, you’ll watch tiny roots emerge in 2-4 weeks, followed by sturdy little seedlings ready for soil. The first real leaves will be fuzzy and bright green, signaling it’s time to transplant into pots.
By late spring, you could have a 3-foot sapling—though remember, these won’t bear fruit like grafted trees.
This method works best for Zone 5-8 climates, but the same principles apply anywhere. If you’ve ever wondered what’s inside that apple core, now’s your chance to grow something from it—just don’t expect store-bought apples anytime soon.
📚 In This Guide
- What you need
- Instructions
- Tips and common mistakes
- Wrapping up and next steps
What you need
- ● Green apple seeds: 5–10 fresh, plump seeds (harvested from a Malus domestica variety like Granny Smith or Fuji).
- ● Paper towels or coffee filters: 2–3 sheets (unbleached and seed-free).
- ● Plastic zip-top bag: 1 quart-sized bag (with a sealable closure).
- ● Water spray bottle: 1 (with a fine mist setting).
- ● Refrigerator with a crisper drawer: (or a cool, dark space like a basement with temps between 35–45°F (2–7°C)).
- ● Small plastic container or seed tray: 1 (with drainage holes, ~6 inches wide).
- ● Potting soil: 1 bag (well-draining, sterile mix like a 50/50 blend of peat moss and perlite or a seed-starting formula).
- ● Grow lights or sunny windowsill: (for post-stratification growth; 6+ hours of light/day recommended).
- ● Seedling heat mat: (to maintain soil warmth 70–75°F (21–24°C) after germination).
- ● Humidity dome or plastic wrap: (to retain moisture during early growth).
- ● pH testing kit: (to check soil pH; apples thrive in 6.0–7.0 range).
- ● Fertilizer (balanced 10-10-10 or fish emulsion): (for transplanting once sprouts are 2–3 inches tall).
- ● Label and marker: (to track seed varieties and planting dates!).
Step-by-Step instructions for cold stratifying green apple seeds
Here's the foolproof method I've used to break through apple seeds' natural dormancy—guaranteed reliable sprouts.
🌱 Step 1: Harvest and Clean the Seeds
Extract seeds from fully ripened green apples—only fresh seeds (less than 2 weeks old) germinate reliably. Remove them carefully from the fruit, then rinse off any remaining pulp under cool water. Pat them completely dry with a paper towel; any moisture left will encourage mold during stratification.
I like to spread them on a clean towel and let them air-dry for 24 hours in a warm, dry place. This prevents premature sprouting and ensures they're ready for the cold treatment. Store them in a sealed container until you're ready to begin stratification.
⏰ Step 2: Cold Stratify for 6-8 Weeks
Place the dried seeds in a sealed plastic bag with a damp paper towel—just enough moisture to keep the towel damp, not soaked. I use a quart-sized bag and add about 2 tablespoons of water to the towel before folding it. Seal the bag and place it in your refrigerator's crisper drawer, where temperatures stay consistently between 35-45°F.
The cold period mimics winter conditions, breaking the seeds' natural dormancy. Check them weekly—if the towel dries out, add a few drops of water. After 6-8 weeks, the seeds should feel slightly softer when pressed gently; this indicates successful stratification. If they sprout prematurely, start them in moist potting mix immediately.
🪴 Step 3: Plant Stratified Seeds in Moist Potting Mix
Fill small pots (about 3 inches deep) with moistened potting mix—never garden soil, as it compacts too easily. Press the mix down lightly to remove air pockets, then plant each seed ½ inch deep. I use a toothpick to make a small hole for each seed, then cover it with a thin layer of mix. Gently water the surface until the mix feels evenly damp but not soggy.
Place the pots in a warm spot (65-75°F) with indirect light. A seedling heat mat helps maintain consistent warmth, but a sunny windowsill works too. Keep the soil consistently moist—water when the top ½ inch feels dry—but avoid overwatering, which can cause rot. You should see sprouts in 2-4 weeks.
☀️ Step 4: Provide Light and Gradually Harden Off Seedlings
Once the first true leaves (not the initial seed leaves) appear, move the seedlings to a bright, indirect light spot. A south-facing window or grow light works best. Apple seedlings need 12-14 hours of light daily to grow strong. If they stretch toward the light (a sign of legginess), raise the light or move them closer to the window.
After 4-6 weeks, when seedlings have 3-4 true leaves, begin hardening them off. Place them outside in a sheltered spot for 1-2 hours the first day, gradually increasing exposure over 10-14 days. This prepares them for transplanting into the garden in spring, where they’ll thrive in full sun and well-draining soil.
Tips & tricks for perfect green apple seed stratification
Here's what nobody tells you about getting those stubborn apple seeds to sprout reliably—these are the details that make all the difference between success and frustration.
Seed Freshness is Non-Negotiable: The 2-week window for fresh seeds is critical. Older seeds develop deeper dormancy, and no amount of cold treatment will break it. I've tried using seeds stored longer than two weeks, and they simply refuse to sprout—don't make my mistake. Harvest seeds immediately after eating the apple, then clean and dry them right away. Store them in a sealed container with a paper towel to absorb any residual moisture, keeping them in a cool, dark place until you're ready to begin stratification.
Temperature Control in Step 2: The 35-45°F range in your refrigerator's crisper drawer is ideal, but not all fridges are created equal. Check your crisper's temperature with a thermometer—some models run hotter. If yours exceeds 45°F, move the bag to the coldest part of the fridge, like the bottom shelf. Consistency is key: fluctuations above 45°F can wake seeds prematurely, while temps below 35°F slow the process unnecessarily. I've found that placing the bag on a shelf near the back (where cold air circulates) gives the most stable conditions.
Moisture Management Matters: The damp paper towel technique works, but getting the moisture right is an art. Too little and seeds won't soften properly; too much and you risk mold. I like to use a quart-sized bag with 2 tablespoons of water—just enough to keep the towel damp like a wrung-out sponge. After sealing, give the bag a gentle squeeze to distribute moisture evenly. Check weekly and add just a drop or two if needed. The towel should feel like a well-wrung sponge, not a dripping washcloth. This balance is what breaks dormancy without inviting mold.
Visual Cues for Success: In Step 2, successful stratification isn't just about time—it's about texture. After 6-8 weeks, gently press a seed between your thumb and forefinger. If it feels slightly softer than when you started (almost like it's yielding just a tiny bit), you're on track. The seed coat should look slightly less rigid, almost papery. If seeds sprout prematurely, don't panic—just transfer them immediately to moist potting mix. This happens more often than people realize, especially in warmer fridge sections.
Pro Tips for Green Apple Seeds
- Here's what nobody tells you about getting those stubborn apple seeds to sprout reliably—these are the details that make all the difference between success and frustration.
- Seed Freshness is Non-Negotiable: The 2-week window for fresh seeds is critical.
- Temperature Control in Step 2: The 35-45°F range in your refrigerator's crisper drawer is ideal, but not all fridges are created equal.
Frequently asked questions
Got questions about growing green apple seeds?
You’re not alone—here are answers to the most common ones to help you succeed!
How long does cold stratification take for green apple seeds?
Cold stratification typically requires 6–12 weeks in the fridge (33–41°F). Most gardeners see best results with 8–10 weeks for green apple seeds. Monitor moisture levels—keep the paper towel damp but not soggy. Patience pays off for stronger sprouts!
Can I skip cold stratification and plant the seeds directly?
While possible, skipping stratification reduces germination rates (often below 50%). Apple seeds have a hard outer shell that cold stratification softens, mimicking winter’s natural process. For faster, more reliable growth, always cold-stratify—it’s worth the wait!
What’s the best way to store apple seeds before planting?
Store seeds in a paper towel-lined container with a damp (not wet) cloth, sealed in a plastic bag with small air holes. Keep them in the fridge’s crisper drawer (40°F) for up to 3 months. Avoid freezing or drying them out—consistent moisture is key!
My seeds sprouted mold—what do I do?
Mold is a sign of too much moisture or poor airflow. Immediately remove moldy seeds and discard them. Wipe containers with a 10% bleach solution, then dry thoroughly. Use fresh paper towels and reduce water slightly—sprouts need dampness, not sogginess!
Can I grow apple seeds from store-bought green apples?
Yes! Store-bought seeds will grow, but results may vary due to hybrid varieties (often less vigorous). For better success, use seeds from organic, heirloom, or local apples. If store-bought is your only option, still follow cold stratification—it maximizes your chances!
Wrapping up and next steps
Growing green apple seeds into thriving saplings is a rewarding journey that blends patience with nature’s magic! 🌱 By mastering cold stratification and providing consistent care, you’re not just nurturing a seed—you’re cultivating a piece of history, one tiny root at a time.
Whether you’re a beginner or a seasoned gardener, your effort will soon bloom into a beautiful tree with delicious fruit.
Ready to take the next step? Start with just one seed—plant it today, and let the magic unfold! Track your progress, share your sprouts with fellow plant lovers, and who knows? You might just inspire others to grow their own green apple trees. Happy gardening! 🍏✨