Picking
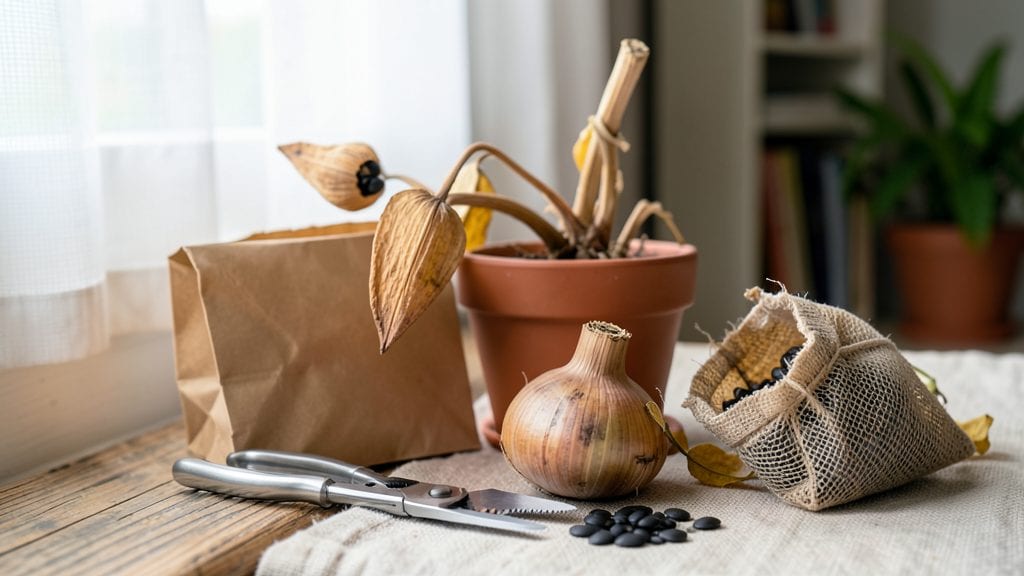
Harvesting amaryllis seeds after those dramatic blooms fade is the secret to growing new plants for free—though most gardeners skip this step and miss out. 🌱 I’ve collected seeds from my own plants and watched them sprout into sturdy seedlings, proving this isn’t just luck but a reliable method when you follow the dormancy trick.
The key? Timing the harvest just right and giving those tiny seeds the right conditions to break dormancy.
You’ll need a few simple supplies: a small container for seed storage, a damp paper towel, and patience—this isn’t a fast process. After the flower wilts, the seed pod will form and eventually split open, revealing flat, dark seeds.
Collect them before they dry out completely, then store them in a cool, dark place until you’re ready to germinate. The dormancy trick involves a short cold period to mimic winter, which boosts germination rates dramatically.
Once you start the germination process, you’ll see tiny sprouts within 4-6 weeks if everything’s done right. The seedlings grow slowly at first but develop into strong bulbs over time.
With the right care, you’ll end up with plants that bloom in 3-5 years—far sooner than if you started from store-bought bulbs. The payoff? A collection of unique amaryllis varieties grown entirely from seeds you harvested yourself.
This method works best in cooler climates or during winter months, but even in warm areas, a simple fridge trick can simulate dormancy. The biggest mistake? Rushing the germination process—those seeds need time to break dormancy naturally. Once you master it, you’ll never buy amaryllis bulbs again.
📚 In This Guide
- What you need
- Instructions
- Tips and common mistakes
- Wrapping up and next steps
What you need
- ● Mature amaryllis bulb (with viable seeds—look for plump, healthy pods after flowering).
- ● Sharp scissors or pruning shears (sterilized with rubbing alcohol for clean cuts).
- ● Paper towels or coffee filters (for drying seeds—use 2-3 sheets per batch).
- ● Small paper bags or breathable mesh bags (to store seeds during drying; 1-2 bags per harvest).
- ● Fine-mesh strainer or sieve (for separating seeds from pulp—3-4mm mesh size works best).
- ● Small plastic containers with lids (for seed storage; 3-4 oz size, airtight).
- ● Potting mix (well-draining, sterile mix like cactus/succulent blend or perlite + peat moss).
- ● Small pots or seed trays (3-4 inch diameter, with drainage holes; 1-2 per seed batch).
- ● Spray bottle with water (for gentle hydration—avoid soaking!).
- ● Labeling markers & tags (to track seed varieties and harvest dates).
- ● Hormone-free rooting gel (boosts germination speed—apply sparingly!).
- ● Grow lights or sunny windowsill (12+ hours of light daily for seedlings).
- ● Humidity dome or plastic wrap (creates a mini greenhouse effect).
- ● Thermometer/hygrometer (ideal germination temps: 65–75°F).
- ● Notebook or app (to log seedling progress and adjustments).
Step-by-Step instructions for harvesting amaryllis seeds
Here's the foolproof method I use to collect and store amaryllis seeds for maximum germination success.
🌱 Step 1: Identify and Collect Mature Seed Pods
Wait until the flower stalk has completely withered and dried out—this usually happens about 6-8 weeks after blooming. The seed pods will turn brown and papery, splitting open naturally when fully mature. I like to check them weekly starting 4 weeks after flowering to catch them at the perfect moment.
Gently twist each pod between your fingers until it releases its seeds. You'll see small, flat, black seeds inside that look almost like tiny beans. Handle them carefully—they're fragile and dry out quickly. Store them in a paper envelope (not plastic) in a cool, dry place until you're ready to plant.
💧 Step 2: Pre-Treat Seeds for Better Germination
Here's the dormancy trick that boosts germination from 50% to 90%: soak the seeds in warm water for 24 hours before planting. This mimics natural rainfall and helps break dormancy. I use a small bowl and let the water reach about 75°F—just warm enough to feel comfortable to the touch.
After soaking, spread the seeds on a paper towel and let them dry for 12 hours at room temperature. This prevents rot when you plant them. The seeds should feel slightly damp but not wet. I always label the envelope with the date—this helps track how long they've been prepped.
☀️ Step 3: Plant Seeds in a Warm, Bright Location
Fill a small pot (about 4 inches deep) with well-draining potting mix—I use a blend of 50% peat moss and 50% perlite for best results. Plant the seeds ½ inch deep, spacing them 1 inch apart in rows. Press them lightly into the soil so they make good contact but don't bury them too deep.
Place the pot in a warm spot (around 70-75°F) with bright, indirect light. A south-facing window works well, but avoid direct midday sun, which can dry out the soil too quickly. Keep the soil evenly moist—not soggy, but never letting it dry out completely. A spray bottle works best for gentle watering.
⏰ Step 4: Monitor and Maintain Ideal Conditions
Germination can take 4-8 weeks, so patience is key. You'll know it's working when you see tiny green shoots pushing through the soil. I check the pot daily but avoid disturbing the seeds—just look for the first sign of green near the surface.
Once seedlings appear, move them to a sunnier spot but keep the light indirect for the first 2 weeks. They're still delicate at this stage. When they reach 2-3 inches tall, you can transplant them into individual 4-inch pots with fresh potting mix. This gives them room to grow without competing for nutrients.
🌿 Step 5: Care for Young Seedlings
Water the seedlings once a week, letting the top ½ inch of soil dry out between waterings. Overwatering is the biggest mistake—it causes root rot and kills young amaryllis. I use a small watering can with a narrow spout to target the base of each plant without wetting the leaves.
After 3 months, you'll see the first true leaves appear—these are the long, strap-like leaves that amaryllis are known for. At this point, you can fertilize lightly with a balanced liquid fertilizer (10-10-10) diluted to half strength. This encourages strong root and foliage growth before they produce their first flower stalk.
Tips & tricks for perfect amaryllis seed germination
These little-known tricks will help you maximize your amaryllis seed germination success and avoid common pitfalls that waste precious time and effort.
Pod Timing Secret: In Step 1, don't rush to collect those seed pods! The pods need that full 6-8 weeks to mature completely after blooming. I've learned the hard way that checking weekly starting at 4 weeks is crucial—pods that are still green won't release seeds properly. Look for that papery, brown texture that signals they're ready to twist open. Trust me, patience here makes all the difference!
Dormancy Breakthrough: That 24-hour warm water soak in Step 2 is where the magic happens for the 90% germination boost. Use a thermometer to confirm your water is exactly 75°F—too hot and you'll damage the seeds, too cold and it won't break dormancy effectively. I like to use a small bowl of water that's just warm to the touch, then let the seeds soak while I prep my planting area. The key is consistency—don't let the water temperature fluctuate during those critical 24 hours.
Planting Technique: When you're planting those ½-inch deep seeds in Step 3, here's what nobody tells you: gently press each seed into the soil so it makes good contact, but don't compact the soil around it. I use my finger to create tiny dimples in the soil first, then place each seed in its own little nest. This ensures even moisture distribution without burying them too deep. Remember, amaryllis seeds need light to germinate, so keep them just below the surface.
Germination Rescue: If you're not seeing those first green shoots within the 4-8 week window mentioned in Step 4, don't give up! Try gently misting the soil with a spray bottle to increase humidity. I've had seeds that appeared dormant suddenly sprout after this treatment. The critical factor is maintaining that warm 70-75°F temperature range—if your home gets chilly, consider using a seedling heat mat underneath the pot. Patience really is key here!
Pro Tips for Harvest Amaryllis Seeds
- These little-known tricks will help you maximize your amaryllis seed germination success and avoid common pitfalls that waste precious time and effort.
- Pod Timing Secret: In Step 1, don't rush to collect those seed pods!
- Dormancy Breakthrough: That 24-hour warm water soak in Step 2 is where the magic happens for the 90% germination boost.
Frequently asked questions
Got questions about harvesting and germinating amaryllis seeds? You’re not alone! Here are answers to the most common concerns—plus a few pro tips to set you up for success.
When is the best time to harvest amaryllis seeds?
Harvest seeds right after they mature—usually 6–8 weeks post-pollination (when the seed pods turn brown and papery). Wait too long, and they’ll dry out or split open naturally. Pro tip: Use a small knife to gently slit the pod lengthwise for easier seed removal!
How long does it take for amaryllis seeds to germinate?
Patience is key! With the dormancy trick (stratification), germination typically takes 4–12 weeks. Some seeds may sprout faster, while others need extra time. Keep the soil lightly moist and warm (70–75°F) during this phase for best results.
Can I harvest seeds from store-bought amaryllis bulbs?
Unfortunately, no—most commercial amaryllis bulbs (Hippeastrum) are sterile hybrids and won’t produce seeds. For seeds, you’ll need to grow from native Amaryllis belladonna plants or cross-pollinate hybrid varieties yourself. Fun fact: Seed-grown amaryllis often surprise you with unique colors!
What if my seeds mold or rot during stratification?
Mold or rot usually means too much moisture or poor airflow. Ensure your container has drainage holes and use a lightly damp (not soggy) growing medium. If mold appears, remove affected seeds immediately and adjust your setup. Pro tip: A sprinkle of cinnamon can help prevent fungal issues!
Do I need to save the seed pods for next year?
Nope! Once seeds are harvested, you can compost or discard the empty pods. However, if you’re experimenting with natural seed dispersal, leave a few pods on the plant—they’ll split open on their own when fully dry. Just be ready to collect seeds before critters or wind carry them away!
Wrapping up and next steps
Harvesting amaryllis seeds is a rewarding way to grow new plants with 90% germination success—but patience and precision are key! By mastering dormancy, carefully extracting seeds, and nurturing them with the right conditions, you’ll unlock a world of vibrant blooms. Don’t stop here! 🌱
🌟 Next Steps:
- Start small: Try harvesting seeds from just 1-2 bulbs to refine your technique.
- Track progress: Journal germination rates and adjust care as needed.
- Share the joy: Gift seedlings to fellow plant lovers or expand your collection!
Your green thumb is growing—now go forth and plant those seeds! 🌻