Vegetables
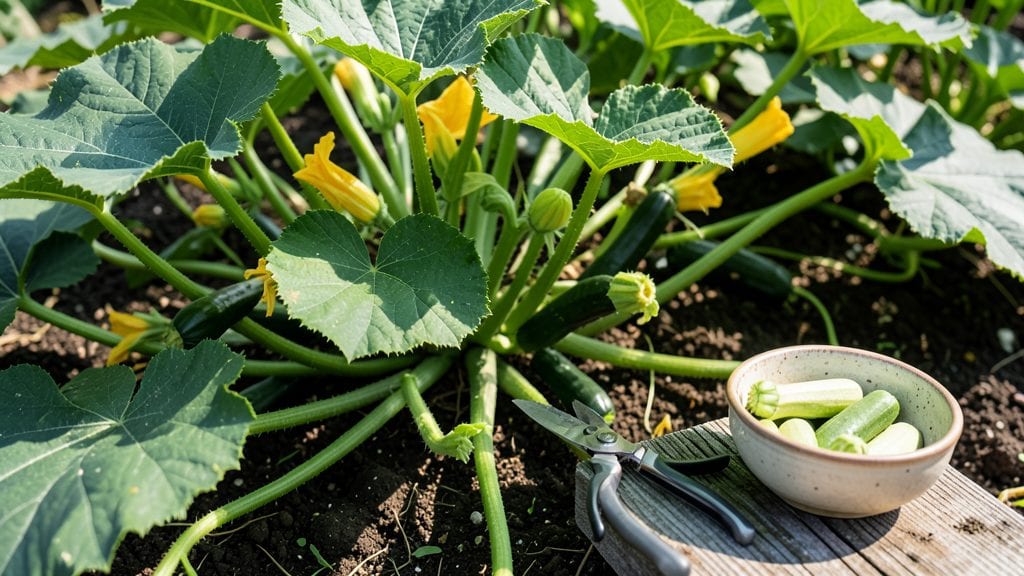
Saving zucchini seeds from your harvest lets you grow your own plants for free next season—no store-bought packets needed.
Did you know you can skip the seed rack entirely? With just a few zucchini from your garden, you’ll have all the seeds you need to replant 🎃 year after year. It’s a cost-effective way to keep heirloom varieties alive and ensure your garden thrives without relying on commercial sources.
This simple process starts with selecting the right zucchini—look for ones that are fully mature with a yellowing stem end. Once you’ve harvested those, the next steps are easy: scoop out the seeds, clean them, and dry them properly.
I’ll walk you through every step, from picking the perfect zucchini to storing your seeds so they stay viable for planting in spring 2025.
Whether you’re a seasoned gardener or just starting out, learning how to harvest zucchini seeds is a game-changer. You’ll save money, reduce waste, and enjoy the satisfaction of growing plants from seeds you saved yourself. Let’s get started!
When and how to harvest zucchini seeds for best results
Saving zucchini seeds is one of the easiest ways to ensure you’ll have fresh plants next season without spending a dime on new seeds. The key to success lies in selecting the right zucchini, knowing when the seeds are mature, and harvesting them at the perfect moment.
If done correctly, your saved seeds can achieve a 90% germination rate, giving you a head start on your garden. Let’s dive into the step-by-step process so you can master this skill like a seasoned gardener.
Not all zucchini are created equal when it comes to seed saving. For the best results, focus on heirloom varieties or open-pollinated types, as hybrid zucchini may not produce true-to-type plants.
Look for zucchini that are overripe or slightly past their prime—these are the ones packed with fully mature seeds. Avoid harvesting seeds from zucchini treated with pesticides, as chemical residues can harm seed viability and future plants. Always prioritize organic or homegrown produce for seed saving.
Timing is everything when harvesting zucchini seeds. The ideal moment is when the fruit has turned yellow and mushy inside. This usually happens about 2-3 weeks after the zucchini stops growing on the vine. If you leave it too long, the seeds may ferment or mold, reducing their quality.
Keep an eye out for these visual cues: the skin will soften, the stem end will turn yellow, and the flesh will start to break down. This is your signal that the seeds are ready for harvest.
Step-by-Step Guide to Harvesting Zucchini Seeds
-
Step 1: Choose the Right Zucchini
Select 3-5 overripe zucchini from your garden. Look for ones that are yellowing or softening—these indicate mature seeds. -
Step 2: Cut Open the Zucchini
Slice the zucchini lengthwise and scoop out the seeds and gel using a spoon. Place the mixture in a glass jar or bowl for fermentation. -
Step 3: Ferment the Seeds
Cover the jar and let it sit in a warm, dark place for 3-5 days. This process helps separate viable seeds from the gel and encourages mold to grow on non-viable seeds. -
Step 4: Rinse the Seeds
After fermentation, stir the mixture and rinse the seeds under cool water through a fine-mesh strainer. Discard any moldy or discolored seeds. -
Step 5: Dry the Seeds
Spread the cleaned seeds on a paper towel or screen in a well-ventilated area. Allow them to dry for 1-2 weeks until they are hard and brittle. -
Step 6: Store the Seeds
Once completely dry, store the seeds in a paper envelope or airtight container in a cool, dark place. Label with the variety name and date for future reference.
One of the most critical steps in harvesting zucchini seeds is fermentation. This process mimics what happens naturally in the soil and helps separate viable seeds from the gel and any mold or debris. During fermentation, you’ll notice a foamy, bubbly mixture forming on top—this is normal!
The viable seeds will sink to the bottom, while non-viable seeds or debris will float. After 3-5 days, you’ll see a clear distinction, making it easier to rinse away the unwanted material.
If you’re new to seed saving, you might wonder why fermentation is necessary. The process breaks down the gel that surrounds the seeds, making it easier to clean them. It also helps identify non-viable seeds, which often develop mold during fermentation.
Skipping this step can lead to lower germination rates or even contaminated seeds. Pro tip: Use a glass jar for fermentation, as it’s easier to monitor the process and spot any issues early.
Once your seeds are rinsed and ready for drying, the next challenge is ensuring they dry properly and evenly. Humidity is your enemy here—too much moisture can lead to mold or rot.
Place your seeds on a paper towel or mesh screen in a dry, well-ventilated area, away from direct sunlight. Stir them gently every few days to prevent clumping. When the seeds are fully dry, they should rattle when shaken in their container—a sure sign they’re ready for storage.
Storing your zucchini seeds correctly is just as important as harvesting them. Use paper envelopes or breathable containers to prevent moisture buildup, which can cause mold. Avoid plastic bags or airtight containers unless you’re storing seeds in a dry, cool environment like a seed vault.
Label each envelope with the variety name, harvest date, and your initials to avoid confusion later. Properly stored seeds can remain viable for 3-5 years, though germination rates may drop slightly over time.
To maximize your seed-saving success, pay attention to the color and texture of the seeds. Mature zucchini seeds should be flat, dark, and hard. If they’re still soft or light-colored, they need more time to dry.
Overripe seeds can also become discolored or shriveled, so keep an eye on them during the drying process. If you notice any signs of mold or unusual smells, discard those seeds immediately to avoid contaminating your entire batch.
Harvesting zucchini seeds is a rewarding process that connects you more deeply to your garden. By following these steps, you’ll not only save money but also preserve heirloom varieties and reduce your environmental footprint.
Plus, there’s nothing like the satisfaction of growing a plant from seeds you saved yourself. Happy gardening!
How to clean, dry, and store zucchini seeds for next year’s planting
Once you’ve harvested your zucchini seeds from overripe fruit, the next critical steps are cleaning, drying, and proper storage. These processes ensure high germination rates and prevent mold or moisture damage.
Skipping these steps can leave you with seeds that fail to sprout—or worse, develop harmful fungi. I’ll walk you through each phase, including my favorite drying techniques and storage methods for long-term viability.
Start by scooping the seedy pulp from your harvested zucchini into a bowl of cool water. Gently swirl the mixture to separate the seeds from the fibrous material. The seeds will sink to the bottom while the pulp and debris float to the surface.
After 3-5 minutes, pour off the water and repeat the process until the water runs clear. This rinse-and-sink method removes most of the slimy coating, which can attract pests and mold during storage.
After rinsing, spread the seeds on a clean, dry paper towel or seed drying screen. Place them in a well-ventilated area away from direct sunlight, like a shady windowsill or a dehumidifier-free room. Avoid using a microwave or oven—high heat can kill the seeds.
Instead, let them air-dry for 3-5 days, stirring occasionally to ensure even drying. Properly dried seeds should be hard and dark, with no moisture left on their surface.
Storage Method
Pros
Cons
Best For
Paper Envelopes
Breathable, prevents moisture buildup
Less protective against pests
Short-term storage (1-2 years)
Air-Tight Containers
Blocks light/pests, longer shelf life
Risk of mold if seeds aren’t fully dry
Long-term storage (3+ years)
Glass Jars with Silica Gel
Absorbs moisture, extends viability
Requires monitoring silica gel
Climate-controlled environments
For long-term storage, I recommend using airtight containers like glass jars or Mylar bags with a silica gel packet to absorb moisture. Label each container with the variety name and harvest year using a permanent marker.
Store them in a cool, dark place, such as a pantry or basement, where temperatures stay between 32°F and 41°F. Under these conditions, zucchini seeds can remain viable for 3-5 years, though germination rates may drop after 2 years.
Avoid storing seeds in the refrigerator or freezer unless you’re using a vacuum-sealed bag, as temperature fluctuations can damage their seed coat. If you notice white mold or a musty smell, discard the seeds immediately—they’ve likely spoiled.
Always test a small batch of seeds by planting them in moist paper towels for 3-5 days to check germination before committing to a full garden sowing.
One common mistake I see is rushing the drying process. Seeds left too moist will develop mold within 24-48 hours, ruining your entire batch. Another pitfall is storing seeds in plastic bags without ventilation, trapping humidity and accelerating spoilage.
To maximize your seed-saving success, combine proper drying with correct storage—and you’ll have a reliable supply of homegrown zucchini for seasons to come.