Pests
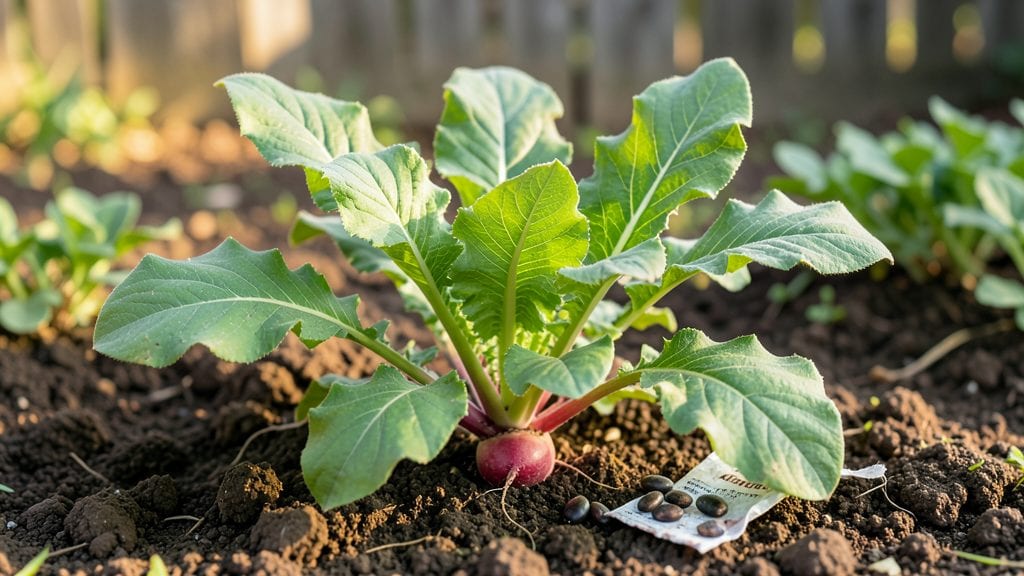
Getting radish seeds for next year doesn't have to mean buying new packets every spring. 🌱 I've saved seeds from my own garden for years, and it's easier than you'd think—especially when you know which varieties are best for seed saving and how to handle them properly after harvest.
The simplest way is to buy fresh seeds from reputable online stores or local nurseries, but saving your own is rewarding. Choose heirloom or open-pollinated varieties like 'Cherry Belle' or 'French Breakfast'—they're bred to produce true-to-type seeds.
Just let a few plants bolt and go to seed in your garden, then collect the dried pods before they scatter.
Once you have those pods, store them in a cool, dry place for 3-4 months to dry completely. Properly stored seeds stay viable for 3-5 years, so you'll never need to buy again if you save a good batch.
The first time you watch those tiny seedlings emerge from your homegrown seeds, you'll understand why gardeners swear by this practice.
This method works for any climate zone, though timing varies slightly. Start saving seeds after your first successful harvest, and you'll be set for planting seasons to come with seeds that perform exactly as your favorite varieties did last year.
📚 In This Guide
- What you need
- Instructions
- Tips and common mistakes
- Wrapping up and next steps
What you need
- ● Mature radish plants: Choose non-hybrid (heirloom) varieties like 'French Breakfast,' 'Cherry Belle,' or 'Daikon' for seed-saving success. Aim for 10-15 healthy plants to ensure good seed production.
- ● Garden shears or pruning scissors: For cleanly harvesting seed pods without damaging the plant.
- ● Paper bags or breathable mesh bags: 5-10 bags (one per plant or per 2-3 plants) to allow airflow and prevent mold.
- ● Drying rack or screen: A flat, elevated surface (like a wire rack or wooden screen) to dry seeds in a well-ventilated area.
- ● Fine-mesh sieve or colander: For separating seeds from chaff once dried.
- ● Paper towels or parchment paper: To line containers for seed storage.
- ● Air-tight containers: 2-3 small jars or envelopes with labels (e.g., mason jars, seed-saving envelopes).
- ● Permanent marker or labels: To mark varieties, harvest date, and storage date.
- ○ Spray bottle with water: For lightly misting seed pods during drying (optional but helpful).
- ● Glassine envelopes: For long-term seed storage (better than paper for humidity resistance).
- ● Hygrometer: To monitor humidity levels (ideal: 30-40% for storage).
- ● Silica gel packets: Place 1-2 packets in storage containers to absorb moisture.
- ● Notebook or seed journal: To track varieties, germination rates, and growing conditions.
- ● Hand lens or magnifying glass: For inspecting seeds for pests or damage before storage.
Step-by-Step guide to harvesting and storing radish seeds
Here’s how to save radish seeds from your garden—no fancy tools or expensive kits needed.
🌱 Step 1: Grow Radishes to Maturity for Seed Production
First, let radishes grow past their usual harvest time. Instead of pulling them when they’re tender, wait until they develop pods (the seed-bearing structures) after flowering. Most varieties produce flowers in 3-4 weeks, and pods form 2-3 weeks later. You’ll know they’re ready when the pods turn dry and papery—like tiny, elongated bean pods.
Leave 4-5 of the largest, healthiest plants in the garden. These will produce the most seeds. Remove the rest to avoid overcrowding, which weakens seed production. If you see any signs of disease (yellowing leaves, spots), pull those plants immediately—they’ll contaminate your seeds.
☀️ Step 2: Harvest the Seed Pods at the Right Time
Harvest pods when they’re fully dry and brown but before they split open and scatter seeds. Use clean scissors or pruners to snip them from the plant, leaving a short stem attached. Lay them on a tray or paper towel in a warm, dry spot (like a sunny windowsill or garage) for 1-2 weeks to finish drying.
Don’t rush this step—if pods are still green or damp, seeds won’t store well. You’ll see them ready when the outer shell feels crisp and the seeds inside rattle when shaken. Once fully dry, gently crush a pod to release the seeds. Store these in a small envelope or jar labeled with the variety and harvest date.
🪴 Step 3: Clean and Store Seeds for Next Year
Remove any debris or chaff from the seeds by winnowing—hold them in your hand and let a fan or gentle breeze blow away lighter particles. For a quick method, pour seeds onto a white plate and pick out any discolored or shriveled ones. Healthy seeds should be plump, uniform, and dark-colored (usually black, brown, or red).
Store seeds in a cool, dark place (like a sealed jar in the fridge) for 1-2 years. Radish seeds lose viability faster than many others, so label them with the year and test a few each spring to check germination. If they sprout within 7-10 days when planted, they’re still good to use.
⏰ Step 4: Test Germination Before Planting Next Season
About 2 months before your last frost date, test a handful of seeds to confirm they’ll grow. Place 10 seeds between damp paper towels in a ziplock bag and keep them in a warm spot (like on top of the fridge). Check daily—true germination should happen within 7-10 days. If fewer than 80% sprout, save the rest for quick-starting indoors or order fresh seeds.
This test gives you peace of mind and helps you adjust planting times. If germination is slow, try soaking seeds in lukewarm water for 12 hours before planting to encourage faster sprouting. Once you confirm viability, you’re ready to grow next year’s radishes from your own saved seeds!
Tips & tricks for perfect radish seed harvesting
Saving radish seeds takes patience and attention to detail—here's how to avoid common pitfalls and maximize your yield.
Selection Tip: In Step 1, focus on leaving the 4-5 healthiest plants with the most vibrant flowers. Look for plants with dark green, disease-free leaves and sturdy stems—they'll produce the most viable seeds. I've learned the hard way that even small signs of disease can ruin an entire seed batch, so remove any questionable plants immediately.
Timing Secret: The 3-4 week flowering period and 2-3 week pod development in Step 1 can vary based on your climate. In cooler regions, extend the growing season by planting radishes in early spring or late summer. Use row covers if nighttime temperatures dip below 50°F—this helps ensure proper flowering and pod formation.
Harvesting Hack: When harvesting pods in Step 2, cut them when they're fully dry and brown but still intact. If you wait too long, they'll split open and scatter seeds everywhere—this is especially frustrating after all that work! A quick trick is to shake a pod over a piece of paper: if seeds rattle inside but the pod doesn't break, it's ready. Store harvested pods in a paper bag rather than plastic to prevent moisture buildup during the 1-2 week drying period.
Storage Wisdom: For Step 3's storage, I recommend using small glass jars with tight-sealing lids instead of envelopes. Glass preserves seed viability better than paper over the 1-2 year storage period. Place a small packet of silica gel in each jar to absorb any moisture—this simple addition can double your seeds' shelf life. Always label with both the variety name and harvest year to avoid confusion when testing germination next spring.
Pro Tips for Get Radish Seeds
- Saving radish seeds takes patience and attention to detail—here's how to avoid common pitfalls and maximize your yield.
- Selection Tip: In Step 1, focus on leaving the 4-5 healthiest plants with the most vibrant flowers.
- Timing Secret: The 3-4 week flowering period and 2-3 week pod development in Step 1 can vary based on your climate.
Frequently asked questions
When is the best time to harvest radish seeds?
The ideal time to harvest radish seeds is when the seed pods turn from green to brown and begin to split open naturally. This usually happens 60-90 days after planting, depending on the variety. Wait until the pods are dry and crispy—don’t rush it! Overripe seeds may scatter or lose viability.
Can I save seeds from store-bought radishes?
Unfortunately, no. Most radishes sold in grocery stores are hybrid varieties (marked as "F1" on seed packets) and won’t produce true-to-type seeds. For seed-saving, grow open-pollinated or heirloom varieties like 'French Breakfast' or 'Cherry Belle' from a trusted seed supplier.
How do I store radish seeds for long-term use?
Store seeds in a cool, dry place (like a sealed jar in the fridge) or use a vacuum sealer for extra protection. Label with the variety and date—most radish seeds stay viable for 2-4 years. Avoid moisture and direct sunlight to prevent mold or sprouting.
Why aren’t my radish plants producing seed pods?
Several factors could be at play: poor pollination (radishes need bees!), overcrowding (thin plants for airflow), or harvesting too early. If flowers appear but no pods form, hand-pollinate with a soft brush or check for pests like aphids blocking access.
What’s the easiest way to clean radish seeds from pods?
Once pods are fully dry, gently crush them in a paper bag or sieve to separate seeds from chaff. For stubborn debris, use a fine-mesh strainer under running water—but dry seeds thoroughly afterward to prevent spoilage. Store only clean, dry seeds!
Wrapping up and next steps
Growing your own radishes is a rewarding experience, and saving seeds ensures you can enjoy fresh harvests year after year!
By following these simple steps—selecting healthy plants, harvesting at the right time, drying seeds properly, and storing them correctly—you’ll have a stash of radish seeds ready for next season’s garden. 🌱
Now that you’re equipped with the knowledge, why not take the next step? Share your radish seeds with fellow gardeners or experiment with new varieties. Happy gardening—your future harvests will thank you! 🌟