Pruning
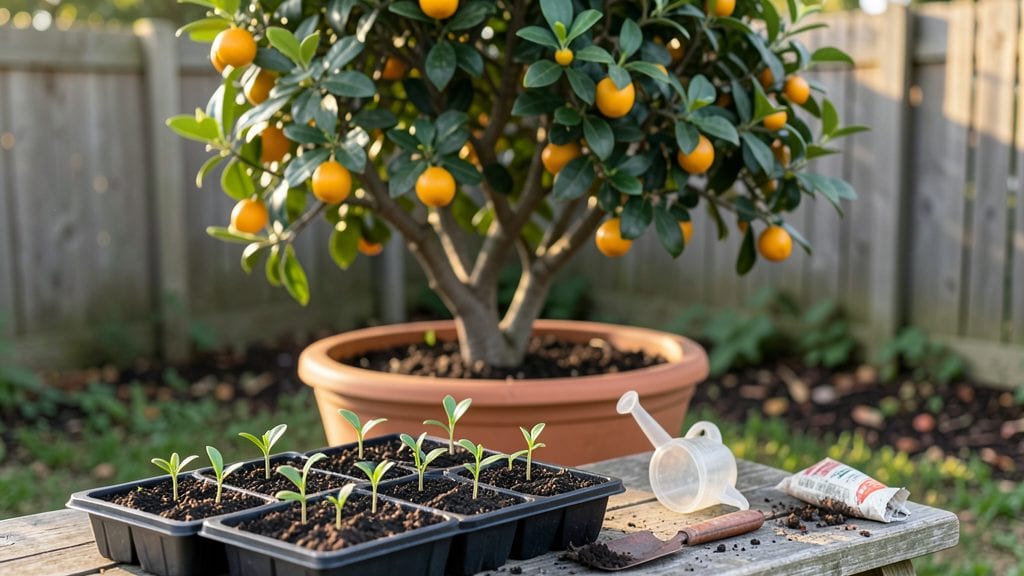
Growing kumquat trees from seeds gives you a year-round citrus harvest that no store-bought plant can match. 🌱 I’ve started dozens from seed, and the first sweet-tart fruit appears in just three years—far faster than most citrus trees.
The trick isn’t just patience, though. It’s knowing when to soak those tiny seeds, how to mimic their native humidity, and when to move them from shade to sun without burning the tender leaves.
You’ll need a warm spot (70–80°F) for germination, a mix of peat and perlite to keep roots airy, and a patience test—some seeds take 4–6 weeks to crack open. Most beginners rush the transplanting, which is why their seedlings flop.
I’ll show you how to spot the signs of overwatering (mushy stems) and underwatering (crispy leaves) before they become permanent problems.
By year three, you’ll be harvesting tiny, edible-oranges that burst with flavor—peel and all. The trees stay compact enough for containers, so even apartment balconies can grow them.
The real magic? They fruit twice a year if you prune correctly, and the scent of blossoms in spring will make your neighbors ask where you got yours.
This method works in zones 9–11, but with grow lights and winter protection, you can push it as far north as zone 7. The biggest mistake? Assuming kumquats are like oranges—they’re tougher, slower, and need more humidity than most citrus. Let’s get those seeds sprouting right.
📚 In This Guide
- What you need
- Instructions
- Tips and common mistakes
- Wrapping up and next steps
What you need
- ● Kumquat seeds: 3–5 fresh, plump seeds (harvested from ripe kumquats—avoid store-bought seeds if possible, as they’re often treated to prevent germination).
- ● Seed-starting mix: 1–2 cups of sterile, well-draining potting soil (look for a blend labeled for seeds or seedlings). Pro tip: Mix in a handful of perlite or sand for extra drainage!
- ○ Small pots or containers: 2–3 biodegradable pots (3–4 inches wide) or a seed tray with drainage holes. Optional: Use egg cartons or plastic cups with holes punched in the bottom for budget-friendly starts!
- ● Spray bottle: For gentle watering (avoid over-saturating the soil).
- ● Plastic wrap or clear lid: To create a mini greenhouse effect and retain humidity.
- ● Grow lights or sunny windowsill: A south-facing window (6+ hours of sunlight daily) or a 12–14 hour LED grow light for seedlings.
- ○ Fertilizer (optional but helpful): A balanced, water-soluble fertilizer (5-5-5 or 10-10-10) diluted to half-strength for young seedlings.
- ● Larger pot (1–2 gallons): For when seedlings are 6+ inches tall (use a pot with drainage holes).
- ● Well-draining soil: A mix of potting soil, compost, and perlite (ratio: 2:1:1).
- ● Pruning shears: Small, sharp scissors for trimming leggy growth or shaping the tree.
- ○ Support stake or trellis: (Optional) To help the tree stay upright as it grows taller.
- ○ Citrus-specific fertilizer: (Optional) Once the tree is established, switch to a fertilizer higher in nitrogen (e.g., 8-3-9) to encourage leafy growth.
- ○ Warmth: Ideal germination temperature: 70–80°F (21–27°C). Use a heat mat (optional) if your space is cooler.
- ● Humidity: High humidity (70%+) speeds up germination. A humidifier or pebble tray under the pots helps!
- ● Patience: Germination can take 2–4 weeks—stay consistent with care!
Step-by-step instructions for growing kumquat trees from seeds
Here's the method I've used to grow thriving kumquat trees from seed—patience pays off with fragrant blooms and tart-sweet fruit.
🌱 Step 1: Extract and Stratify the Seeds
Remove seeds from fully ripe kumquats (they should yield slightly when squeezed). Rinse them thoroughly to remove all fruit pulp, then let them air-dry for 24 hours on a paper towel. This prevents mold during stratification.
Place the dried seeds in a plastic bag with slightly damp paper towels, then seal and refrigerate for 6-8 weeks. Check weekly—they're ready when a small white root (1/4 inch) appears. Cold stratification mimics winter conditions and breaks seed dormancy, which is critical for kumquats.
🌱 Step 2: Sow in a Sterile Growing Medium
Fill a 4-inch pot with sterile seed-starting mix (never garden soil—it's too dense). Moisten until evenly damp but not soggy. Make a 1/4-inch deep hole with your finger, then place 1-2 seeds per pot (they germinate unpredictably). Cover lightly with additional mix—just enough to hide the seeds.
Water gently from below by placing the pot in 1 inch of warm water for 10 minutes. This prevents seed displacement. Place in a warm, dark spot (70-75°F) until germination, which can take 4-8 weeks. Avoid bright light now—you'll see tiny white roots first, then a sprout.
☀️ Step 3: Provide Light and Gradual Transplanting
Once seedlings show first true leaves (not the initial seed leaves), move them to bright, indirect light for 2 weeks. After that, introduce 4-6 hours of morning sun daily, gradually increasing to full sun over 2 weeks. Sudden sun exposure causes leaf scorch on young kumquats.
When seedlings reach 4-6 inches tall (usually 3-4 months), transplant each into its own 6-inch pot with fresh sterile potting mix. Handle roots gently—kumquats are sensitive to root disturbance. Water deeply after transplanting to settle the soil around the roots.
🪴 Step 4: Maintain Optimal Conditions for Growth
Keep soil consistently moist but never soggy—kumquat roots rot easily in waterlogged conditions. Water when the top inch feels dry to the touch. Fertilize monthly with a balanced citrus fertilizer (diluted to half strength) starting 3 months after transplanting. Over-fertilizing burns delicate roots.
Rotate pots quarter-turn weekly to prevent leggy growth toward the light. By year 2, you'll see buds forming—this is when pruning becomes important. Trim back 1/3 of leggy growth in early spring to encourage bushier structure. Kumquats thrive in 65-85°F and need well-draining soil at all stages.
⏰ Step 5: Prepare for Year-Round Harvest
By year 3, your kumquat will produce first fruit (small and tart). Thin clusters to 3-4 fruits per branch to improve size and quality. Kumquats fruit year-round in warm climates, but heaviest production occurs in fall and winter. Harvest when fruit is fully colored but still slightly firm to the touch.
To overwinter indoors (if temperatures drop below 30°F), move pots to a sunny window or under grow lights (14 hours daily). Reduce watering slightly—kumquats enter dormancy in cooler months. Prune again in early spring to shape the tree and remove dead wood before new growth begins.
Tips & tricks for perfect kumquat tree growth
Growing kumquats from seed is a rewarding journey that requires patience and precision—here's how to optimize every stage for success.
Stratification Success: The 24-hour drying period before stratification is non-negotiable—this prevents mold that can kill your seeds before they even sprout. I've learned the hard way that skipping this step leads to rot in the fridge. For extra insurance, place a small piece of dry paper towel at the bag's opening to absorb any excess moisture during the 6-8 week cold treatment.
Germination Environment: Maintaining that 70-75°F warm, dark spot during germination is critical—any cooler and you'll wait months for sprouts. I use an under-sink warming drawer for consistent temperatures. The 10-minute watering technique from below prevents seed displacement, which is especially important since kumquat seeds are delicate and can float away if watered from above.
Light Transition Strategy: The gradual light introduction in Step 3 is where most beginners make mistakes. After those first true leaves appear, I recommend using a sheer curtain over a sunny window for the initial 2 weeks—this filters harsh light while still providing brightness. The 4-6 hour morning sun rule helps prevent leaf scorch that can kill young seedlings. Remember, kumquats are tropical plants that need gentle acclimation to full sun.
Root Care Through Growth: Kumquat roots are particularly sensitive, so handle with care during the 3-4 month transplant stage. I always use a small trowel to gently loosen roots before transferring to 6-inch pots—this minimizes shock. The quarter-turn weekly rotation isn't just about light exposure; it also helps develop a more compact root system that supports heavier fruit production later.
Pro Tips for Kumquat Tree Seeds
- Growing kumquats from seed is a rewarding journey that requires patience and precision—here's how to optimize every stage for success.
- Stratification Success: The 24-hour drying period before stratification is non-negotiable—this prevents mold that can kill your seeds before they even sprout.
- Germination Environment: Maintaining that 70-75°F warm, dark spot during germination is critical—any cooler and you'll wait months for sprouts.
Frequently asked questions
Got questions about growing kumquat trees from seeds? You’re not alone! Here are some of the most common queries—and their straightforward answers—to help you get started with confidence.
How long does it take for kumquat seeds to germinate?
Kumquat seeds typically germinate within 2 to 4 weeks when kept in warm, moist conditions (around 70–75°F). Patience is key—some seeds may take up to 6 weeks, especially if they’re fresh. Use a seedling heat mat to speed up the process if your climate is cool.
Can I grow a kumquat tree indoors from seed?
Kumquat trees thrive indoors with bright, indirect light (like a south-facing window) and a pot with drainage holes. Keep the soil consistently moist but not soggy, and rotate the pot occasionally for even growth. Just be prepared for slower fruit production compared to outdoor trees.
Will a kumquat tree grown from seed produce fruit?
Yes, but it may take 3 to 5 years (or longer) for seed-grown trees to bear fruit. While they’re edible, seedling kumquats might not be as sweet or uniform as grafted varieties. For faster, more reliable results, consider grafting a known cultivar onto your seedling later.
What’s the best way to store kumquat seeds for planting later?
Store seeds in a cool, dry place (like a sealed container in the fridge) for up to 6 months. For longer storage, dry them completely and keep them in a paper envelope in the freezer. Soaking dried seeds in warm water for 24 hours before planting can improve germination rates.
Why aren’t my kumquat seeds sprouting?
Common culprits include old seeds (plant fresh ones for best results), cold soil (use a heat mat), or overwatering (keep soil damp but not waterlogged). Try scarifying the seed (lightly nicking the shell) or soaking it in warm water to break dormancy. If all else fails, test a few seeds in different conditions!
Wrapping up and next steps
Growing a kumquat tree from seed is a rewarding journey that brings year-round citrus joy—and yes, it’s totally doable! 🌱 With patience, the right conditions, and a little care, you’ll enjoy tart-sweet fruits in just three years.
Whether you’re pruning for shape, troubleshooting pests, or simply admiring your progress, every step is a chance to connect with nature.
Ready to take the next step? Start with those seeds today—plant them, nurture your sapling, and soon, you’ll be harvesting your own kumquats! Share your progress with fellow gardeners or even gift a tree to a friend. The citrus adventure awaits! 🍊✨