
Flowers
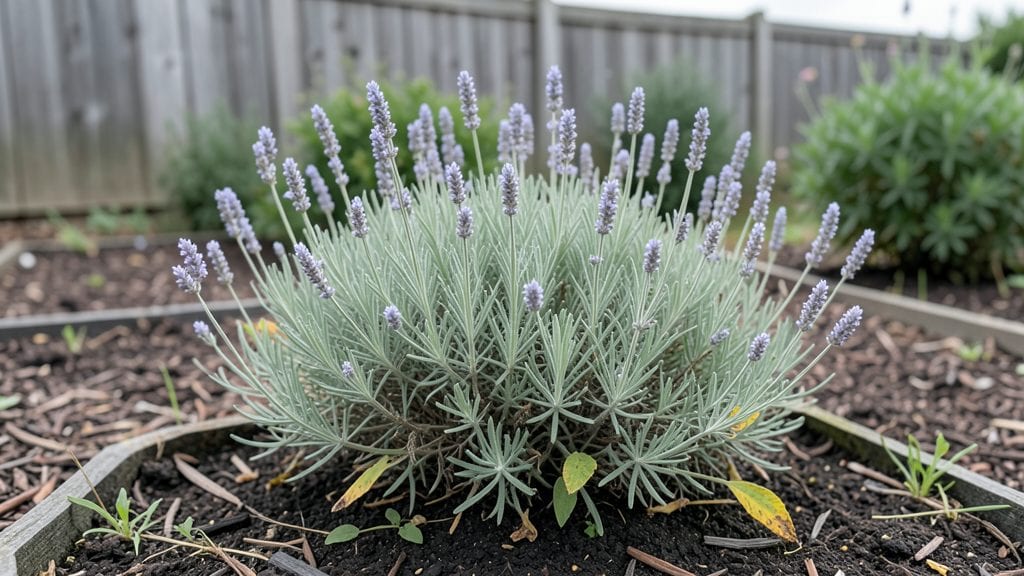
Understanding lavender seedling stages transforms a high-risk gamble into a predictable, fragrant success. 🌱 I’ve watched tiny specks in seed-starting mix turn into bushy, purple-scented plants—and the key is knowing exactly what to expect at each growth phase.
The first leaves look nothing like mature lavender, and that’s where most beginners go wrong.
Germination takes 14-21 days in warm soil, but the real magic happens after the first true leaves appear—those narrow, gray-green needles signal the plant’s identity. Transplanting too soon kills delicate roots, while waiting too long risks shock.
I learned this the hard way when my first batch flopped after moving them outside before they were ready.
By 6-8 weeks, seedlings should be 3-4 inches tall with woody stems, ready for their permanent home. The scent won’t develop until flowering, but healthy stems and vibrant foliage mean you’re on track.
Prune leggy growth now to encourage bushier plants later—this is where most lavender gardens go from "decent" to "showstopping."
Common pitfalls include overwatering (lavender hates soggy roots) and transplant shock (harden them off gradually). Once established, these stages become second nature, and you’ll end up with fragrant hedges that neighbors will envy. Let’s break it down step by step so you skip the guesswork.
📚 In This Guide
- What you need
- Instructions
- Tips and common mistakes
- Wrapping up and next steps
What you need
- ● Lavender seeds: 1–2 packets (50–100 seeds) of Lavandula spp. (e.g., English, French, or Spanish lavender). Choose heirloom or organic seeds for best results.
- ● Seed-starting mix: 1–2 bags (10–15 quarts) of sterile, well-draining potting soil (avoid garden soil—it’s too dense!). Look for a mix labeled for seedlings or herbs.
- ● Seed trays or small pots: 24–72 cell trays OR 3–4 inch biodegradable pots (10–20 units). Ensure they have drainage holes!
- ● Grow lights or sunny windowsill: A full-spectrum LED grow light (12–16 hours/day) OR a south-facing window with 6+ hours of direct sunlight.
- ● Misting bottle or spray nozzle: For gentle watering (avoid soaking seeds!).
- ○ Plastic wrap or humidity dome: To create a mini greenhouse effect (optional but helpful for germination).
- ● Fertilizer: A balanced, water-soluble fertilizer (5-10-5 or 10-10-10 ratio) diluted to half-strength for seedlings.
- ● Tweezers or toothpick: For gently pressing seeds into soil (lavender seeds need light to germinate—don’t bury them!).
- ○ Heat mat (optional): A seedling heat mat (70–75°F) can speed up germination if your home is cool.
- ● Pruning shears: For trimming leggy seedlings later.
- ● Transplanting tools: Small trowel or spoon for moving seedlings to larger pots.
- ○ pH test kit (optional): Lavender thrives in neutral to slightly alkaline soil (6.5–7.5 pH).
- ○ Lavender companion plants (optional): Rosemary, thyme, or sage to deter pests and share growing conditions.
Step-by-step guide to lavender seedling development
Watch your lavender transform through precise growth phases—each stage reveals what it needs next.
🌱 Step 1: Germination (Days 7-21)
Lavender seeds germinate slowly, often taking 10-21 days at 68-75°F. Start with a sterile seed-starting mix in shallow trays—lavender roots are delicate and need loose soil to avoid damping-off. Press seeds ⅛ inch deep (they won’t tolerate deep planting) and keep the mix consistently moist but never soggy.
Cover the tray with a clear plastic dome to retain humidity, but remove it immediately once sprouts appear. You’ll spot the first tiny green cotyledons breaking through—these look like tiny leaves but aren’t true foliage. Here’s the thing: lavender seedlings are light-sensitive even at this stage, so place them under a grow light 12-14 hours daily within 3 inches of the plants.
🌿 Step 2: Early Growth (Weeks 3-6)
Once the first true leaves emerge (they’ll be narrow and gray-green, unlike the rounded cotyledons), your seedlings are entering the juvenile stage. This is when roots begin branching, but they’re still shallow. Use a small hand trowel to gently loosen the soil around each plant—lavender hates root disturbance, so avoid transplanting until 4-6 weeks old.
Thin seedlings to 2 inches apart if crowded. You’ll notice leggy growth if light is insufficient—immediately adjust the grow light to 2 inches above the tallest seedling. Lavender responds poorly to stretching, and leggy stems rarely recover. At this stage, water only when the top ½ inch of soil feels dry—overwatering causes rot in the woody stems.
☀️ Step 3: Vegetative Maturation (Weeks 6-10)
By week 6, seedlings develop woody stems and silver-gray foliage—key identifiers of mature lavender. This is the critical hardening phase: move them outdoors to a sheltered, partially shaded spot for 2 hours daily, gradually increasing to full sun over 10-14 days. Lavender is drought-tolerant but cannot handle sudden heat stress—introduce full sun slowly.
Pinch back the top set of leaves when stems reach 4 inches tall to encourage bushier growth. Use clean, sharp scissors (not fingers) to avoid crushing stems. You’ll see new side shoots within 2 weeks—this signals the plant is establishing its permanent structure. Reduce watering to once every 7-10 days unless the soil is bone-dry.
✂️ Step 4: Bloom Preparation (Weeks 10-16)
The pre-bloom stage begins when stems thicken and buds form at the tips. Lavender flowers on new wood, so avoid heavy pruning now—focus on removing only dead or yellowing leaves with sterilized pruners. You’ll spot tiny purple buds (the first sign of blooms) around week 12-14, depending on variety. At this point, water only during prolonged dry spells—lavender thrives on neglect once established.
Transplant to well-draining soil in full sun by week 16 if still in containers. Space plants 18-24 inches apart—crowding reduces airflow and invites fungal issues. The first flush of blooms will appear 4-6 weeks after buds form, but don’t harvest until half the flowers open for maximum fragrance and oil content.
Tips & tricks for perfect lavender seedling growth
Growing lavender from seed requires patience and precision—here's how to avoid common pitfalls and nurture thriving seedlings.
Germination Temperature Control: Maintain that 68-75°F range consistently during the 10-21 day germination period. I use a seedling heat mat set to 72°F for reliable results. Fluctuations below 65°F can stall germination while temperatures above 78°F risk damping-off. Place your tray on a thermometer to monitor—lavender seeds are particularly sensitive to temperature shifts during this critical phase.
Light Sensitivity Strategy: The 12-14 hours of daily grow light within 3 inches is non-negotiable for preventing leggy seedlings. I position my grow lights on a timer and adjust the height weekly as seedlings grow. At week 3, move the light to 2 inches above the tallest seedlings—this creates a more compact growth habit. Use full-spectrum LED grow lights for best results; they provide the blue light spectrum lavender needs for proper development.
Hardening Phase Insight: During the 10-14 day hardening phase starting at week 6, I gradually increase outdoor exposure by 30 minutes daily until reaching full sun. The key is to watch for leaf bleaching—this is lavender's way of telling you it's getting too much sun too fast. Start with morning sun only, then slowly introduce afternoon exposure. This mimics natural conditions and prevents sunburn that can stunt growth.
Pruning Technique: When pinching back the top set of leaves at 4 inches, I use sterilized scissors and make cuts just above a set of leaves where new growth will emerge. Avoid using fingers or dull tools—they can crush stems and introduce pathogens. After pruning, I spray the area with a 1% hydrogen peroxide solution (1 part peroxide to 9 parts water) to prevent infection. This simple step dramatically improves bushiness and flowering potential.
Pro Tips for Lavender Seedling Stages
- Growing lavender from seed requires patience and precision—here's how to avoid common pitfalls and nurture thriving seedlings.
- Germination Temperature Control: Maintain that 68-75°F range consistently during the 10-21 day germination period.
- Light Sensitivity Strategy: The 12-14 hours of daily grow light within 3 inches is non-negotiable for preventing leggy seedlings.
Frequently asked questions
Got questions about growing lavender from seedlings? You’re not alone! Here are answers to the most common queries to help you navigate each stage with confidence.
How long does it take for lavender seedlings to germinate?
Lavender seeds are notoriously slow to germinate—typically 21 to 30 days under ideal conditions (warmth, moisture, and indirect light). Patience is key! Use a heat mat (70–80°F) and keep soil consistently moist but not soggy. If nothing sprouts in 6 weeks, the seeds may need stratification (chilling) or could be old.
When can I transplant lavender seedlings outdoors?
Wait until seedlings have 3–5 true leaves and are at least 3–4 inches tall. Transplant after the last frost when nighttime temps stay above 50°F. Harden them off for 7–10 days first by gradually exposing them to outdoor conditions. Choose a sunny spot with well-draining soil—they hate soggy roots!
Why are my lavender seedlings wilting or turning yellow?
Wilting or yellowing usually signals overwatering or poor drainage. Lavender thrives on neglect—water only when the top inch of soil is dry. Ensure pots have drainage holes and use a sandy, gritty potting mix. Yellow leaves can also mean nutrient deficiency; fertilize lightly with a balanced, low-nitrogen formula (like 5-10-5) in spring.
Can I grow lavender from cuttings instead of seeds?
Cuttings are often easier and faster. Take 4–6 inch stems from healthy lavender plants, strip the lower leaves, and dip in rooting hormone. Plant in well-draining soil and keep humid (use a plastic bag or propagator). Roots form in 4–8 weeks. This method preserves the parent plant’s traits—perfect for heirloom varieties!
How do I protect lavender seedlings from frost?
Young lavender is frost-sensitive. If frost is forecast, cover seedlings with frost cloth or a lightweight blanket. Avoid plastic, which traps moisture. For extreme cold (<20°F), move pots to a sheltered spot or indoors near a bright window. Once established (after 1–2 years), mature lavender tolerates light frosts better—but young plants need extra care!
Wrapping up and next steps
Growing lavender from seedlings is a rewarding journey that transforms tiny seeds into fragrant, vibrant plants—and you’ve now got the expert know-how to make it happen! 🌱 From sprouting to blooming, each stage offers a chance to connect with nature and nurture something beautiful.
Whether you’re a seasoned gardener or a curious beginner, your green thumb is ready for this aromatic adventure.
Ready to take the next step? Plant your seeds, monitor their progress, and soon you’ll be harvesting lavender for sachets, teas, or stunning garden displays. Happy growing!