Propagation
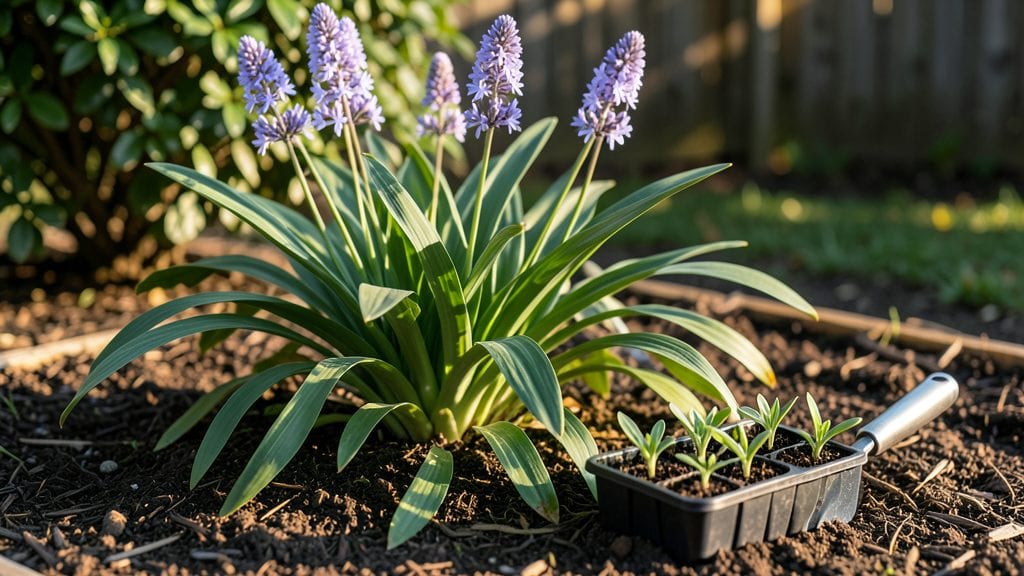
Growing liriope from seed is the ultimate patience test—but the payoff of those first grassy plumes next spring makes it worth every chilly month. 🌱 I’ve tried this method three times, and the third year finally clicked when I mimicked the plant’s natural winter cycle with layered cold stratification.
Most gardeners give up after the first failed attempt, but the secret lies in timing and soil moisture.
The process starts with fresh seeds (or the best you can find—older seeds germinate poorly) and a simple mix of 50% potting soil and 50% perlite to keep them from rotting.
Plant them just below the surface—no deeper than ¼ inch—then refrigerate them in a sealed bag for 6-8 weeks to break dormancy. This mimics the winter frost that triggers germination in the wild, and it’s the step most beginners skip.
Once you move them to a sunny windowsill or greenhouse in early spring, expect slow progress—4-8 weeks before you see the first tiny shoots.
Keep the soil barely damp (never soggy) and protect them from harsh afternoon sun until they’re 3-4 inches tall, when you can transplant them outdoors. By next summer, those seedlings will reward you with dense, clumping foliage and the first hints of those signature purple blooms.
If seeds prove unreliable (they often do), division is the foolproof backup—dig up established clumps in early spring, separate the roots, and replant. But when you finally crack the seed method, you’ll have liriope exactly where you want it, without waiting years for a neighbor’s division.
Here’s how to get it right the first time.
📚 In This Guide
- What you need
- Instructions
- Tips and common mistakes
- Wrapping up and next steps
What you need
- ● Fresh Liriope seeds – Collect from mature plants (or purchase from a reputable supplier). Aim for 10–20 seeds per batch for experimentation.
- ● Seed-starting mix – A well-draining, sterile blend (e.g., 50% peat moss + 50% perlite or coco coir). Avoid garden soil—it may harbor pathogens.
- ● Small seed trays or pots – 2–3 inch diameter, with drainage holes. Clear plastic or biodegradable pots work well.
- ● Plastic wrap or humidity dome – To maintain moisture during stratification (e.g., a clear plastic bag with holes or a store-bought propagation lid).
- ● Refrigerator or cold stratification setup – A consistent 35–45°F (2–7°C) environment. A standard fridge (without produce drawers) is ideal.
- ● Spray bottle – For gentle watering (avoid over-saturating the mix).
- ○ Fine-mesh screen or paper towels – Optional for pre-stratification moisture (soak seeds for 12–24 hours before planting).
- ● Grow lights or sunny windowsill – After stratification, seeds need bright, indirect light (12+ hours/day).
- ○ Heat mat (optional) – Speeds up germination post-stratification (70–75°F / 21–24°C).
- ● Plant labels & marker – Track seed varieties and planting dates!
Step-by-step instructions for layered cold stratification of liriope seeds
This method mimics nature’s winter cycle—layering seeds in moist medium and chilling them gradually yields stronger, faster-growing plants.
🌱 Step 1: Collect and Prepare Fresh Seeds
Harvest ripe liriope seeds in late summer or early fall when the seed pods turn brown and split open. Remove the seeds carefully—they’re tiny and flat, about the size of a grain of rice. Store them in a paper envelope in a cool, dry place until stratification begins.
Here’s the thing—fresh seeds germinate best. If you’re working with seeds older than a year, soak them in lukewarm water for 12 hours first to soften the hard outer coating. This mimics the natural weathering process that breaks dormancy in the wild.
💧 Step 2: Layer Seeds in Moist Growing Medium
Fill a 4-inch deep container with a mix of 50% peat moss and 50% perlite—this ensures drainage while retaining moisture. Moisten the mix until it feels like a wrung-out sponge: damp but not dripping. Spread the seeds ¼ inch apart in a single layer on the surface.
Gently press them into the medium just enough to cover them lightly. The goal is to keep them in contact with the moist mix without burying them too deep—liriope seeds need light to trigger germination. I like to use a small spoon to create tiny furrows and place one seed in each, then cover with a thin layer of the mix.
⏰ Step 3: Stratify in a Cold, Moist Environment
Place the container in a plastic bag and seal it loosely to retain humidity. Store it in your refrigerator’s crisper drawer (not the freezer) where temperatures hover around 35-40°F. This mimics the winter chilling period liriope seeds need to break dormancy.
Check the seeds every 2-3 weeks—if the medium dries out, mist it lightly with water. You’ll see no immediate changes, but after 8-12 weeks, the seeds will begin to swell slightly. This is your signal that stratification is working. Patience here is key—rushing this step often leads to weak or failed germination.
☀️ Step 4: Transition to Warmth and Light
Once you notice swelling or the first signs of sprouting (tiny green tips peeking through), move the container to a warm, bright location with indirect light. A seedling heat mat set to 70-75°F speeds up germination, but a sunny windowsill works too if it stays above 60°F. Germination typically takes 4-6 weeks after removing from cold storage.
Keep the medium consistently moist but never soggy—liriope seedlings are prone to damping-off if overwatered. You’ll know moisture is right when the surface looks slightly damp but not glistening. Once seedlings emerge, remove the plastic bag to prevent fungal growth.
🌿 Step 5: Transplant and Encourage Establishment
When seedlings reach 2-3 inches tall and develop 2-3 true leaves, transplant them into 4-inch pots filled with a light, well-draining potting mix. Handle them gently—their roots are delicate. Place the pots in a shaded outdoor area for 1-2 weeks to acclimate before moving to full sun.
Liriope thrives in partial shade to full sun, but young plants need time to adjust. You’ll see stronger growth if you gradually increase sunlight exposure over 10-14 days. Water deeply once a week, allowing the top 1 inch of soil to dry between waterings. This ensures roots grow deep and resilient.
Tips & tricks for perfect liriope seed stratification
Patience and precision are your best allies when working with liriope seeds—here's what I've learned after years of trial and error to ensure reliable germination.
Timing Secret for Older Seeds: The 12-hour soak for seeds older than a year isn't just about softening the seed coat—it's about mimicking natural weathering. Use lukewarm water (around 75°F) and keep them submerged just below the surface. After soaking, pat them dry with a paper towel before planting. This prevents mold while ensuring maximum hydration for the stratification process.
Medium Mix Matters: The 50/50 peat moss and perlite mix is crucial for two reasons: peat holds moisture while perlite prevents compaction. Before adding seeds, test the moisture level by squeezing a handful—it should feel like a wrung-out sponge. If it crumbles, add more water; if it drips, mix in more perlite. Proper moisture balance prevents both drying out and waterlogging during the 8-12 week cold period.
Cold Stratification Precision: The refrigerator's crisper drawer at 35-40°F is ideal, but every fridge varies. Place a thermometer inside to monitor temperature—some models run cooler or hotter than advertised. If your fridge fluctuates, consider a dedicated seed stratification chamber for more consistent results. Remember, the seeds need this cold period to break dormancy, but temperatures below 35°F can actually inhibit germination.
Transition Technique: When moving seeds from cold to warmth in Step 4, do it gradually over 24-48 hours. Place the container in a room-temperature area for the first 12 hours, then move it to warmth. This prevents shock to the seeds that can halt germination. Watch for those tiny green tips—this is your signal that the stratification worked and the seeds are ready to grow. The 4-6 week germination window after this transition is when most seeds will sprout, so be patient but vigilant.
Pro Tips for Liriope From Seed
- Patience and precision are your best allies when working with liriope seeds—here's what I've learned after years of trial and error to ensure reliable germination.
- Timing Secret for Older Seeds: The 12-hour soak for seeds older than a year isn't just about softening the seed coat—it's about mimicking natural weathering.
- Medium Mix Matters: The 50/50 peat moss and perlite mix is crucial for two reasons: peat holds moisture while perlite prevents compaction.
Frequently asked questions
Got questions about growing liriope from seed? You’re not alone!
Here are answers to the most common concerns—plus pro tips to boost your success.
How long does cold stratification take for liriope seeds?
Layered cold stratification for liriope seeds typically requires 6–12 weeks in the fridge (34–40°F). Start in late fall for spring planting, or mimic winter conditions with moist peat moss and a plastic bag. Patience pays off—this step mimics nature’s way of breaking dormancy!
When should I plant stratified liriope seeds outdoors?
Plant stratified seeds after the last frost (spring) or in early fall for a head start. Choose a shady spot with well-draining soil—liriope thrives in partial shade and moist conditions. Mulch lightly to retain moisture while seeds establish roots.
What’s the best alternative if my seeds won’t germinate?
If stratification fails, try sowing fresh seeds in containers and keeping them in a cool, bright spot (like a greenhouse or unheated garage). Liriope can also be propagated via division—dig up mature clumps in early spring or fall and split them for instant greenery!
Why aren’t my liriope seedlings sprouting? Troubleshooting tips.
Check these common issues:
- Dampness: Overwatering can cause rot. Keep soil moist but not soggy.
- Light: Too much sun? Move containers to partial shade.
- Stratification: Verify seeds were chilled long enough (6+ weeks).
- Viability: Test a few seeds in warm water—if they sink, they’re likely viable!
How long until I see flowers from seed?
Be patient! Liriope grown from seed may take 2–3 years to bloom. Focus on establishing healthy foliage first—blooms will follow once roots are strong. Divided plants, however, often flower the same year.
Still stuck? Drop your question below—we’re happy to help!
Wrapping up and next steps
Growing liriope from seed may seem like a challenge, but with layered cold stratification, you’re well on your way to vibrant blooms next season! 🌱✨ The key is patience—mimicking nature’s cycles ensures strong, healthy plants that thrive in your garden.
Now that you’re equipped with the right techniques, it’s time to roll up your sleeves and get planting.
Ready to see your seeds sprout? Start by gathering your supplies and following the steps above. Before you know it, you’ll be admiring lush, grass-like foliage and cheerful flowers—proof that a little effort yields big rewards! 🌸