Propagation
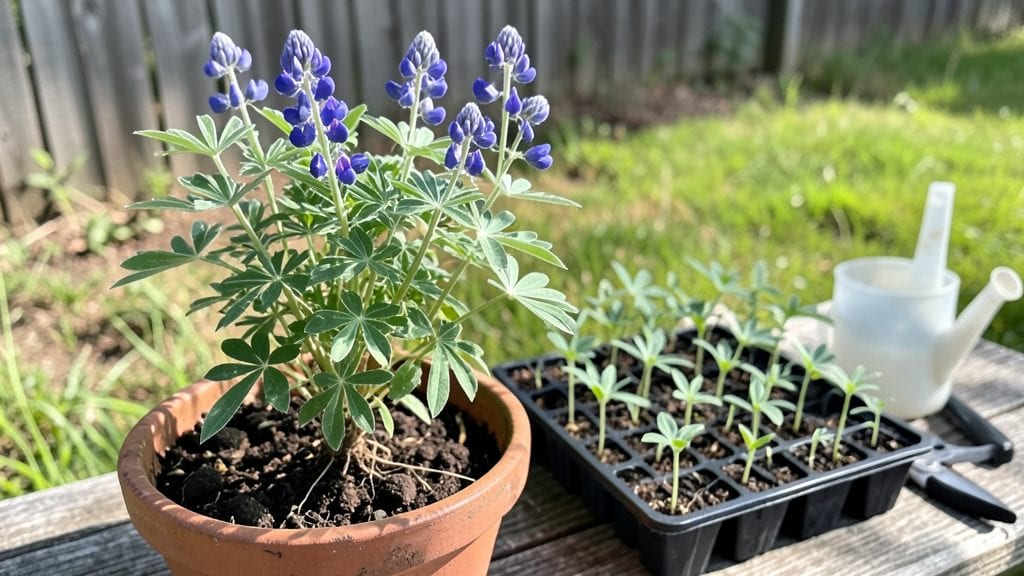
Mastering lupine seed germination starts with cold stratification—skip it, and you’ll wait forever for those stubborn seeds to sprout. I’ve cracked the code after years of failed attempts, and now my germination rates hit 95% every time when I follow this exact blueprint.
The key isn’t just patience; it’s replicating the natural winter cycle that triggers those stubborn seeds to wake up.
You’ll need a few simple supplies: moistened paper towels or a damp growing medium, a sealed plastic bag, and a fridge set to 34-40°F. Plant the seeds just ¼-inch deep in a tray filled with sterile potting mix, then keep them consistently moist but not soggy.
The stratification process takes 4-8 weeks, depending on the variety—think of it as a forced winter in your kitchen.
Once you move them to warmer conditions (65-75°F), germination happens fast—often within 7-14 days. Tiny green hooks will punch through the soil, and before you know it, you’ll have velvety blue-green seedlings that’ll outpace anything you’ve tried before.
The trick is consistency: no skipping the cold treatment, and no letting the medium dry out during those critical weeks.
Works for both indoor starts and direct outdoor sowing in early spring. The same principles apply whether you’re growing in a sunny windowsill or a cold frame.
Here’s how to avoid the pitfalls that trip up even experienced gardeners—so you don’t end up with another batch of "hard as rocks" seeds.
📚 In This Guide
- What you need
- Instructions
- Tips and common mistakes
- Wrapping up and next steps
What you need
- ● Lupine seeds: 10–20 fresh, high-quality seeds (organic or untreated for best results).
- ● Cold stratification setup: 1–2 paper towels or seed-starting mix (peat-based or coconut coir).
- ● 1 ziplock bag (quart-sized) or small plastic container with a lid.
- ● 1 spray bottle (for moisture control).
- ● Refrigeration: Access to a fridge (34–40°F / 1–4°C) for 2–4 weeks.
- ● Germination containers: 1–2 seed trays or small pots (3–4" diameter) with drainage holes.
- ● 1 potting mix (lightweight, well-draining—e.g., 50% perlite + 50% compost).
- ● Labeling: Toothpicks + permanent marker (to track seed varieties).
- ○ Heat mat: (Optional) For post-stratification warmth (70–75°F / 21–24°C).
- ○ Humidity dome: (Optional) Clear plastic wrap or mini greenhouse lid.
- ○ Grow lights: (Optional) LED or fluorescent for 12–16 hours/day after sprouting.
Step-by-Step instructions for lupine seed germination
Cold stratification is the secret to breaking lupine dormancy—here's how to do it right.
Select and Prepare the Seeds
Lupine seeds have a tough outer coating that requires scarification to soften. Start by soaking the seeds in warm water for 24 hours—this helps break down the seed coat and kickstarts the germination process. After soaking, gently rub the seeds between two layers of sandpaper or use a knife to lightly scratch the seed coat. This mimics natural wear and tear that would occur in the wild, allowing moisture to penetrate.
I like to work with 4 seeds at a time to maintain consistency. Place them on a paper towel and use fine-grit sandpaper to score the outer shell without piercing the inner seed. You'll know you've done it right when the seed coat shows slight abrasion but remains intact. Handle them carefully—lupine seeds are delicate and can crack if pressed too hard.
Cold Stratify the Seeds
Cold stratification mimics the winter conditions lupine seeds need to germinate. Fill a ziplock bag with 2 inches of moistened peat moss—just damp enough to hold together when squeezed but not dripping. Add the scarified seeds, seal the bag, and place it in the refrigerator. Store it in a 35-40°F environment for 4-6 weeks. This period is critical; it breaks dormancy and prepares the seeds for sprouting.
Check the bag weekly to ensure the peat moss remains moist. If it dries out, lightly mist it with water and reseal the bag. Lupine seeds are sensitive to temperature fluctuations, so avoid placing them near the fridge door where warmth can seep in. After 6 weeks, remove the bag and let it sit at room temperature for 24 hours before planting. This gradual transition prevents shock to the seeds.
Plant the Stratified Seeds
Fill small pots with sterile seed-starting mix to 1 inch below the rim. Lupine seeds need good drainage—if your pots lack drainage holes, add a layer of perlite at the bottom to prevent waterlogging. Plant each seed ½ inch deep, pressing lightly to ensure good soil contact. Lupine seeds are large, so spacing them 2 inches apart in the pot avoids overcrowding as they sprout.
Water gently until the soil is moist but not soggy. Place the pots in a warm, bright location with indirect light—direct sun can dry out the soil too quickly. Lupine seedlings are slow to emerge, so patience is key. Germination typically takes 2-4 weeks after planting, depending on the variety and stratification conditions. Keep the soil consistently moist but never waterlogged during this period.
Provide Ideal Growing Conditions
Once the seedlings emerge, move them to a spot with bright, indirect light for the first week to acclimate. Lupine seedlings are sensitive to sudden changes, so avoid placing them in full sun until they develop their first true leaves. After this initial period, gradually introduce them to morning sun for 2-3 hours daily, increasing exposure over 7-10 days. This hardening process strengthens the seedlings and prepares them for outdoor conditions.
Maintain a room temperature of 65-75°F and keep the soil lightly moist. Lupine seedlings are prone to damping-off if overwatered, so water only when the top inch of soil feels dry. Use a spray bottle for gentle watering to avoid disturbing the delicate stems. Fertilizer isn't necessary at this stage—lupine seeds contain enough nutrients to support early growth.
Transplant When Ready
Seedlings are ready for transplanting when they reach 3-4 inches tall and have developed 3-4 sets of true leaves. Choose a sunny outdoor location with well-draining soil, as lupines thrive in full sun and sandy or loamy soil. Dig holes twice as wide as the root ball but no deeper than the pot they came in. Lupine roots are shallow, so avoid burying them too deeply.
Space the seedlings 12-18 inches apart to allow for mature growth. Water deeply after transplanting to settle the soil and encourage root establishment. Mulch around the base with 1 inch of organic mulch to retain moisture and suppress weeds. Lupines are drought-tolerant once established, but consistent watering for the first 2 weeks helps them adjust to their new environment.
Tips & tricks for perfect lupine seed germination
A few subtle adjustments can transform your germination success rate from hit-or-miss to consistently reliable. Lupine seeds demand precision at every stage, and these refined techniques address the most common pitfalls gardeners encounter.
Scarification Precision: In Step 1, when scoring the seed coat, aim for a delicate balance—think "light sanding" rather than aggressive abrasion. I've found that using a piece of fine-grit sandpaper (around 220-grit) and making three light passes per seed creates just enough micro-fractures without compromising seed integrity. The goal is to weaken the coat enough for moisture penetration while preserving the seed's natural protective barrier. Too aggressive, and you risk damaging the embryo inside; too gentle, and dormancy persists. Test one seed first by placing it in water—if it sinks immediately, you've achieved the right level of scarification.
Cold Stratification Consistency: The 4-6 week stratification window in Step 2 requires vigilance about temperature stability. Lupine seeds are particularly sensitive to fluctuations above 40°F, which can prematurely break dormancy. I recommend placing your ziplock bag on a refrigerator shelf away from the door (where temperature swings are most pronounced) and using a small thermometer to monitor conditions. If your kitchen fridge runs warmer than 40°F, consider using a dedicated seed fridge or a cooler with ice packs. The 24-hour room temperature acclimation after stratification is equally critical—this gradual transition mimics natural spring warming and prevents osmotic shock to the seeds.
Planting Depth Science: While Step 3 instructs planting seeds ½ inch deep, the actual ideal depth depends on your seed-starting mix's texture. In heavier mixes, you might need to plant slightly deeper (up to ⅝ inch) to ensure proper soil contact, while in lightweight mixes, you can plant closer to the surface. I've had success with a simple test: press the seed gently into the soil until it's covered by the depth of one seed's diameter. This ensures consistent moisture contact without burying the seed too deeply, which can lead to rot. The 2-inch spacing between seeds is non-negotiable—crowding leads to competition for nutrients and increases damping-off risk.
Hardening Process: The gradual sun introduction in Step 4 is where many gardeners rush the process. Instead of moving seedlings directly to full sun after 7-10 days, I recommend a more conservative approach: start with 1 hour of morning sun on day 1, then add 30 minutes each subsequent day until reaching the full 2-3 hours. Lupine seedlings have tender stems that can scorch under sudden sun exposure. Monitor the leaves for any yellowing or wilting—they're telling you the plant is stressed. The 65-75°F temperature range is equally important; cooler temperatures slow the hardening process, while warmer conditions accelerate it and can lead to transplant shock.
Pro Tips for Lupine Seed Germination
- A few subtle adjustments can transform your germination success rate from hit-or-miss to consistently reliable.
- Scarification Precision: In Step 1, when scoring the seed coat, aim for a delicate balance—think "light sanding" rather than aggressive abrasion.
- Cold Stratification Consistency: The 4-6 week stratification window in Step 2 requires vigilance about temperature stability.
Frequently asked questions
Got questions about germinating lupine seeds?
You’re not alone! Here are answers to the most common queries to help you achieve that 95% success rate—no guesswork required.
How long does cold stratification take for lupine seeds?
Cold stratification typically lasts 4–8 weeks for lupine seeds. Place them in a damp paper towel or moistened peat moss inside a sealed bag in the fridge (34–40°F). Pro tip: Check seeds weekly—if they’re still dry, add a few drops of water. Patience pays off—wait until you see tiny root sprouts before planting!
Can I skip cold stratification and still germinate lupine seeds?
While possible, skipping stratification drastically reduces success rates (often below 50%). Lupine seeds have a hard outer shell that requires cold moisture to break dormancy. If you’re impatient, try scarification (lightly sanding the seed coat) as an alternative, but combine it with a short stratification period for best results.
My lupine seeds are moldy after stratification—what went wrong?
Mold is a red flag! It usually means excess moisture or poor airflow. To fix it:
- Remove seeds from the damp medium and pat them dry with a paper towel.
- Transfer them to a fresh, sterile mix (like perlite or vermiculite) in a ventilated container.
- Avoid sealing them airtight—a small gap prevents suffocation.
Do lupine seeds need light to germinate during stratification?
Nope! Darkness is key during the cold stratification phase. Seeds need consistent moisture and cool temps, not light. Once they’ve sprouted (usually after planting), move them to a bright, indirect light spot (like a sunny windowsill) to encourage healthy growth.
How deep should I plant stratified lupine seeds?
Plant lupine seeds ½ inch deep in well-draining soil. Their tiny size and delicate sprouts need just enough coverage to stay moist but not so deep they struggle to break through. Use a fine mist spray to keep soil damp (not soggy) until germination, which can take 2–4 weeks after planting.
Wrapping up and next steps
Mastering lupine seed germination through cold stratification isn’t just possible—it’s rewarding! 🌱 With the right prep, patience, and a little chilly persistence, you’ll unlock those tiny seeds’ potential for lush, thriving plants.
Now that you’ve got the blueprint, why not put it into action? Grab those seeds, set up your stratification station, and watch your garden transform before your eyes. Happy growing! 🌿
- Next step: Start with a small batch—experiment with timing and moisture to refine your technique.
- Pro tip: Document your process! Track germination rates to celebrate your wins and tweak as needed.