Tools
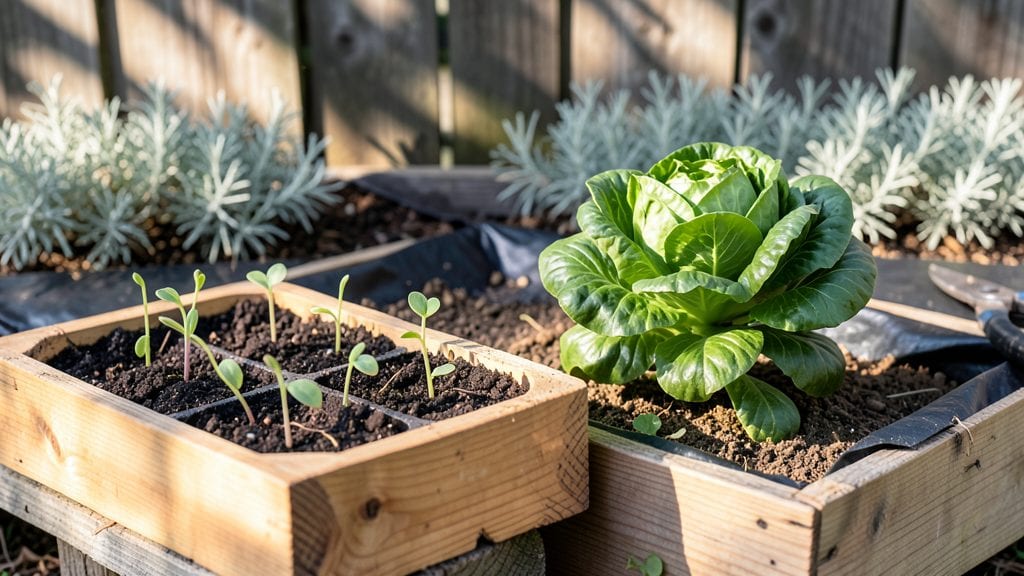
Finding quality garden seeds isn’t just about what’s on the packet—it’s about what grows from it. ✨ I’ve learned the hard way that cheap seeds with low germination rates mean wasted time and money, and I’m sharing how to pick seeds that actually perform in your garden.
The best seeds start with clear labels: look for high germination rates (85% or better), organic certification if that matters to you, and varieties suited to your zone. Heirlooms offer unique flavors but may need extra care, while hybrids often resist disease better.
I’ve had the most success with reputable suppliers like Baker Creek or Johnny’s Selected Seeds—they test germination rates annually.
Once you’ve chosen your seeds, proper storage makes all the difference. Keep them cool, dry, and in airtight containers—most stay viable for 2-5 years that way. When planting, follow the packet’s depth and spacing instructions precisely, and don’t forget to harden off seedlings before transplanting.
You’ll see those first true leaves in 7-14 days, and that’s when you know you’ve won.
This works for everything from tomatoes to annual flowers, whether you’re a beginner or a seasoned grower. The key is treating seeds like the foundation of your garden—they deserve your attention upfront. Let’s get those roots growing strong!
📚 In This Guide
- What you need
- Instructions
- Tips and common mistakes
- Wrapping up and next steps
What you need
- ● Quality Garden Seeds: 1–5 seed packets (depending on garden size) of certified organic or heirloom varieties with 90%+ germination rates.
- ● Examples: tomato, pepper, basil, lettuce, or marigold seeds (choose based on your climate and preferences).
- ● Seed Starting Supplies: Seed trays or biodegradable pots (10–20 units, depending on quantity).
- ● High-quality seed starting mix (sterilized, peat-free, or coconut coir-based).
- ● Organic potting soil (5–10 gallons) for transplanting.
- ● Tools: Garden trowel or small hand shovel.
- ● Spray bottle (for gentle watering).
- ● Plant labels (biodegradable or reusable) + marker.
- ○ Gloves (optional but recommended for hygiene).
- ● Grow lights or sunlight window (for indoor seed starting).
- ● Heating mat (for cold climates, speeds up germination).
- ● Humidity dome or plastic wrap (to retain moisture).
- ● Compost or organic fertilizer (for nutrient boost after sprouting).
- ● Seed storage containers (to preserve unused seeds for next season).
How to select and store quality garden seeds for maximum germination
Here’s how I ensure every seed I plant has the best chance to thrive—no wasted packets or weak starts.
🌱 Step 1: Choose Seeds with High Germination Rates
Look for seed packets labeled with a germination rate of 85% or higher. I always check the back of the packet for this percentage—it tells you how many seeds will actually sprout. Organic, heirloom, and reputable brand seeds tend to have better rates than cheap, generic ones.
Freshness matters too. Seeds lose viability over time, so pick packets with a current or next-year planting date. If a packet says "best planted in 2024," buying it in 2023 gives you the longest shelf life. Avoid seeds older than a year unless you’re okay with lower success rates.
🌿 Step 2: Test Seed Viability Before Planting
Not all seeds germinate as promised, so I do a quick paper towel test before committing to a full planting. Take a few seeds, place them between two damp paper towels, and fold them into a sealed bag. Store it in a warm spot (around 70-75°F) for 3-5 days. If most seeds sprout, they’re ready to plant.
This step saves time and frustration. If fewer than half sprout, I either replant with fresh seeds or adjust my expectations. It’s a small effort that prevents wasted effort in the garden.
🪴 Step 3: Store Seeds Properly for Long-Term Use
Keep seeds in a cool, dark, and dry place—like a sealed container in the fridge or a cool basement. Moisture and heat are the enemies of seed longevity. I use small, airtight containers with silica gel packets to absorb any excess humidity.
Label each container with the seed type and planting date so you don’t forget. If stored correctly, many seeds stay viable for 2-5 years, depending on the variety. For example, tomato seeds last about 4 years, while onion seeds may only stay good for 1 year. Always check the packet for specific storage tips.
⏰ Step 4: Plant at the Right Time for Best Results
Timing is everything. Plant seeds when the soil temperature matches the optimal range for the species—usually 60-70°F for most vegetables. Use a soil thermometer to check, especially if your growing season is short. I wait until the last frost date has passed and the ground has warmed up before sowing outdoor crops.
For indoor starts, begin seeds 6-8 weeks before the last frost so they’re ready to transplant when conditions improve. If you’re unsure, err on the side of starting too early—you can always move seedlings outside later, but waiting too long means stunted growth.
💧 Step 5: Maintain Ideal Conditions After Planting
Once seeds are in the soil, keep them consistently moist but not soggy. Overwatering can cause seeds to rot before they sprout, while underwatering prevents germination. I use a spray bottle to mist the soil lightly until I see the first signs of sprouts.
Place containers in a warm, bright spot (like a sunny windowsill or under grow lights) to encourage quick germination. Most seeds need light to germinate, but a few (like peas) prefer darkness—always check the packet instructions. Once seedlings emerge, thin them to 1-2 inches apart to prevent competition.
Tips & tricks for perfect seed germination
Small details make all the difference when it comes to getting your seeds to sprout reliably. Here's what I've learned after years of trial and error in the garden.
Seed Selection Strategy: Beyond just checking the 85% germination rate in Step 1, pay attention to the seed company's reputation. I've found that companies specializing in heirloom or organic seeds often provide more detailed growing instructions on their packets. Look for seed varieties that are well-suited to your specific climate zone—local nurseries usually carry the best adapted seeds. For example, if you're in a short-season area, choose fast-maturing varieties that can complete their life cycle before frost.
Paper Towel Test Precision: When doing the paper towel test in Step 2, make sure your towels are damp but not soaking wet—think of them as wrung-out sponges. Too much moisture can cause mold before germination. I place the sealed bag in a plastic container to contain any potential mess, and I always label it with the seed type and date. The 70-75°F range is ideal, but if your home runs cooler, consider using a seedling heat mat set to low for the test. You'll notice sprouts emerge more consistently when conditions are just right.
Storage Environment Secrets: For Step 3's storage advice, I've found that the fridge's crisper drawer (not the freezer section) provides the perfect cool, dark environment. If you don't have silica gel packets, you can use small packets of uncooked rice to absorb moisture. I organize my seeds by planting season—spring, summer, and fall—so I can quickly locate what I need. Remember that some seeds, like lettuce, have shorter viability (often just 1 year), while others like beans can last 3-4 years when stored properly.
Soil Temperature Troubleshooting: In Step 4, if your soil thermometer shows temperatures below 60°F, don't rush planting—wait for warmer conditions. I've learned that seeds planted in cold soil often rot before sprouting. For indoor starts, I use a heat mat set to 75°F under my seed trays to help maintain that optimal 60-70°F range. This extra warmth gives seedlings a strong start, especially for cool-season crops like broccoli and cabbage that need consistent temperatures to germinate properly.
Pro Tips for Quality Garden Seeds
- Small details make all the difference when it comes to getting your seeds to sprout reliably.
- Seed Selection Strategy: Beyond just checking the 85% germination rate in Step 1, pay attention to the seed company's reputation.
- Paper Towel Test Precision: When doing the paper towel test in Step 2, make sure your towels are damp but not soaking wet—think of them as wrung-out sponges.
Frequently asked questions
Got questions about choosing or using quality garden seeds?
You’re not alone! Here are answers to the most common queries to help you grow a thriving garden with confidence.
What makes a seed "high-quality" for gardening?
High-quality seeds boast high germination rates (typically 80%+), strong disease resistance, and genetic purity. Look for certifications like USDA Organic or NOP, and check the seed packet for expiration dates—older seeds (over 2 years) may have lower viability. Reputable brands also test for vigor, ensuring robust starts.
How do I know when to plant seeds based on my climate zone?
Timing depends on your USDA Hardiness Zone and the plant’s needs. Most seed packets include sowing instructions (e.g., "plant after last frost"). For cooler zones (3–5), start cold-hardy crops like peas or spinach in early spring. Warmer zones (7–10) can direct-sow heat lovers (tomatoes, peppers) after March. Use a local planting calendar or moon phase guides for extra precision!
Are heirloom seeds worth the extra cost over hybrid seeds?
It depends on your goals! Heirloom seeds offer genetic diversity, save-able seeds for future years, and unique flavors—but may require more care. Hybrid seeds often yield higher disease resistance and uniformity but produce sterile offspring. For beginners, hybrids are low-maintenance; for sustainability or flavor, heirlooms shine. Pro tip: Buy from trusted sellers like Baker Creek or High Mowing Seeds for quality.
My seeds sprouted but died—what went wrong?
Common culprits include overwatering (root rot), underwatering (dried-out seeds), or poor drainage. Check soil temperature (most seeds need 60–85°F), light exposure (some need darkness to germinate), and container depth (roots need room!). If issues persist, test your soil’s pH (6.0–7.0 is ideal) or try a seedling heat mat for stubborn sprouts.
Can I save seeds from my homegrown veggies for next year?
Yes! Most open-pollinated (heirloom) varieties can be saved, but hybrids usually won’t grow true. Let produce fully ripen on the plant, then dry seeds in a cool, dark place. Store in airtight containers with silica packets to prevent moisture. Label seeds with the variety and year—test a few before planting your entire crop to check viability!
Wrapping up and next steps
Investing in quality garden seeds is the first step toward a thriving, bountiful garden—one where every plant has the best chance to flourish from seed to harvest. 🌱 High-germination varieties ensure faster growth, stronger yields, and less wasted effort, making your gardening journey both rewarding and efficient.
Now that you’re armed with the right knowledge, it’s time to take action!
🌱 Your Next Steps:
- Order seeds from trusted suppliers or save your own from heirloom plants.
- Test germination rates with a simple paper towel experiment before planting.
- Plan your garden layout—consider spacing, sunlight, and companion plants for optimal growth.
Your green thumb is closer than ever—start planting with confidence! 🌿