Pruning
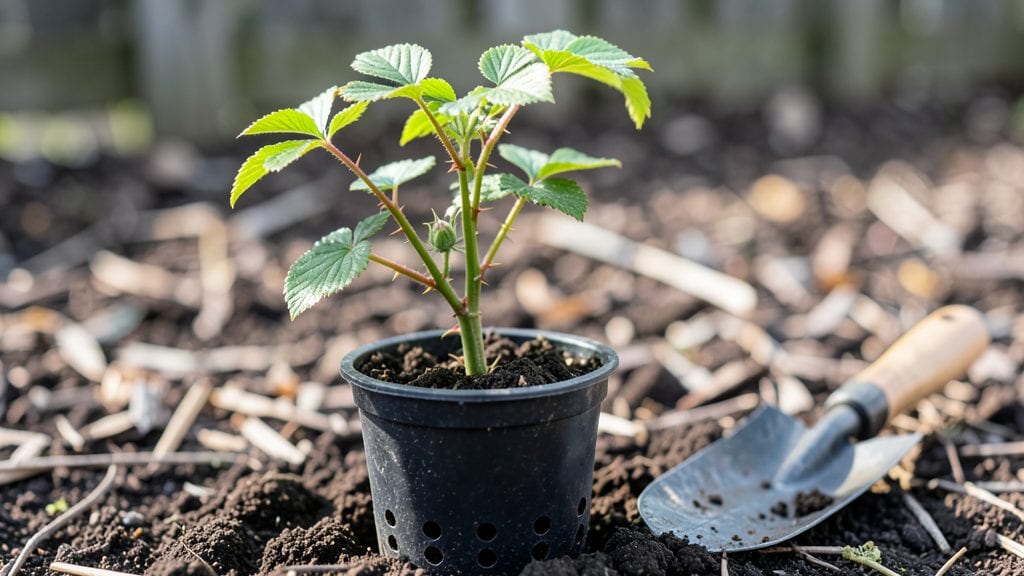
Planting a raspberry bush seedling starts with the right spot and soil—where it thrives becomes your year-round privacy hedge. 🌿 I learned the hard way that skipping soil prep means struggling with weak growth, but the right mix of compost and mulch gives you a sturdy plant that spreads beautifully.
The layered root system these bushes develop means deeper, more stable growth than most shrubs, and once established, they handle drought and wind like champions.
You’ll need a sunny location with at least 6 hours of direct light daily, well-draining soil, and space to spread—6 feet apart for summer-bearing varieties, 4-5 feet for everbearing. The key difference between types?
Summer-bearing raspberries produce one big harvest, while everbearing types give smaller crops twice a year. Both need the same care, but everbearing varieties reward patience with consistent fruit.
After planting, keep the soil moist but not soggy—1 inch of water per week is ideal—and mulch heavily to protect roots and retain moisture. The first year is all about root development, so resist the urge to prune.
By spring, you’ll see strong new canes ready to support those lush, thornless leaves that block views while adding beauty to your yard.
Common mistakes? Overwatering, crowding plants too close, or ignoring soil quality. Raspberries hate soggy feet, so raised beds or slopes work well.
And yes, those thorns might seem intimidating, but the right placement turns them into a natural barrier that’s impossible to ignore—just like the berries you’ll harvest in just a few seasons.
📚 In This Guide
- What you need
- Instructions
- Tips and common mistakes
- Wrapping up and next steps
What you need
- ● Raspberry seedling: 1 healthy, disease-free Rubus idaeus (red, black, or purple raspberry) seedling with visible roots (bare-root or potted).
- ● Garden soil: 1 bag (50 lbs) of well-draining, slightly acidic soil (pH 5.5–6.5). Mix with compost (20% by volume) for nutrients.
- ● Container or trench: Option 1: 1 large pot (12"+ deep, 18"+ diameter) with drainage holes.
- ● Option 2: 1–2 ft wide, 12"+ deep trench (for in-ground layering).
- ● Pruning tools: 1 pair of clean, sharp pruners (sterilized with rubbing alcohol).
- ● 1 small hand saw (for thicker stems, if needed).
- ● Rooting hormone: 1 small bottle (e.g., Rootone or Clonex) to boost root growth.
- ● Mulch: 2–3 inches of straw or wood chips to retain moisture and suppress weeds.
- ● Watering can or hose: With a gentle spray nozzle for hydration.
- ● Support stakes: 2–3 bamboo or metal stakes (5–6 ft tall) for training canes.
- ● 1 drip irrigation kit for consistent moisture (especially in hot climates).
- ● 1 soil moisture meter to monitor hydration levels.
- ● 1 shade cloth (30–50%) to protect seedlings from intense sun during establishment.
- ● 1 fertilizer (balanced 10-10-10 or organic options like fish emulsion).
- ● 1 plant tag to label your raspberry variety and planting date.
Step-by-Step guide to establishing a raspberry bush seedling
Here's how to give your raspberry seedling the strong foundation it needs for lush, productive growth.
🌱 Step 1: Prepare the Soil and Planting Site
Choose a location with at least 6-8 hours of sunlight daily and well-draining soil. Raspberries thrive in slightly acidic to neutral soil with a pH between 5.5-7.0. If your soil is heavy clay, amend it with 2-3 inches of compost mixed into the top 12 inches of soil to improve drainage and fertility.
Dig a hole twice as wide as the seedling's root ball but only as deep as the container it came in. Loosen the sides of the hole with a garden fork to encourage root spread. This prevents compaction that can strangle young roots. Gently remove the seedling from its container and tease apart any circling roots with your fingers.
💧 Step 2: Plant and Water Deeply
Place the seedling in the hole so the top of the root ball sits 1-2 inches below soil level. This ensures stability and encourages new root growth from the buried stem. Backfill with native soil, pressing lightly to eliminate air pockets but not compacting the roots. Water immediately after planting to settle the soil around the roots.
Apply 1-2 gallons of water directly to the base of the plant, letting it soak in completely. The soil should feel moist 6 inches deep—use your finger to check. Mulch with 2-3 inches of organic mulch around the base, keeping it 3 inches away from the stem to prevent rot. This conserves moisture and regulates soil temperature.
☀️ Step 3: Provide Support and Prune for Structure
Install a 5-foot tall trellis or stake system immediately to support the plant as it grows. Raspberries need vertical support to prevent sprawling and improve air circulation, which reduces disease risk. Use soft ties or fabric strips to attach the main canes to the trellis, avoiding wire or anything that could damage the bark.
Prune the seedling right after planting to encourage a strong framework. Remove any dead or damaged canes, and trim back the remaining canes by one-third to stimulate bushier growth. Watch for new shoots emerging from the base—these are your primary canes. Thin them to 4-6 of the strongest to focus the plant’s energy on fewer, healthier stems.
🌿 Step 4: Maintain Through the First Growing Season
Water your raspberry seedling 1-2 times per week, depending on rainfall, ensuring the soil stays consistently moist but not waterlogged. Young plants are particularly sensitive to drought, so check the soil 2 inches deep before watering. Drip irrigation or soaker hoses are ideal—they deliver water directly to the roots without wetting the foliage, reducing disease risk.
Fertilize lightly in early spring with a balanced, slow-release fertilizer (10-10-10 ratio) applied at half the recommended rate. Avoid high-nitrogen fertilizers, which promote leafy growth at the expense of fruit production. Monitor the plant for pests like spider mites or aphids, and treat any issues promptly with neem oil or insecticidal soap to protect the young plant.
⏰ Step 5: Winterize for Long-Term Health
As temperatures drop below 40°F, reduce watering but keep the soil slightly moist. Raspberries are hardy, but young plants benefit from extra protection. Apply an additional 2-3 inches of mulch around the base in late fall to insulate the roots and prevent temperature fluctuations. This helps the plant establish a deeper root system before winter.
Prune again in late winter or early spring, just before new growth begins. Remove any dead or weak canes, and trim back the remaining canes by one-third again. This encourages vigorous new growth and ensures the plant directs its energy toward producing fruit rather than repairing damaged or weak stems. Your raspberry will reward you with strong, productive canes for years to come.
Tips & tricks for establishing a thriving raspberry bush seedling
These foundational insights will help you cultivate a raspberry bush that thrives for seasons—avoiding the common pitfalls that sabotage new plantings.
Soil Preparation Secret: Before amending your soil with compost, conduct a simple pH test using a kit from your garden center. Raspberries prefer that 5.5-7.0 range, and adjusting now prevents future struggles. If your soil tests below 5.5, mix in 1 cup of lime per 10 square feet when you incorporate the 2-3 inches of compost. This creates the perfect balance right from planting day.
Root System Strategy: When teasing apart circling roots in Step 1, don't just pull—they'll tear. Instead, gently work your fingers between the roots and the root ball, using a small garden knife if needed. This encourages outward root growth rather than creating a tangled mess that strangles your seedling. The goal is to mimic natural root spread, not force it.
Watering Wisdom: That 1-2 gallons of water in Step 2 should be applied slowly over 10-15 minutes to prevent runoff. Use a watering wand or soaker hose to direct the flow to the base, avoiding the foliage. Wet leaves attract fungal diseases, and raspberries are particularly susceptible. Think "root zone hydration" rather than surface watering—this builds deep, resilient roots from the start.
Pruning Precision: When trimming back canes by one-third in Step 3, make clean cuts at a 45-degree angle just above a bud or lateral branch. This encourages outward growth rather than upward. I always prune on a dry day when the plant is dormant (early morning or late afternoon) to minimize stress. The 4-6 strongest canes you keep should be evenly spaced around the plant for balanced growth.
Pro Tips for Raspberry Bush Seedling
- These foundational insights will help you cultivate a raspberry bush that thrives for seasons—avoiding the common pitfalls that sabotage new plantings.
- Soil Preparation Secret: Before amending your soil with compost, conduct a simple pH test using a kit from your garden center.
- Root System Strategy: When teasing apart circling roots in Step 1, don't just pull—they'll tear.
Frequently asked questions
Got questions about growing a raspberry bush seedling? You’re not alone!
Here are some of the most common concerns—and their answers—to help you cultivate a thriving, privacy-proofing raspberry hedge.
When is the best time to plant a raspberry bush seedling?
The ideal time to plant raspberry seedlings is in early spring (after the last frost) or early fall. This gives roots time to establish before extreme weather. Avoid planting in summer heat or winter frost, as young seedlings are delicate. If you must plant in late fall, choose a mild-climate zone or protect the seedling with mulch.
How deep should I plant the raspberry bush seedling?
Plant the seedling so the root crown (where the roots meet the stem) sits just above the soil line—never buried. Dig a hole twice as wide as the root ball but only as deep. Backfill with native soil mixed with compost for better drainage. Over-deep planting can suffocate the roots, while planting too shallow risks exposure to temperature swings.
Why are my raspberry seedlings turning yellow or wilted?
Yellowing leaves (chlorosis) often signal nutrient deficiency (like nitrogen or magnesium) or overwatering. Wilting can mean underwatering, root rot (from soggy soil), or transplant shock. Check soil moisture—raspberries need 1–1.5 inches of water weekly. If leaves are yellow with green veins, it’s likely iron deficiency; amend soil with chelated iron or compost.
Can I grow raspberries from seed instead of buying seedlings?
While possible, growing raspberries from seed is tricky—most store-bought berries are hybrids that won’t reproduce true to type. Seedlings may take 3–5 years to fruit and could produce wild, tart berries. For reliable privacy hedges, buy certified bare-root or potted seedlings from nurseries. If you’re experimenting, collect seeds from organic berries and cold-stratify them for 60–90 days before planting.
How do I prune a raspberry bush seedling for a dense hedge?
Prune new seedlings lightly—just remove dead or crossing branches to encourage airflow. For a layered hedge, wait until the plant is 1–2 years old, then prune old canes (those that fruited last year) to the ground in late winter. Leave new canes (thin, green shoots) to grow. Use sharp shears to make clean cuts at a 45-degree angle just above a bud.
Wrapping up and next steps
Growing a raspberry bush seedling with a layered root system is a rewarding way to create a lush, year-round privacy screen—plus, you’ll enjoy fresh berries as a bonus! 🌱 With the right tools, patience, and pruning techniques, your raspberry bushes will thrive, offering both beauty and functionality.
Now that you’re equipped with the know-how, roll up your sleeves and get planting! Start by selecting a healthy seedling, then follow the layered root method to encourage strong growth. Happy gardening!