Vegetables
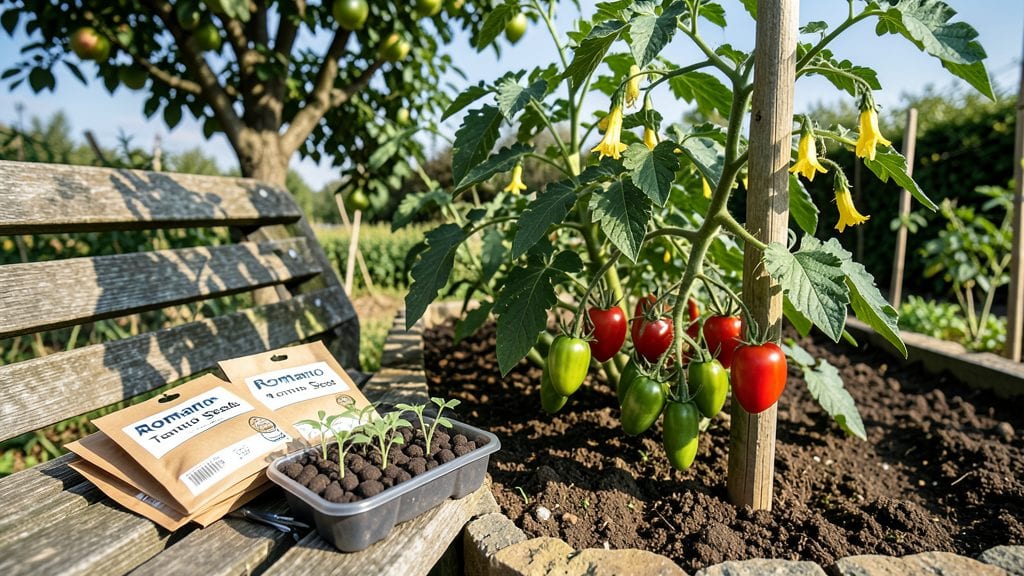
Saving those romano tomato seeds from your best homegrown fruit means next year's harvest could taste even more intense than this year's. I learned the hard way—letting seeds dry too fast or too slow ruins their viability, and you don’t want to waste a season’s worth of effort.
The key is patience and precision, turning ripe tomatoes into next year’s garden starters without losing that signature tang.
You’ll need just a few simple tools: ripe tomatoes, a bowl of water, some cheesecloth or paper towels, and a warm, dry spot.
The process takes about 2 weeks from harvest to dry seeds, but the payoff is seeds that germinate reliably and produce plants true to the parent’s bold, elongated shape.
Romano tomatoes thrive in full sun and well-drained soil, so saving seeds means you’re also securing the perfect match for your growing conditions.
Once dried, these seeds will give you plants that mature faster and resist cracking better than store-bought varieties. The first flush of glossy green leaves appears within 10-14 days after planting, and by midsummer, you’ll be snapping off those signature long, meaty fruits.
The flavor? Unmatched—bright, slightly acidic, and perfect for slicing or sun-drying for winter.
This method works in zones 5-10, though timing shifts slightly with your first frost date. Start drying seeds in late summer when tomatoes are fully ripe but before cold sets in.
Whether you’re a seasoned gardener or just starting, saving Romano seeds is a game-changer for flavor consistency and garden pride.
📚 In This Guide
- What you need
- Instructions
- Tips and common mistakes
- Wrapping up and next steps
What you need
- ● Fresh, ripe Romano tomatoes – Aim for at least 5-10 for a good seed yield.
- ● Sharp knife or pruning shears – For cleanly slicing open the tomatoes.
- ● Large bowl or container – To hold tomato pulp and water (preferably glass or food-grade plastic).
- ● Fine-mesh strainer or cheesecloth – For separating seeds from gel (a 4-inch strainer works well).
- ● Paper towels or coffee filters – To lay seeds out for drying (2-3 sheets per batch).
- ● Small plates or seed envelopes – For storing dried seeds (label them with the year!).
- ● Spray bottle with water – To lightly mist seeds if the air is too dry.
- ● Permanent marker – For labeling seed packets.
- ● Glove – To protect hands from tomato acids (especially if you have sensitive skin).
- ● Fan or dehumidifier – Speeds up drying in humid climates.
- ● Desiccant packets – For long-term seed storage (keeps moisture out).
- ● Notebook – To track tomato varieties and germination notes.
Instructions for drying romano tomato seeds properly
Here's how to save seeds from your favorite Romano tomatoes while keeping them viable for next season.
Harvest and Prepare Mature Tomatoes
Select tomatoes that are fully ripe and slightly soft to the touch—these yield the most seeds. Cut them open and scoop out the jelly-like pulp along with the seeds into a bowl. You'll need about 4 ripe tomatoes to yield enough seeds for drying. The pulp contains fermenting enzymes that help clean the seeds naturally.
Add 2 cups of water to the bowl and stir well. Let the mixture sit at room temperature for 2-3 days, stirring once daily. You'll see the seeds sink to the bottom while the pulp ferments and rises to the top. This process removes the gelatinous coating that can inhibit germination.
Rinse and Separate the Seeds
After fermentation, pour the mixture through a fine-mesh strainer or cheesecloth to separate the seeds from the pulp. Rinse the seeds under lukewarm water until the water runs clear—this removes any remaining pulp residue. The seeds should feel slightly gritty between your fingers when dry.
Spread the cleaned seeds on a paper towel in a single layer, ensuring they don’t overlap. Place the towel on a flat surface or drying rack in a well-ventilated area away from direct sunlight. This prevents overheating, which can damage viability. You’ll need about 1-2 hours for them to air-dry completely.
Store Seeds for Long-Term Viability
Once the seeds are fully dry, transfer them to a small envelope or airtight container. Label it with the tomato variety and the harvest date—this helps track freshness. Store the container in a cool, dark place, like a pantry or seed vault, where temperatures stay between 40-50°F.
Seeds stored this way remain viable for 3-5 years, though germination rates drop slightly after the first year. Check the moisture level occasionally—if seeds feel damp, return them to the drying process immediately to prevent mold. Properly dried seeds should feel light and crisp to the touch.
Test Germination Before Planting
Before using saved seeds, conduct a simple germination test to confirm viability. Moisten a paper towel and place 10 seeds in a single layer on it. Fold the towel and place it in a sealed plastic bag. Keep the bag in a warm, dark spot (70-75°F) for 7-10 days. Check daily for sprouts—50% or more should germinate for good viability.
If fewer than half sprout, store the remaining seeds in the freezer for 1-2 weeks to reset dormancy, then retest. This step ensures you only plant seeds with the best chance of growing into healthy Romano tomatoes. Discard any seeds that fail to germinate after multiple tests.
Tips & tricks for perfectly drying romano tomato seeds
Preserving tomato seeds properly is an art that ensures next season's garden thrives. Here's how to maximize success with these essential tips.
Fermentation is Key: The 2-3 day fermentation process in Step 1 is critical for removing the gelatinous coating that can inhibit germination. Stirring once daily helps maintain even fermentation and prevents mold. If you're short on time, you can reduce fermentation to 1-2 days, but germination rates may be slightly lower. Use a spoon to gently break up any mold that forms on the surface—just don't stir it into the mixture.
Rinse Thoroughly: In Step 2, rinsing seeds until the water runs clear is essential. Any remaining pulp can cause seeds to stick together during drying or develop mold in storage. For extra cleanliness, use a fine-mesh strainer to catch any tiny seed fragments that might slip through during the initial straining process. This ensures you're only drying pure seeds.
Drying Conditions Matter: The 1-2 hour drying time in Step 2 assumes moderate humidity and good air circulation. If your kitchen feels particularly humid, extend drying to 2-3 hours or use a fan on low setting to speed up the process. Avoid direct sunlight or heat sources—even gentle warmth can overheat seeds and reduce viability. A well-ventilated area with indirect light is ideal.
Storage Environment: Maintaining the 40-50°F storage temperature in Step 3 is crucial for long-term viability. If your pantry occasionally exceeds 50°F, consider using a refrigerator instead. Store seeds in small portions—separate by year if saving multiple harvests. This prevents moisture buildup and makes it easier to track germination rates over time.
Pro Tips for Romano Tomato Seeds
- Preserving tomato seeds properly is an art that ensures next season's garden thrives.
- Fermentation is Key: The 2-3 day fermentation process in Step 1 is critical for removing the gelatinous coating that can inhibit germination.
- Rinse Thoroughly: In Step 2, rinsing seeds until the water runs clear is essential.
Frequently asked questions
Got questions about growing and preserving romano tomato seeds? You’re not alone! Here are answers to the most common queries to help you succeed—from germination to drying.
How long does it take for romano tomato seeds to germinate?
Romano tomato seeds typically germinate in 5–14 days when kept in warm (70–85°F), moist conditions. For faster sprouting, soak seeds overnight before planting. Pro tip: Use a seedling heat mat if your climate is cool!
What’s the best way to dry romano tomato seeds?
Ferment the seeds in tomato juice for 3–5 days, then rinse and spread them on a paper towel in a warm, dry place (avoid direct sunlight). They’re ready when crispy—usually 3–7 days. Store in a cool, dark spot for long-term viability.
Can I save seeds from store-bought romano tomatoes?
Yes! But ensure the tomato is heirloom or open-pollinated (not hybrid). Avoid seeds from sauces or processed tomatoes, as they may be sterilized. Fresh, homegrown romano tomatoes are your best bet for reliable seeds.
How do I know if my dried romano seeds are still viable?
Test viability by placing a few seeds on a damp paper towel in a sealed bag. If 50%+ sprout in 7–10 days, they’re good to plant. Old seeds (over 2 years) may need a soaking boost to encourage germination.
Are romano tomato seeds different from regular tomato seeds?
Not structurally, but romano seeds come from long, oblong tomatoes prized for their bold, savory flavor. Their drying process is the same, but focus on preserving the seed’s genetic traits by using fresh, disease-free fruit.
Wrapping up and next steps
Growing romano tomato seeds from dried tomatoes is a rewarding way to preserve heirloom flavors and ensure future harvests! With the right techniques—like proper drying, storage, and stratification—you’ll unlock the potential for vibrant, flavorful plants.
Remember, patience and care are key, but the payoff is worth it: homegrown tomatoes bursting with that classic romano tang.
Ready to take the next step? Start small—dry a few tomatoes this season, experiment with germination, and soon you’ll be sharing your own romano tomato seeds with fellow gardeners. Happy growing! 🌱