Aphids
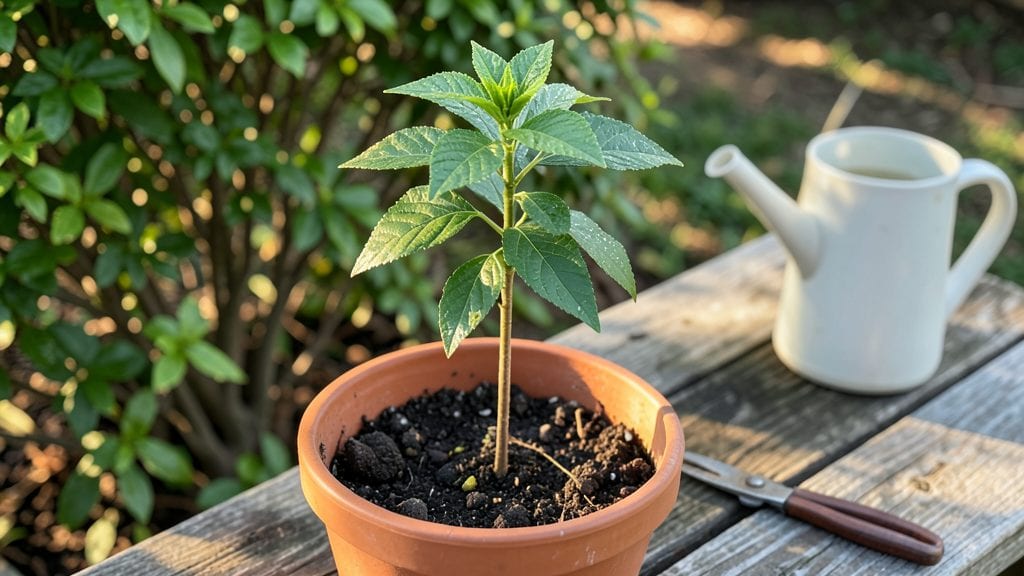
The roselle hibiscus seedling thrives when you skip the cold stratification entirely—no chilling required for these tropical bloomers. 🌿 I’ve grown roselle from seed for three summers now, and the key is mimicking its natural warm, humid conditions from day one.
The first true leaves appear in just 10-14 days if you keep the soil consistently warm and moist.
Most people assume roselle needs the same fuss as other hibiscus varieties, but it’s actually one of the easiest tropical plants to start.
You’ll need a seed-starting mix that drains well but holds moisture, a heat mat (or a sunny windowsill in warm climates), and patience—these seedlings grow fast once they break through the soil.
The real magic happens when you transplant them outdoors after the last frost, where they’ll reward you with bold red calyces perfect for tea and cooking.
Leggy seedlings are the biggest red flag, but a simple trick fixes it: move them under brighter light immediately. Slow growth usually means cooler soil—keep those roots warm with a bottom heat source or move the pot to a sunnier spot.
By midsummer, you’ll have plants tall enough to support their own weight, with vibrant blooms that attract hummingbirds and butterflies.
Whether you’re growing roselle in pots on a balcony or in garden beds, the care routine stays the same: full sun, rich soil, and regular watering.
The edible flowers and calyces add a tangy twist to drinks and dishes, making this more than just a pretty plant—it’s a functional tropical treasure. Let’s get those seeds sprouting!
📚 In This Guide
- What you need
- Instructions
- Tips and common mistakes
- Wrapping up and next steps
What you need
- ● Roselle hibiscus seeds: 5–10 high-quality, organic seeds (ensure they’re fresh for best germination).
- ● Seed-starting mix: 2–3 cups of well-draining, sterile potting soil (look for a mix labeled for seedlings or tropical plants).
- ● Containers: 3–5 small pots (3–4 inches in diameter) or
- ● A seed tray with individual cells (for easier transplanting).
- ● Spray bottle: 8–12 oz with a fine mist nozzle (for gentle watering).
- ● Clear plastic wrap or dome: 1 sheet (to create a humidity tent).
- ● Grow lights or sunny windowsill: Access to 6–8 hours of warm light daily (south-facing window or LED grow lights work best).
- ● Plant labels: Small markers or sticks to track seedlings (trust us, it helps!).
- ○ Heat mat (optional): A seedling mat set to 75–80°F (24–27°C) to speed up germination.
- ● Fertilizer: A diluted, water-soluble fertilizer (like fish emulsion or 5-5-5) for after sprouting.
- ● Tweezers: For delicate seed handling (if seeds are tiny or dust-like).
- ○ Humidity tray (optional): A shallow tray with pebbles and water to boost moisture levels.
Step-by-Step instructions for germinating roselle hibiscus seedlings
Here's how I reliably coax roselle hibiscus from seed—no cold treatment needed.
🌱 Step 1: Prepare Containers and Warm Soil Mix
Fill four 3-inch diameter biodegradable pots with a mix of 50% peat moss and 50% perlite. Roselle seeds need warmth to germinate, so I pre-warm the mix in a microwave for 2-3 minutes until it reaches 85°F. This mimics tropical soil conditions and speeds up sprouting.
Press the mix down gently to remove air pockets, then create a shallow dimple in each pot—just enough to cradle a single seed. The key here is keeping the mix loose but stable enough to support tender seedlings. I like to tap the pots lightly on the counter to settle everything evenly.
💧 Step 2: Plant and Moisture-Seal for Germination
Place one roselle seed in each dimple, pressing it down just enough to make contact with the soil but not burying it. Cover the seed with a thin layer of the warm mix—about 1/8 inch deep. Too deep, and the seedling will struggle to reach light; too shallow, and it may dry out.
Mist the surface with a spray bottle until the mix feels damp but not saturated. Then, cover each pot with a clear plastic dome or wrap them in plastic wrap to create a greenhouse effect. Place them in a warm spot—75-85°F—like on top of a refrigerator or near a heat mat. Germination should occur in 10-14 days.
☀️ Step 3: Introduce Gentle Light and Humidity
Once the first true leaves appear—those are the second set after the initial seed leaves—remove the plastic cover immediately. Roselle seedlings are sensitive to excess moisture once they break the surface. Place the pots under a grow light set to 12-14 hours of light daily, keeping it 4-6 inches above the seedlings.
You'll notice the seedlings lean toward the light at first—that's normal. Rotate the pots a quarter turn daily so they grow straight and sturdy. Keep the soil lightly moist; let the top inch dry out slightly between waterings. Overwatering now can cause damping-off, a fungal disease that turns seedlings to mush overnight.
🌿 Step 4: Transplant and Harden Off Before Outdoor Move
After 4-6 weeks, when seedlings have 3-4 sets of true leaves and are about 4 inches tall, it's time to transplant. Fill a 5-gallon container with a mix of 60% potting soil, 20% compost, and 20% perlite for drainage. Dig a hole twice as wide as the seedling's root ball and place it in, firming the soil gently around the base.
Move the container to a shaded outdoor spot for 1 week to acclimate. Gradually increase sun exposure over 7-10 days, watching for signs of stress like wilting or yellowing leaves. Roselle thrives in full sun, but sudden exposure can shock the plant. Once hardened off, they'll reward you with vibrant growth and eventual blooms.
Tips & tricks for perfect roselle hibiscus seedling germination
Here's what I've learned after helping roselle seeds break through their tough shells—these tricks make all the difference.
The Heat Factor: That 2-3 minute microwave warming of your soil mix is non-negotiable. I've tried room-temperature mixes, and germination takes twice as long. Use a microwave-safe bowl and stir the mix halfway through to ensure even heating. The goal is 85°F throughout—stick a thermometer in if you're unsure. Too hot can cook the seeds, too cool won't trigger germination.
Seed Placement Precision: In Step 2, when creating those dimples, aim for a depth where the seed sits just below the surface but still makes contact with the warmest part of the mix. I've found that pressing too firmly can actually prevent sprouting—just enough pressure to make contact works best. The seed should look like it's nestled in a cradle, not buried.
Light Management Strategy: Once those first true leaves appear, resist the urge to rush into full light exposure. Start with 4-6 hours of grow light daily during Step 3, then gradually increase to 12-14 hours over 3-4 days. This slow transition prevents the seedlings from getting sunburned. I've seen seedlings collapse when moved too quickly from plastic cover to bright light.
Transplant Timing Secret: The 4-6 week mark for transplanting is flexible—watch for those 3-4 sets of true leaves and 4-inch height, not just the calendar. I've transplanted early and had leggy, weak plants that struggled. If your seedlings are smaller but have the right leaf count, wait another week. The goal is sturdy stems that can support themselves after transplanting.
Pro Tips for Roselle Hibiscus Seedling
- Here's what I've learned after helping roselle seeds break through their tough shells—these tricks make all the difference.
- The Heat Factor: That 2-3 minute microwave warming of your soil mix is non-negotiable.
- Seed Placement Precision: In Step 2, when creating those dimples, aim for a depth where the seed sits just below the surface but still makes contact with the warmest part of the mix.
Frequently asked questions
Got questions about growing roselle hibiscus seedlings?
You’re not alone! Here are answers to the most common concerns—from germination quirks to troubleshooting tips.
How long does it take for roselle hibiscus seeds to germinate?
Roselle hibiscus seeds typically sprout within 7–21 days under ideal conditions (warmth, moisture, and indirect light). If your seeds haven’t sprouted after 3 weeks, gently check for mold or rot—discard any suspicious seeds and replant fresh ones. Pro tip: Soak seeds overnight before planting to speed up germination!
What’s the best temperature for germinating roselle hibiscus seeds?
These tropical seedlings thrive in warmth (70–85°F or 21–29°C). Use a seedling heat mat if your home runs cooler, or place the tray near a sunny window. Avoid cold drafts—roselle seeds hate chilly conditions and may refuse to sprout. A mini greenhouse or plastic wrap can help trap heat and humidity.
Why are my roselle hibiscus seedlings turning yellow or wilting?
Yellowing leaves often signal overwatering or poor drainage. Let the top inch of soil dry out between waterings, and ensure pots have drainage holes. Wilting can also mean underwatering or root stress. Check for pests like aphids (common on hibiscus!) and adjust light—too much direct sun can scorch tender seedlings.
Can I grow roselle hibiscus from store-bought dried flowers?
Yes! Save the plump, unopened calyces from dried roselle flowers, clean them, and let them dry completely. The seeds inside are viable—just plant them like fresh seeds. Bonus: This is a great way to propagate heirloom varieties!
How do I transplant roselle seedlings without shocking them?
Wait until seedlings have 2–3 true leaves and harden them off for 5–7 days by gradually exposing them to outdoor conditions. Use a well-draining potting mix (roselle hates soggy roots!) and transplant in the early morning or evening to avoid stress. Water thoroughly after transplanting to help roots establish.
Wrapping up and next steps
Growing a roselle hibiscus seedling without cold stratification is totally doable—just follow the right steps! With the right materials, patience, and a little care, you’ll soon be watching those vibrant tropical blooms thrive. Whether you’re a seasoned gardener or a curious beginner, this process is rewarding and so satisfying.
Ready to take the next step? Start with just one seedling and experiment with different conditions—soon, you’ll have a lush, thriving roselle plant! 🌱✨