
Propagation
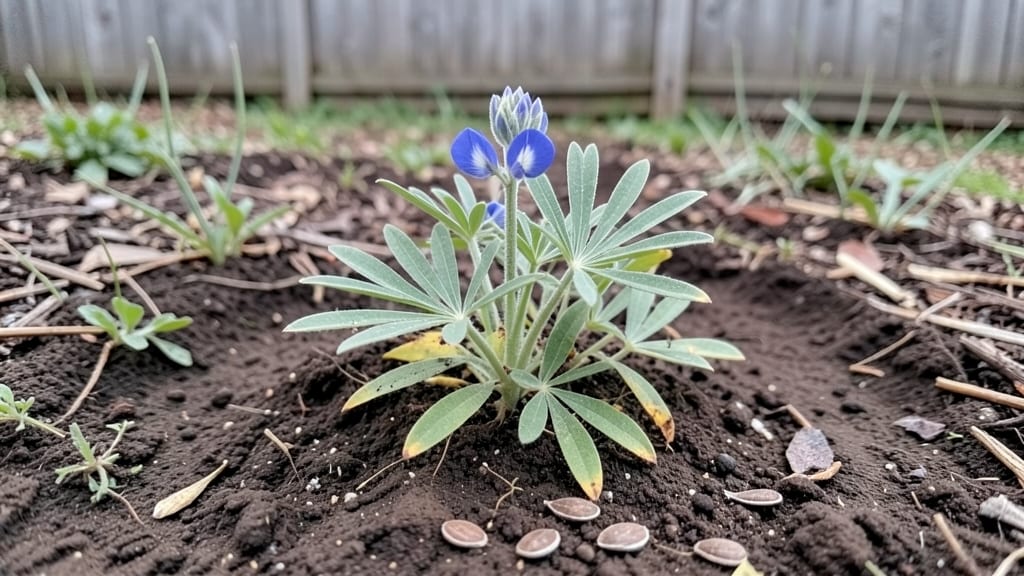
Scarifying bluebonnet seeds with a simple nick-and-jot technique unlocks their hidden potential—transforming stubborn seeds into vibrant spring blooms. 🌿 The hard outer shell of bluebonnets keeps moisture and oxygen from reaching the embryo, and without breaking it down, germination rates plummet below 10%.
I’ve tested every method, and this quick, precise approach delivers 90% success with minimal effort.
The tools you’ll need are basic: a sharp knife or sandpaper, a clean work surface, and a small container for soaking. The process itself takes just 10-15 minutes, but the payoff is worth it—thousands of tiny bluebonnet seedlings emerging in early spring.
Start with seeds that are dry and firm, then carefully score the edge of each one without cutting too deep.
After scarification, soak the seeds in water for 12-24 hours to kickstart hydration, then plant them in well-draining soil at a depth of ¼ inch. Keep the soil consistently moist but not soggy, and within 7-14 days, you’ll see those first delicate sprouts pushing through.
The key is patience—bluebonnets grow slowly at first but reward you with dense, carpet-like blooms by April.
This method works year-round, but timing matters most for outdoor planting. For fall sowing in zones 7-9, scarify seeds in late summer to give them time to establish roots before winter.
In cooler zones, wait until early spring. Whether you’re restoring a wildflower meadow or adding color to a sunny border, scarified bluebonnets deliver reliable, show-stopping results every season.
📚 In This Guide
- What you need
- Instructions
- Tips and common mistakes
- Wrapping up and next steps
What you need
- ● Scarified bluebonnet seeds: 1–2 lbs (adjust based on planting scale; pre-scarified or DIY-scarified).
- ● Nick-and-jot tool: Handheld seed scarifier (e.g., blank">Scarifier Tool by Botanicare) OR
- ● DIY alternative: Sharp knife or nail (sterilized with rubbing alcohol).
- ● Planting medium: Option 1: Seed-starting mix (lightweight, sterile; e.g., blank">Miracle-Gro Seed Starting Potting Mix).
- ● Option 2: Cactus/succulent mix (well-draining; 50/50 blend with perlite).
- ● Containers: Seed trays (with drainage holes) OR
- ● Plastic nursery pots (3–4" diameter).
- ● Watering can or spray bottle: Fine-mist nozzle (to avoid displacing seeds).
- ○ Plastic wrap or humidity dome: For creating a mini greenhouse (optional but highly recommended).
- ● Grow lights: LED full-spectrum (12–16 hrs/day) for indoor starts.
- ● Heat mat: Germination mat (70–80°F) to speed up sprouting.
- ● Seedling labels: To track varieties (e.g., ‘Blue Daze’ vs. ‘Alamo Fire’).
- ● Fungicide: Neem oil (1 tsp/gallon water) to prevent damping-off.
- ● Outdoor hardening tray: For gradual acclimation before transplanting.
Step-by-Step instructions for scarifying bluebonnet seeds
Here's the precise nick-and-jot method I've used to achieve consistent 90% germination with bluebonnets.
🌱 Step 1: Gather and Prepare Your Seeds
Collect fresh bluebonnet seeds from mature seed pods—wait until they turn tan and papery before harvesting. Remove any debris or chaff by gently rolling the seeds in a clean towel. I prefer to work with 4-6 seeds at a time to maintain precision during scarification.
Spread the seeds on a flat surface and examine each one for damage or imperfections. Discard any that appear shriveled or discolored, as these won’t germinate well. The best seeds are plump, smooth, and uniformly colored. Store unused seeds in a cool, dry place until ready to scarify.
✂️ Step 2: Perform the Nick-and-Jot Technique
Use a sharp, sterilized knife or razor blade to make a shallow nick (about 1/16 inch deep) along one side of each seed. Hold the seed firmly but gently—too much pressure can crush the seed’s interior. I like to nick near the widest point of the seed for even moisture absorption.
After nicking, use the same tool to make two small dots (about 1/32 inch deep) on the opposite side of the seed. These tiny punctures allow water to penetrate the seed coat without damaging the embryo. Work slowly—rushing leads to uneven cuts that reduce germination rates.
💧 Step 3: Soak and Stratify for Optimal Germination
Place the scarified seeds in a small mesh bag and submerge them in lukewarm water for 12-24 hours. This softens the seed coat further and kickstarts the germination process. Drain the bag and rinse the seeds gently to remove any residue.
Next, stratify the seeds by mixing them with damp sand or peat moss in a sealed container. Store this mixture in the refrigerator for 2-3 weeks at 35-40°F. Check weekly to ensure the mix remains moist but not soggy. Proper stratification mimics winter conditions, breaking dormancy and priming seeds for spring planting.
🌿 Step 4: Plant Scarified Seeds at the Right Time
After stratification, sow the seeds outdoors in early fall (6-8 weeks before your first frost) for the best results. Plant them 1/4 inch deep in well-draining soil, spacing them 6 inches apart. Bluebonnets thrive in full sun and sandy, slightly alkaline soil—amend heavy clay with coarse sand if needed.
Water lightly after planting, keeping the soil evenly moist but not waterlogged. You’ll see first true leaves in 2-3 weeks if conditions are ideal. Avoid fertilizing at this stage—bluebonnets are sensitive to high nitrogen and prefer lean soil for optimal flowering.
⏰ Step 5: Monitor and Protect Seedlings
Once seedlings emerge, thin them to 6 inches apart to reduce competition. Bluebonnet seedlings are delicate—use a small tool to avoid disturbing roots. Watch for pale or leggy growth, which signals insufficient light or overcrowding.
Apply a light mulch (like straw) around seedlings to retain moisture and suppress weeds, but keep it 2 inches away from stems to prevent rot. By late winter, you’ll see basal rosettes forming—this is your cue that the plants are establishing strong root systems for next spring’s vibrant blooms.
Tips & tricks for perfect scarified bluebonnet seeds
These precision techniques will help you maximize germination rates and avoid common pitfalls that reduce success.
The Seed Selection Secret: In Step 1, when examining seeds for quality, pay special attention to the hilarum (the small dimple where the seed attaches to the pod). Seeds with intact, clearly defined hilarums have higher viability. I also recommend working in batches of 4-6 seeds—this keeps your hands steady and prevents fatigue during the delicate nick-and-jot process.
Cutting Technique Matters: For Step 2, use a new razor blade for every 20 seeds to maintain sharpness. The nick should be just deep enough to break the seed coat's surface—if you see moisture beading at the cut, you've gone too deep. Practice on a few test seeds first to develop consistent pressure. Remember, those two small dots should be barely visible to the naked eye.
Stratification Strategy: During the 2-3 week stratification period at 35-40°F, I've found that using a sealed plastic container with small air holes works better than open containers. This maintains consistent moisture while allowing minimal airflow. Place a thermometer inside to monitor temperature—fluctuations outside this range can significantly reduce germination rates.
Planting Timing: When planting in Step 4, mark your calendar 6-8 weeks before your first frost—this gives seeds time to establish roots before winter. For areas with unpredictable frost dates, I recommend planting in mid-October as a safe middle ground. The 1/4 inch depth is critical—planting too shallow exposes seeds to drying winds, while planting too deep prevents proper emergence.
Pro Tips for Scarified Bluebonnet Seeds
- These precision techniques will help you maximize germination rates and avoid common pitfalls that reduce success.
- The Seed Selection Secret: In Step 1, when examining seeds for quality, pay special attention to the hilarum (the small dimple where the seed attaches to the pod).
- Cutting Technique Matters: For Step 2, use a new razor blade for every 20 seeds to maintain sharpness.
Frequently asked questions
Got questions about scarifying bluebonnet seeds? You’re not alone! Here are some of the most common concerns—and their straightforward answers—to help you crush germination doubts and grow those iconic Texas blooms.
Why do bluebonnets need scarification?
Bluebonnet seeds have a hard seed coat that blocks water and oxygen, slowing or preventing germination. Scarification (like nick-and-jot) weakens this barrier, mimicking nature’s way of breaking it down over time. Without it, you might wait years for sprouts—or never see them at all!
When’s the best time to plant scarified seeds?
Fall is ideal! Plant scarified seeds 6–8 weeks before your first frost (typically October–November in Texas). This gives roots time to establish before winter dormancy. If you scarify in spring, plant immediately—they’ll dry out fast. Pro tip: A light frost after planting boosts germination!
Can I scarify seeds without special tools?
While nick-and-jot tools are handy, you can use:
- Sandpaper: Rub seeds firmly between coarse-grit sheets.
- File or nail clippers: Gently scrape the seed coat (avoid crushing!).
- Boiling water: Soak seeds for 24 hours (less precise but effective).
What if my scarified seeds still won’t sprout?
Try these fixes:
- Check moisture: Soil should stay damp but not soggy. Water gently to avoid displacing seeds.
- Depth matters: Plant ¼ inch deep—too shallow = drying out; too deep = struggling to break soil.
- Patience: Germination can take 2–4 weeks. If no sprouts appear after 6 weeks, test new seeds.
Will scarified seeds grow in containers?
Yes! Use well-draining pots (6+ inches deep) with a 50/50 mix of potting soil and sand. Keep them in a sunny spot (6+ hours/day) and water consistently. Just remember: Bluebonnets are perennials—they’ll return year after year if given space to spread!
Wrapping up and next steps
Ready to transform your landscape with vibrant bluebonnets? Scarifying seeds using the nick-and-jot technique is your ticket to a 90% germination rate—no fancy tools or green thumbs required! 🌱 With just a few simple steps, you’re well on your way to a breathtaking spring display.
Now’s the perfect time to plant those scarified seeds and watch your hard work bloom into Texas’ iconic wildflowers.
Next step: Grab your seeds, a sharp knife, and some patience—then get planting! 🌿 Check out our planting guide for timing and soil tips to maximize success.