
Lawn
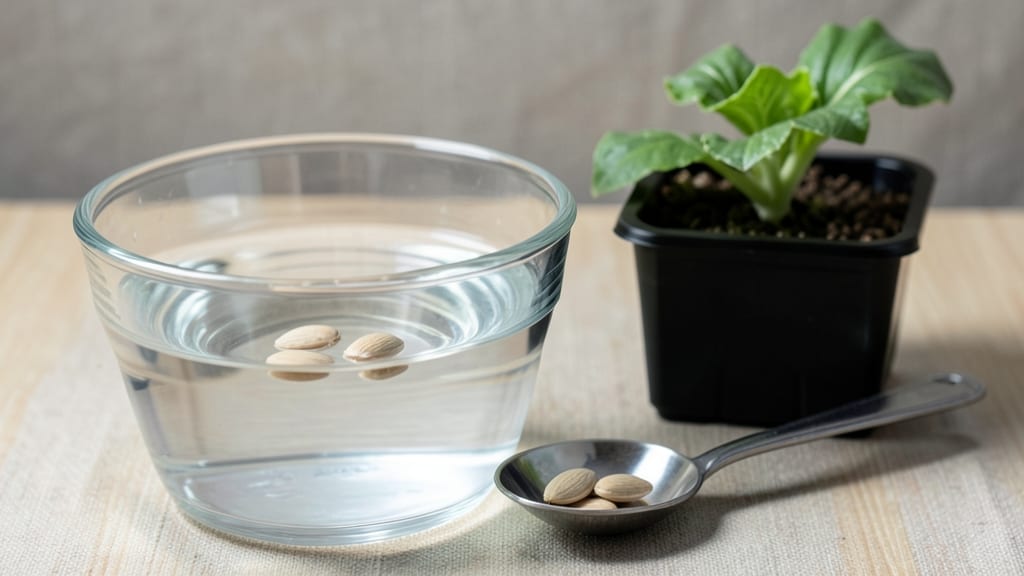
Testing seed viability before planting saves time and money—this simple float test tells you in 24 hours which seeds will sprout and which won’t. I’ve wasted entire seed packets on seeds that refused to germinate, until I discovered this foolproof method that cuts planting frustration in half.
The test is shockingly easy: fill a bowl with room-temperature water, drop in your seeds, and wait. Seeds that sink are viable and ready to plant, while those floating on top won’t grow.
It works best for large seeds like beans, peas, and tomatoes, but even tiny seeds reveal their secrets this way. You’ll know exactly which seeds to plant—and which to toss—before you even break ground.
What you’ll gain is confidence in your planting schedule, fewer empty rows, and a garden that actually comes up. The results are immediate, the supplies cost almost nothing, and it’s a great way to test old seed packets before committing to a full planting.
Just don’t rush the wait—24 hours is the magic number for accurate results.
For extra thoroughness, pair this test with a paper-towel germination check for seeds that sink but still seem questionable. That way, you’re not just guessing—you’re working with the best possible odds for a strong, healthy start to your garden.
📚 In This Guide
- What you need
- Instructions
- Tips and common mistakes
- Wrapping up and next steps
What you need
- ● Seeds: A small sample (about 100–200 seeds) from the batch you’re testing. Use fresh, dry seeds for best results.
- ● Large bowl or container: Deep enough to submerge seeds without overflowing (e.g., a 16–24 oz mixing bowl).
- ● Water: Room-temperature tap water (avoid distilled or softened water—it lacks minerals).
- ● Paper towel or mesh strainer: For gently scooping seeds after soaking.
- ● Timer or phone alarm: To track the 24-hour soak time precisely.
- ● Notebook & pen: To record results (e.g., count of floated vs. sunk seeds).
- ● Fine-mesh sieve: For rinsing seeds post-test to remove water residue.
- ● Labeling tape: To mark containers if testing multiple seed types.
- ● Ruler or measuring tape: For consistency in seed sample size.
- ● Plastic spoon: To avoid damaging seeds when handling.
How to perform a seed float test for germination viability
This quick test reveals which seeds are worth planting—and which to toss—without waiting weeks for germination.
Fill a Bowl with Room-Temperature Water
Use a clean bowl large enough to hold all your seeds with space to spare. I like a shallow glass or ceramic container because it lets me see the seeds clearly. Fill it with enough room-temperature water to cover the seeds by about 1 inch—this ensures they’re fully submerged without overflowing.
Room-temperature water is key here. Cold water can shock seeds, while hot water may damage their delicate membranes. If your tap water runs cool, let it sit for 10 minutes before using. Stir the water gently to remove any chlorine or chemical residue that might affect the test.
Add Seeds and Let Them Soak for 24 Hours
Place all the seeds you plan to test into the water. Spread them out so they don’t clump together—this helps you see individual results clearly. Let them soak undisturbed for exactly 24 hours. Set a timer or alarm so you don’t forget, as longer soaking can cause seeds to absorb too much water and become mushy.
During this time, seeds will either float or sink. The ones that float are typically non-viable, while those that sink are usually good candidates for planting. I know it seems counterintuitive, but the float test works because viable seeds are denser—they’re packed with stored energy to fuel germination.
Separate the Seeds Based on Results
After 24 hours, carefully remove the seeds from the water using a slotted spoon or your fingers. Place the floating seeds in a small bowl or container labeled “discard.” These seeds likely won’t germinate, saving you time and effort. The sinking seeds go into another container labeled “plant”—these are your best bet for successful growth.
Don’t be discouraged if some sinking seeds don’t germinate. The float test isn’t 100% accurate, but it’s a great starting point. For seeds that sink but still fail to sprout, factors like age, storage conditions, or improper planting might be at play. I always plant a few extra sinking seeds just in case.
Dry and Store Non-Viable Seeds (Optional)
If you’d like to save the floating seeds for future testing or experimentation, spread them out on a paper towel in a single layer. Let them dry completely in a warm, well-ventilated area for 24-48 hours. Once dry, store them in a sealed container with a desiccant packet to prevent moisture buildup.
While these seeds may not be viable now, they can still be useful for learning about seed behavior or testing new germination methods. I’ve found that some seeds, like certain heirloom varieties, can surprise you—what seemed like a failed test might yield results if given the right conditions later.
Plant the Viable Seeds Promptly
Plant the sinking seeds as soon as possible after the test. Moisture-sensitive seeds like lettuce or carrots should go straight into damp soil or a seed-starting mix. For seeds that can handle a bit of drying, like beans or peas, you can wait a day or two—but don’t delay longer than necessary.
When planting, follow the depth guidelines on the seed packet. Overwatering after the float test can cause the seeds to rot before they even sprout. I like to water gently after planting and then monitor the soil moisture closely until germination begins. Watch for the first signs of life—tiny green shoots or swollen seed coats—within 3-10 days, depending on the seed type.
Tips and common mistakes for perfect seed float test results
A few simple tricks will help you get the most accurate results from your seed viability test—and avoid common pitfalls that can throw off the whole process.
Water Temperature Matters: The 10-minute wait for room-temperature water is crucial. Cold water can shock seeds, making them appear viable when they're not, while hot water damages their membranes. I like to fill my bowl first, then let it sit on the counter while I gather my seeds—this ensures consistent temperature throughout the test.
Timing Secret: That exact 24-hour soak time in Step 2 is non-negotiable. Any longer and seeds absorb too much water, becoming mushy and unreliable. Set a phone alarm or use a kitchen timer placed right next to your bowl—out of sight means out of mind, and you don't want to forget. I've learned this the hard way after ruining perfectly good seeds through over-soaking.
Seed Separation Strategy: When separating seeds after 24 hours, use a slotted spoon rather than your fingers. This prevents accidentally transferring viable seeds to your discard pile or vice versa. I also recommend labeling containers clearly with masking tape and a marker—"plant" and "discard" written in permanent marker prevents mix-ups later when you're ready to sow.
Drying Non-Viable Seeds: For the optional drying step, spread seeds in a single layer on paper towels. This prevents clumping and ensures even drying within the 24-48 hour window. I place my drying seeds on a wire rack in my pantry where it's warm but not hot—direct sunlight can cause uneven drying and potential mold growth.
Pro Tips for Seed Float Test
- A few simple tricks will help you get the most accurate results from your seed viability test—and avoid common pitfalls that can throw off the whole process.
- Water Temperature Matters: The 10-minute wait for room-temperature water is crucial.
- Timing Secret: That exact 24-hour soak time in Step 2 is non-negotiable.
Frequently asked questions
about the seed float test—because clarity makes gardening easier! Here are answers to common questions to help you get the most out of this quick viability check.Why do some seeds float while others sink?
Seeds float because they’re either empty (no embryo) or damaged—think of them like deflated balloons. Sinking seeds are full of water and nutrients, signaling they’re likely viable. A float test reveals which seeds are worth planting and which should be composted to save time and resources.
How soon can I plant seeds that pass the float test?
You can plant sinking seeds immediately—no waiting! The float test is a 24-hour viability check, not a germination accelerator. Just ensure your soil is prepped (moist, well-drained) and seeds are planted at the correct depth for your plant type. Pro tip: Label your seed packets post-test to track varieties!
What if my seeds are too small or lightweight for the float test?
For tiny seeds (like lettuce or carrots), skip the float test—they’re often too delicate. Instead, use the paper towel method: dampen a paper towel, wrap seeds inside, and check for sprouts in 3–5 days. Alternatively, plant a few seeds in soil and monitor germination rates for future reference.
My seeds sank but didn’t sprout—what went wrong?
Sinking seeds can still fail to sprout due to old age, disease, or poor storage (like exposure to moisture/heat). If this happens, try stratification (cold treatment) for seeds like peppers or apples, or soak them in hydrogen peroxide (1 tsp per cup of water) for 24 hours to boost viability.
What should I do with seeds that float?
Don’t toss them! Floating seeds are non-viable, but they’re great for compost or mulch. If you’re eco-conscious, crush them into your compost pile—they’ll break down faster than larger organic matter. Just avoid planting them; they won’t grow!
| Quick Troubleshooting |
|---|
| Issue: All seeds float but are fresh. Fix: Test water hardness—add a pinch of salt to the water to help heavier seeds sink. |
| Issue: Seeds stick to the container. Fix: Gently rinse them with water before testing to remove coatings (like seed treatments). |
| Issue: Mold grows in the water. Fix: Use distilled or boiled water and reduce test time to 12 hours. |
Wrapping up and next steps
The seed float test is your quick, science-backed way to assess germination viability in just 24 hours—no waiting weeks to find out if your seeds are ready for planting! 🌱 By simply observing which seeds sink or float, you’ll save time, money, and frustration while ensuring a healthier lawn or garden.
Whether you’re a seasoned gardener or just starting out, this simple method empowers you to make smarter planting decisions.
Now that you’re armed with this knowledge, why not grab a bowl of water and test a few seeds today? Your future green space will thank you! 🌿