
Planting
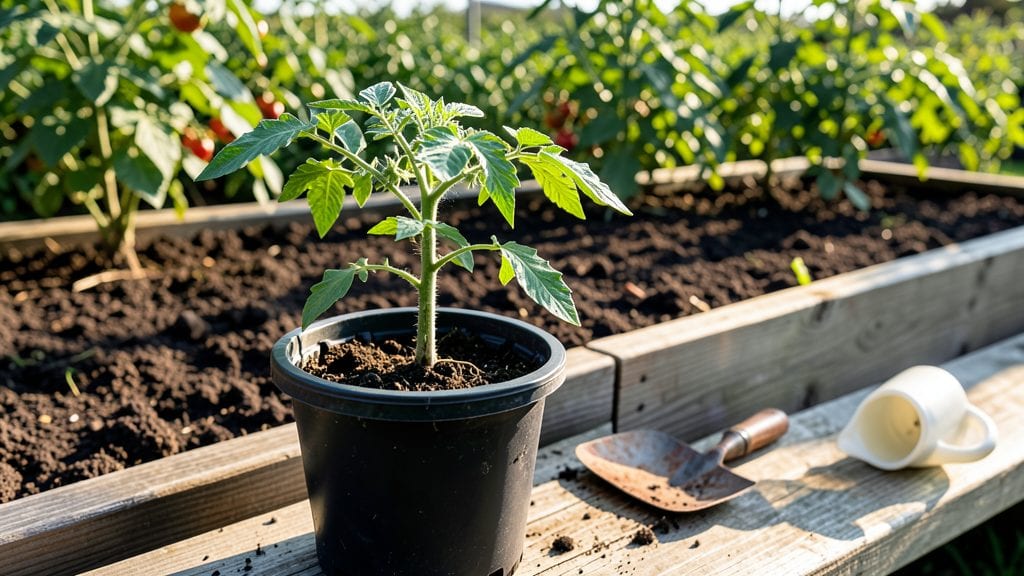
Determining seedling transplant readiness ensures your plants thrive—here’s how to tell when they’re truly ready to move outdoors. I’ve learned the hard way that rushing seedlings—especially tomatoes or peppers—leads to leggy, floppy plants that never recover.
The secret lies in two key checks: sturdy leaves and a strong root system that can handle the shock of fresh air.
Start by counting leaves—most seedlings need 4-6 true leaves (not just the first seed leaves) before transplanting. Then, gently tug on the plant: roots should fill the container, with a dense white tangle at the bottom.
If roots are circling or the stem feels weak, give them another week indoors. Hardening off—gradually exposing them to outdoor conditions—takes 7-10 days, but only start when nighttime temps stay above 50°F.
Timing matters just as much as technique. Early spring transplants thrive with cooler soil, while late summer seedlings need shade protection to avoid scorching. Herbs like basil can handle heat better than tomatoes, so adjust your schedule based on what you’re growing.
A well-timed transplant means plants that take off instead of struggling.
Confession: I’ve killed more seedlings from transplant shock than pests. The fix? A strong root system, proper leaf development, and patience during hardening. Once you master these checks, your garden’s success rate will climb—no more wilting disappointments. Let’s get those seedlings ready to shine outdoors.
📚 In This Guide
- What you need
- Instructions
- Tips and common mistakes
- Wrapping up and next steps
What you need
- ● Seedlings: Healthy, well-established seedlings (typically 2–4 inches tall, depending on the plant type).
- ● Gloves: A pair of gardening gloves (nitrile or cotton) to protect your hands from dirt and potential irritants.
- ● Small hand trowel or transplanting knife: A 6–8-inch tool for gently lifting seedlings without damaging roots.
- ● Watering can or spray bottle: With a fine rose nozzle to keep soil moist during the check.
- ○ Measuring tape or ruler: For assessing seedling height and root length (optional but helpful).
- ● Notebook and pen: To track observations like leaf strength, root development, and transplant dates.
- ● Root pruning shears: For trimming overly long roots if needed (great for compacting root systems).
- ● Grow lights or bright window: If seedlings are still hardening off indoors.
- ● pH test kit: To check soil pH before transplanting (ideal range: 6.0–7.0 for most plants).
- ● Compost or fertilizer: A balanced, slow-release option (like 10-10-10) to mix into the outdoor soil.
- ● Shade cloth or row covers: To protect seedlings from harsh sun or wind during the first few days outdoors.
- ● Weather check: Ensure outdoor temperatures are consistently above 50°F (10°C) (adjust for frost-sensitive plants).
- ● Soil prep: Loosen the outdoor planting area and amend with compost for better drainage.
- ● Hardening-off period: Seedlings should spend 7–10 days acclimating to outdoor conditions (sun, wind, and temperature fluctuations).
How to assess seedling transplant readiness before moving outdoors
Here's how to evaluate your seedlings for strength and resilience before the final move to the garden.
Examine Leaf Development for Maturity
Seedlings are ready when they've developed their first true leaves—the second set of leaves that appear after the initial cotyledons. These true leaves should be dark green, sturdy, and roughly 1-2 inches long, indicating the plant has established its photosynthetic machinery. Count the leaves: if you see 4-6 true leaves, your seedlings are likely ready for transplanting.
Check for any signs of yellowing or discoloration, which can indicate nutrient deficiencies or overwatering. Healthy seedlings will have leaves that stand upright rather than drooping. If you notice leggy growth—long, thin stems with widely spaced leaves—your seedlings need more light before transplanting. This structural weakness makes them vulnerable to wind and temperature fluctuations outdoors.
Test Root Strength Through the Bottom of the Container
Gently squeeze the sides of the container to assess root development. If roots have filled the container and are growing through the drainage holes or wrapping around the bottom, it's a strong sign of readiness. For seedlings in biodegradable pots, gently press the sides—roots should feel dense and fibrous, not loose or sparse.
If roots are still sparse or haven't reached the container walls, hold off on transplanting. Weak root systems struggle to absorb water and nutrients in the garden, leading to transplant shock. A good test is to tip the container slightly—if the seedling stays upright with minimal soil movement, its roots are strong enough for the transition. If it topples easily, it needs more time in its current container.
Conduct a Hardening-Off Trial for Outdoor Resilience
Before transplanting, seedlings must adapt to outdoor conditions through a process called hardening-off. Start by placing them in a sheltered, shaded spot for 1-2 hours on the first day. Gradually increase exposure by 1 hour daily over 7-10 days, moving them to sunnier locations and introducing them to wind. This mimics the gradual shift from indoor conditions to the garden's environment.
Watch for signs of stress like wilting or leaf curling. If seedlings recover quickly after exposure, they’re ready for full outdoor conditions. If they show prolonged signs of distress, extend the hardening-off period by another 3-5 days. Avoid transplanting on hot, windy days—choose overcast or early morning hours to minimize shock. Seedlings that pass this trial will establish themselves more quickly in the garden.
Assess Stem Thickness and Overall Structure
A seedling’s stem should be thick and sturdy, not thin or hollow. Run your thumb along the stem—it should feel firm, not brittle. Thick stems indicate strong vascular development, which helps the plant transport water and nutrients efficiently. If stems are thin or hollow, the seedling may not survive the transplant shock or compete well with weeds and pests in the garden.
Check for any signs of disease, such as black spots, mold, or unusual growths on the stem or leaves. These can weaken the seedling and make it more susceptible to failure after transplanting. If you spot any issues, isolate the affected seedlings and treat them before transplanting. Healthy stems should also be upright and not leaning excessively, which suggests the seedling has been growing in adequate light conditions.
Tips & tricks for perfect seedling transplant readiness
Transplanting seedlings successfully isn't just about timing—it's about assessing their true readiness. Here's what I've learned from years of trial and error to ensure your seedlings thrive after moving outdoors.
Leaf Development Insight: The 4-6 true leaves guideline is non-negotiable, but don't stop there. Look at leaf texture—healthy leaves should feel slightly waxy to the touch and have a crisp edge. I've seen seedlings with the right leaf count fail because their leaves were soft and pliable, indicating they weren't fully hardened. Also, pay attention to leaf arrangement: true leaves should grow in a spiral pattern rather than all emerging from the same point, which suggests proper growth development.
Root Assessment Technique: When testing root strength by squeezing the container, I've found that biodegradable pots actually give more reliable feedback than plastic ones. The fibers in biodegradable pots create more resistance when roots are well-developed. For the tipping test, I recommend using a clean white paper towel—if you see minimal soil spill when tipping, that's a good sign. Roots should hold the soil together like a cohesive unit rather than letting it crumble apart.
Hardening-Off Strategy: The 7-10 day hardening-off period is your safety net, but I've discovered that the first 1-2 hours on day one are critical. Many gardeners rush this step, but seedlings often show stress symptoms during this initial exposure that they recover from later. I always place my seedlings in a spot where they'll receive dappled sunlight—this mimics the natural transition from indoor conditions to full sun. If you notice leaves curling upward during this first exposure, it's a sign they're not quite ready yet.
Stem Strength Secret: When checking stem thickness, I run my thumb along the stem while applying gentle pressure. A healthy stem should feel like it has a slight give but won't collapse under pressure. Thin stems often have a hollow sound when tapped lightly with your fingernail. I've found that seedlings with stems thicker than 1/8 inch at the base have the best chance of surviving transplant shock. This thickness indicates they've developed sufficient vascular structure to support themselves outdoors.
Pro Tips for Seedling Transplant Readiness
- Transplanting seedlings successfully isn't just about timing—it's about assessing their true readiness.
- Leaf Development Insight: The 4-6 true leaves guideline is non-negotiable, but don't stop there.
- Root Assessment Technique: When testing root strength by squeezing the container, I've found that biodegradable pots actually give more reliable feedback than plastic ones.
Frequently asked questions
Got questions about when and how to transplant seedlings? You’re not alone! Here are answers to the most common concerns—so you can confidently move your little greens outdoors without stress.
How do I know if my seedlings are ready for transplant?
Look for 2–4 true leaves (not just cotyledons—the first baby leaves) and a sturdy stem that doesn’t flop. Roots should fill the container or peek through drainage holes. Harden them off first by gradually exposing them to outdoor conditions for 5–7 days.
What’s the best time of day to transplant seedlings?
Transplant on a cool, cloudy day or early morning to reduce stress from heat and wind. Avoid midday sun, which can scorch tender leaves. If you must transplant in the afternoon, water deeply beforehand and provide shade for a few hours afterward.
Can I transplant seedlings if the weather is too hot or cold?
Nope! Ideal temps are between 50–75°F (10–24°C). If it’s too hot, seedlings may bolt (flower prematurely) or wilt. If it’s too cold, they’ll struggle to establish roots. Use row covers or wait until conditions improve—patience pays off!
What if my seedlings look weak or leggy before transplant?
Leggy seedlings (long, thin stems) need more light or fertilizer. Bury them deeper than before (up to the first true leaves) to encourage root growth. If they’re still weak, try a balanced fertilizer (5-5-5) or move them to a brighter spot for 3–5 days before transplanting.
Can I transplant seedlings in containers instead of the ground?
Use 5–7 inch pots with drainage holes and well-draining soil. Just ensure containers get enough sunlight and water. For heavy feeders (like tomatoes), upgrade to gallon-sized pots later. Container gardening is perfect for small spaces or renters!
Wrapping up and next steps
Transplanting seedlings outdoors is an exciting milestone, but leaf strength and root health are the real game-changers! 🌱 By mastering these checks—like the tug test and inspecting root development—you’ll give your young plants the best shot at thriving in their new home.
Don’t rush; patience now means stronger, happier plants later.
Ready to take the next step? Mark your calendar for a cloudy day to minimize stress on your seedlings, and grab those gardening gloves—your green thumbs are about to shine! 🌟