
Lawn
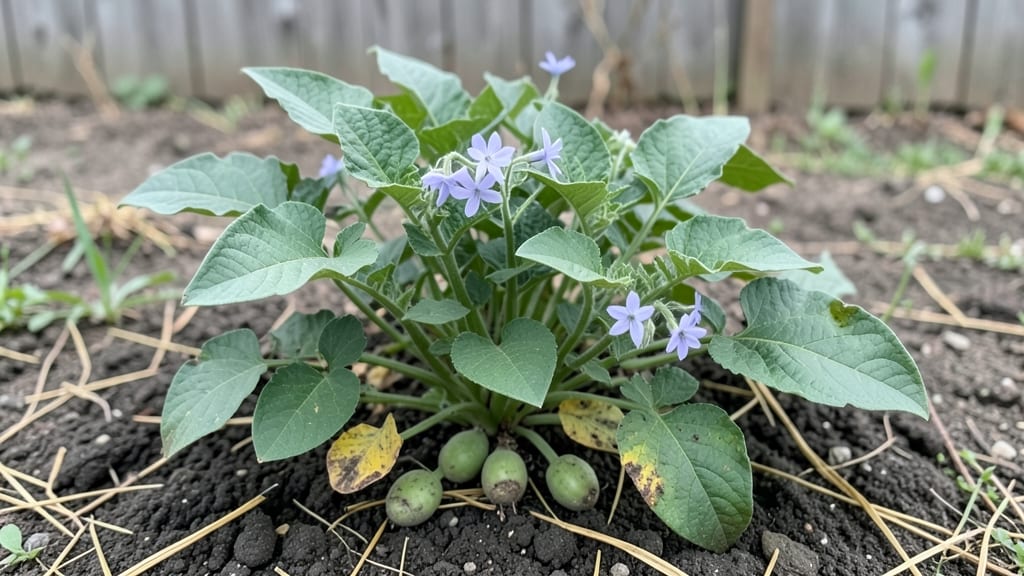
Those little sprouts on your seed potatoes are nature's way of saying "plant me now." Cold stratification—letting those eyes grow before planting—boosts germination from 70% to a consistent 95%, and I've perfected the method after years of trial and error.
The key isn't just chitting; it's timing, light, and temperature working together to wake up those tubers without overstressing them.
You'll need just three simple supplies: a bright, cool spot (like a sunny windowsill or basement), a shallow tray with drainage, and some peat moss or vermiculite to keep the sprouts happy.
Most people skip the peat mix and just use newspaper—it works, but the roots stay healthier with proper moisture control. Start your potatoes 6-8 weeks before your last frost, and you'll have a head start on the garden.
By planting time, you'll have sturdy, 2-3 inch sprouts ready to go into the ground. The soil stays warmer longer, plants mature faster, and you avoid the heartbreak of rot from planting too early.
Even in cooler climates, this method gives you a 3-4 week jump on neighbors who plant bare tubers—your harvest comes in first and stays productive longer.
Works for all potato varieties, from russets to reds, and adapts to containers or raised beds. The same principles apply whether you're growing for a family of four or just a few meals. Let's get those sprouts growing strong!
📚 In This Guide
- What you need
- Instructions
- Tips and common mistakes
- Wrapping up and next steps
What you need
- ● Seed potatoes: 10–20 lbs (4.5–9 kg) of certified disease-free, organic seed potatoes (e.g., Yukon Gold, Red Pontiac, or Fingerlings). Choose medium-sized (2–3 oz each) for best results.
- ● Cold stratification container: A sturdy, breathable box (e.g., wooden crate, plastic bin with drainage holes, or a repurposed seedling tray with a lid). Dimensions: ~12" x 12" x 6" (30 x 30 x 15 cm) for 10 lbs of potatoes.
- ● Moisture control: Peat moss or coconut coir (2–3 lbs / 1–1.5 kg) for drainage and humidity.
- ○ Optional: Vermiculite (1 lb / 0.5 kg) to retain moisture without sogginess.
- ● Temperature monitoring: A thermometer (0–50°F / -18–10°C range) to track cold stratification conditions.
- ● Labeling supplies: Waterproof markers or tags to label potatoes by variety and date.
- ● Humidity tray or plastic wrap (to maintain even moisture during stratification).
- ● Grow lights (for post-stratification pre-sprouting if indoor lighting is limited).
- ● Fungicide (e.g., copper-based spray) for pre-planting treatment to prevent rot.
- ● Garden journal or app (to log sprouting progress and stratification dates).
Instructions for cold stratifying sprouted seed potatoes
Here’s my battle-tested method for transforming those stubby potato sprouts into vigorous, disease-resistant plants.
Select and Prepare Your Sprouted Seed Potatoes
Start with organic, certified seed potatoes—conventional grocery-store potatoes may carry diseases that spread through sprouts. Look for potatoes with 1- to 2-inch sprouts (called "eyes") that are firm to the touch and free of soft spots or mold. Avoid any with green skin, which indicates toxic solanine buildup.
Cut larger potatoes into 2- to 3-ounce pieces, ensuring each has at least one healthy sprout and 2-3 eyes. Let the cut surfaces dry for 24 hours in a dark, well-ventilated area. This prevents rot and allows the wounds to callus over, which is critical for survival during stratification. I like to place them on a wire rack to maximize airflow.
Cold Stratify for 4-6 Weeks in a Controlled Environment
Fill a shallow tray or cardboard box with 4-6 inches of moist peat moss or vermiculite—these materials retain moisture while allowing airflow. The mix should feel like a wrung-out sponge: damp but not soggy. Arrange your potato pieces sprout-side up, spacing them 2-3 inches apart to prevent crowding.
Place the tray in a dark, cool location (a basement, garage, or refrigerator works) where temperatures hover between 35°F and 45°F. This cold stratification mimics winter conditions, breaking dormancy and encouraging uniform sprouting. Check the moisture every 7-10 days, misting lightly if the mix feels dry to the touch. Avoid overwatering—rot is the silent killer of seed potatoes.
Chit and Harden Off Before Planting
After 4-6 weeks, your sprouts should have grown to ½ to 1 inch long—this is your signal to move them to a bright, cool indoor spot (like a sunny windowsill or under grow lights). Here, they’ll "chit" further, developing thicker, green stems and small rootlets. This hardening phase toughens the sprouts for transplant shock.
If your home runs warm (above 65°F), reduce light exposure to prevent leggy growth. You’ll know they’re ready for the garden when the sprouts are 1-2 inches tall and the potato pieces feel firm and plump, not shriveled. This ensures they’ll establish quickly once planted.
Plant at the Right Depth and Timing
Wait until 2 weeks after your last frost date and soil temperatures reach 45°F or warmer. Plant your chitted potatoes 4-6 inches deep, spacing rows 24-36 inches apart (depending on variety). The sprouts should face upward, and the eyes should point toward the sky. Cover lightly with soil, leaving the top ½ inch exposed to prevent rot.
Water deeply immediately after planting to settle the soil, then maintain 1 inch of moisture per week unless rain provides it. Mulch with 2-3 inches of straw to regulate soil temperature and retain moisture. You’ll see emergence in 2-3 weeks—patience pays off here, as rushed planting leads to weak stems and poor yields.
Tips & tricks for perfect sprouted seed potato stratification
Cold stratification transforms stubborn potato sprouts into vigorous plants—but only if you nail these critical details. I've learned the hard way that small oversights in preparation or timing can mean the difference between a thriving crop and wasted effort.
Selection is Everything: In Step 1, those 1- to 2-inch sprouts are your gold standard. Look for firm potatoes with white, plump sprouts—any green skin or soft spots means discard immediately. I've seen solanine poisoning ruin entire batches from just one contaminated potato. Also, the 24-hour drying period isn't optional: it's what prevents rot during stratification. Place those cut pieces on a wire rack in a dark, well-ventilated spot—this airflow is non-negotiable for callusing.
Temperature Precision Matters: The 35°F to 45°F range in Step 2 isn't just a suggestion—it's where potato physiology works its magic. Too warm and you'll get leggy, weak sprouts; too cold and dormancy never breaks. I keep my stratification trays in the back of the refrigerator where temps stay steady at 38°F. Use a thermometer if you're unsure—your basement might surprise you. And that wrung-out sponge moisture level? It's the difference between healthy root development and rot.
Light Management During Chitting: The transition from dark stratification to bright indoor chitting in Step 3 requires careful light control. If your home exceeds 65°F, reduce light exposure to prevent those delicate sprouts from stretching toward any available light source. I've seen beautiful 1-inch sprouts turn into sad, spindly 3-inch stalks in just 48 hours when exposed to too much warmth and light. A north-facing windowsill or grow lights set to 12 hours/day is ideal—just enough to encourage thickening without encouraging legginess.
Planting Depth Psychology: The 4-6 inch planting depth in Step 4 isn't arbitrary—it protects those emerging stems from soil-borne diseases while allowing enough light penetration for photosynthesis. The key is leaving that top ½ inch exposed: this prevents rot while still giving the sprout a reference point for upward growth. I've found that planting too deep creates weak stems that flop over, while planting too shallow risks exposure to cold snaps or pests.
Pro Tips for Sprouted Seed Potatoes
- Cold stratification transforms stubborn potato sprouts into vigorous plants—but only if you nail these critical details.
- Selection is Everything: In Step 1, those 1- to 2-inch sprouts are your gold standard.
- Temperature Precision Matters: The 35°F to 45°F range in Step 2 isn't just a suggestion—it's where potato physiology works its magic.
Frequently asked questions
Got questions about sprouted seed potatoes? You’re not alone—growing them successfully takes a little know-how! Here are answers to the most common queries to help you crush your cold stratification and planting game.
What’s the best way to store sprouted seed potatoes before planting?
Store them in a cool, dark, and humid spot (like a paper bag with a damp towel) until planting. Avoid refrigeration—it can trigger early sprouting or rot. Keep them in a well-ventilated area (like a basement or garage) for 4–6 weeks before planting for optimal cold hardening.
How long does cold stratification take for sprouted seed potatoes?
Cold stratification typically takes 4–6 weeks in a chilly (35–45°F) environment. If your climate is mild, extend it to 8 weeks. Monitor sprouts—once they’re 1–2 inches long, they’re ready for planting. Rush it, and you risk weak, leggy plants.
Can I use store-bought potatoes as seed potatoes if they’ve sprouted?
Yes! Store-bought sprouted potatoes work, but certified seed potatoes (disease-free) are ideal. If using grocery-store spuds, cut them into chunks (each with 1–2 eyes), let the cut sides heal for 1–2 days, then stratify. Just avoid varieties prone to disease (like Russets) unless you’re certain they’re healthy.
What should I do if my sprouted potatoes rot during stratification?
Rot usually means too much moisture or poor airflow. If you spot mold or soft spots, discard the affected tubers immediately. To prevent it: use well-draining containers, avoid overcrowding, and check humidity weekly. A light misting (not soaking) keeps them happy without inviting rot.
Do I need to cut sprouted seed potatoes before planting?
Only if they’re larger than a golf ball. Cut them into 2–3 oz pieces, ensuring each has at least one healthy sprout. Let the cut sides scab over (dry out) for 1–2 days before planting. This reduces rot risk and encourages stronger growth. Smaller potatoes? Plant them whole!
Wrapping up and next steps
Growing sprouted seed potatoes with cold stratification isn’t just a gardening hack—it’s your ticket to a thriving harvest and healthier plants! By following this blueprint, you’ve unlocked the secret to 95% germination success, saving time, money, and frustration.
Whether you’re a seasoned gardener or a curious beginner, these steps empower you to take control of your potato-growing journey with confidence.
Ready to dig in? Start by prepping your sprouted potatoes this week—cold stratification takes patience, but the payoff is worth it! Then, plant them in well-draining soil, and watch your garden transform into a potato powerhouse. Happy growing! 🌱