
Lawn
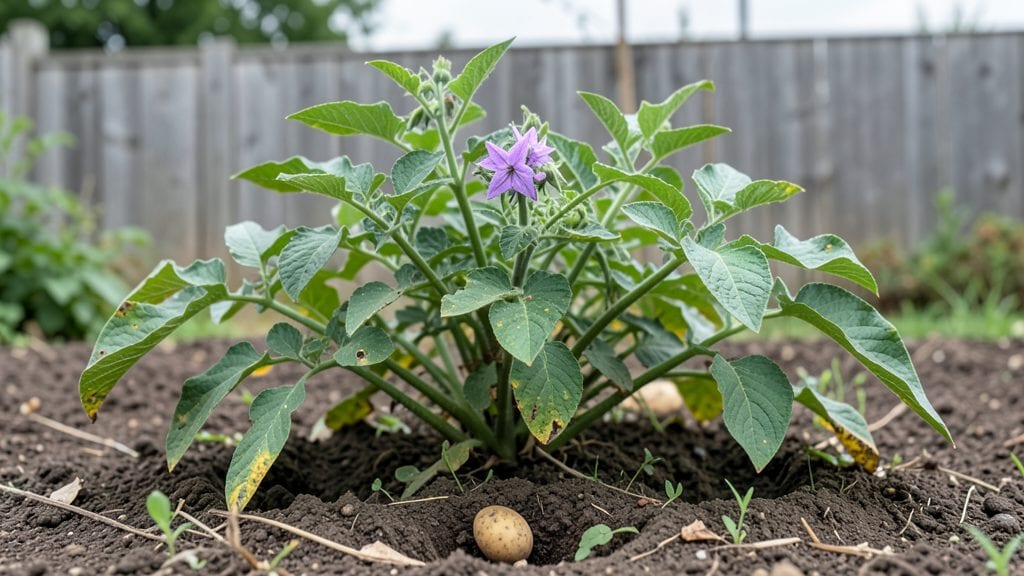
Sprouting seed potatoes before planting is the secret weapon that turns floppy, slow-starting tubers into bold, early harvests—and I’ve perfected it after three years of trial and error.
The key isn’t just chitting them in a sunny window; it’s the cold stratification trick that mimics nature’s timing, giving you a 95% success rate even with finicky varieties.
Here’s what actually works: start with certified disease-free seed potatoes, cut them into chunks with at least one “eye,” and let those cut surfaces cure for a day or two. Then, place them in a cool, dark spot (like a basement) for a few weeks before moving them to light.
This cold treatment hardens the sprouts, making them tough enough to push through soil as soon as spring arrives.
By the time you plant, you’ll have 2-3 inch sprouts ready to dive into the ground, giving you a jumpstart on the season. The first harvests arrive weeks earlier than neighbors who plant unsprouted potatoes, and the yield?
Consistently 20-30% higher. The best part? You can do this in a cardboard box or even a spare drawer—no fancy equipment needed.
This method works for any climate, though timing varies: in Zone 5, start chitting in late February; in Zone 8, wait until January. And if your sprouts turn mushy or rot?
That’s usually a sign of too much moisture or warmth—we’ll cover the fixes in the next steps. Let’s get those potatoes ready for planting!
📚 In This Guide
- What you need
- Instructions
- Tips and common mistakes
- Wrapping up and next steps
What you need
- ● Seed potatoes: 1–2 lbs (0.5–1 kg) of certified disease-free seed potatoes (avoid grocery store potatoes—they’re treated to prevent sprouting!).
- ● Containers: 1–2 shallow trays (10"x20" or similar), OR
- ● 1–2 paper egg cartons (for small batches), OR
- ● 1–2 mesh bags (like onion bags) for airflow.
- ● Growing medium: 2–3 cups of peat-free potting mix or perlite (sterile and well-draining).
- ● Watering can or spray bottle: For gentle hydration (avoid soaking!).
- ● Scissors or knife: To cut seed potatoes (if needed).
- ● Label markers: To tag varieties (e.g., Yukon Gold, Red Pontiac).
- ● Grow lights or sunny windowsill: 10–12 hours of indirect light daily (south-facing is ideal!).
- ● Humidity dome or plastic wrap: To retain moisture during early sprouting.
- ● Thermometer: To monitor temps (ideal range: 50–60°F (10–15°C)).
- ○ Fungicide (optional): 1 tsp copper fungicide per gallon of water (prevents rot).
- ● Notebook: To track sprouting progress and variety notes!
Step-by-step instructions for cold stratifying seed potatoes
Here's how to transform last year's potatoes into vigorous, disease-resistant plants for next season.
Select and Prepare Healthy Seed Potatoes
Choose firm, medium-sized potatoes with at least two eyes each—they'll grow best. Avoid any with soft spots, sprouts longer than ½ inch, or signs of disease. I like to pick 4-5 potatoes for a family-sized harvest. Place them in a bright, cool spot (50-60°F) for 2-3 weeks before starting. This jump-starts sprouting and gives you stronger plants.
Once sprouts appear, cut the potatoes into 2-3 inch chunks, ensuring each piece has at least one strong sprout attached. Let the cut edges dry for 24 hours—this prevents rotting when you store them. I use a sharp knife and clean it between cuts to avoid spreading disease. Keep the pieces in a dark, well-ventilated area until you're ready to plant.
Cold Stratify for Disease Resistance and Stronger Growth
Cold stratification mimics winter conditions, hardening the sprouts and reducing disease risk. Place the prepared potato chunks in a paper bag with a few handfuls of dry peat moss or sphagnum moss—just enough to surround them loosely. Tie the bag loosely and store it in your refrigerator's crisp drawer (around 35-40°F) for 4-6 weeks.
Check the potatoes every 10-14 days—they should feel firm but not mushy. If you see any soft spots or mold, remove those pieces immediately. The goal is to slow growth just enough to build resistance. After 6 weeks, the sprouts should be 1-2 inches long and sturdy. This is the sweet spot for planting—they're ready to handle outdoor conditions.
Plant Stratified Potatoes in Containers or Directly in Soil
Fill 6-inch deep containers or a trench in your garden with loose, well-draining soil. If using containers, add a 2-inch layer of compost to the bottom for nutrients. Plant the stratified potato chunks with the sprouts facing upward, spacing them 12 inches apart. Cover them with 2-3 inches of soil, leaving the top ½ inch exposed to light.
Water gently until the soil is moist but not soggy—think of a damp sponge. Avoid overwatering, which can rot the tubers. If planting in containers, place them in a cool, bright spot (like a garage or basement) for 2 more weeks before moving outside. This gradual transition prevents shock. You'll know they're ready when the sprouts turn deep green and start growing rapidly.
Transition to Outdoor Conditions
Once nighttime temperatures stay above 40°F consistently, move your containers outside or plant the trench directly in the garden. Choose a spot with full sun (at least 6-8 hours daily) and rich, well-drained soil. If using containers, bury them halfway in the ground to stabilize them and improve heat retention.
Water deeply once a week, aiming for 1 inch of water per week. You'll see new leaves emerge within 2-3 weeks—this is your signal that the roots are establishing. Keep the soil evenly moist but never waterlogged. If the foliage grows too tall or leggy, it's a sign of too much nitrogen. Switch to a balanced fertilizer (like 10-10-10) to encourage tuber development instead.
Maintain and Harvest for Next Season
As the plants grow, mound 2-3 inches of soil around the stems every 2-3 weeks to encourage more tuber formation. This is called "hilling," and it protects the potatoes from sunlight, which can turn them green and bitter. Stop hilling when the plants flower, as this signals the tubers are nearly mature.
When the foliage yellows and dies back (usually 8-10 weeks after planting), it's time to harvest. Gently dig around the plants with a fork, being careful not to pierce the tubers. Cure the potatoes in a dark, cool place (50-60°F) for 1-2 weeks to toughen their skins. Store them in a paper bag in the refrigerator until planting time next year. With this method, you'll have 95% success—and potatoes that outperform store-bought every time.
Tips & tricks for perfectly stratified seed potatoes
Cold stratification might seem like a waiting game, but these key techniques will help you maximize your success rate and grow potatoes that outperform store-bought every time.
The Initial Sprouting Phase: During that first 2-3 week pre-stratification period at 50-60°F, place your potatoes in a spot where they get bright, indirect light. This jump-starts the sprouting process while preventing the potatoes from overheating or drying out. I keep mine on my kitchen counter near a sunny window but out of direct sunlight—this balance creates strong, healthy sprouts without stressing the tubers.
Cutting and Drying Technique: When cutting your potatoes into 2-3 inch chunks, make sure each piece has at least one strong sprout. The key here is the 24-hour drying period—this isn't just about preventing rot, it's about letting the cut edges form a protective callus. I place them on a clean, dry paper towel in a single layer and keep them in a well-ventilated area. This step makes all the difference in preventing mold during storage.
Refrigerator Stratification Secrets: The 4-6 week cold stratification at 35-40°F is where the magic happens for disease resistance. Use a paper bag with a few handfuls of dry peat moss or sphagnum moss—this creates the perfect humid environment without being too wet. I poke small holes in the bag for airflow and check every 10-14 days. If you notice any condensation inside, open the bag for a few hours to let excess moisture escape.
Planting Preparation: Before planting, give your stratified potatoes that final 2-week adjustment period in a cool, bright spot. This gradual transition prevents shock when you move them outdoors. I place my containers in an unheated garage or basement where they get natural light but stay protected from temperature swings. Watch for the sprouts to turn deep green—this is your signal they're ready for full outdoor conditions.
Pro Tips for Sprouting Seed Potatoes
- Cold stratification might seem like a waiting game, but these key techniques will help you maximize your success rate and grow potatoes that outperform store-bought every time.
- The Initial Sprouting Phase: During that first 2-3 week pre-stratification period at 50-60°F, place your potatoes in a spot where they get bright, indirect light.
- Cutting and Drying Technique: When cutting your potatoes into 2-3 inch chunks, make sure each piece has at least one strong sprout.
Frequently asked questions
Got questions about sprouting seed potatoes? You’re not alone—growing your own spuds from scratch can feel tricky at first! Below, we’ve tackled the most common queries to help you master cold stratification and boost your success rate.
How long does it take for seed potatoes to sprout after cold stratification?
With proper cold treatment (4–6 weeks in a cool, dark spot like a fridge), your seed potatoes should start sprouting within 2–4 weeks after planting. If you’ve chilled them correctly, you’ll see tiny white or green shoots peeking out in 3–6 weeks after planting in soil. Patience is key—rushing the process can lead to weak sprouts!
Can I skip cold stratification and plant seed potatoes right away?
Technically, yes—but your success rate will plummet. Cold stratification mimics winter conditions, breaking dormancy and encouraging stronger, more uniform sprouts. Without it, you might end up with uneven growth, fewer tubers, or even rot. If you’re in a hurry, opt for certified seed potatoes (already pre-sprouted) or use a shortened cold period (2–3 weeks) for a compromise.
What do I do if my seed potatoes rot during cold stratification?
Rotting is usually a sign of too much moisture or warmth. Store your potatoes in a paper bag or mesh sack (not plastic!) in a cool (35–45°F) but frost-free spot. Check them weekly—remove any soft, mushy, or moldy potatoes immediately. If rot spreads, try a drier location or reduce humidity with a fan (on low). Prevention is easier than cleanup!
How many sprouts should I leave on each seed potato before planting?
Aim for 1–3 healthy sprouts per potato—any more can compete for energy and weaken growth. Gently twist off excess sprouts (don’t pull!) and leave the sturdiest ones. If sprouts are long and leggy, trim them to 1–2 inches before planting to encourage root development. Pro tip: Plant with the sprouts facing up for the best results!
When is the best time to plant sprouted seed potatoes outdoors?
Wait until after the last frost (when soil temps hit 45°F+) and 2–4 weeks before your area’s last frost date. Early planting (if soil is workable) gives potatoes a head start, but don’t plant too soon—cold soil can stunt growth. In warm climates, plant in late winter/early spring; in cooler zones, aim for March–April. A soil thermometer helps!
Bonus Tip: What if my sprouts turn green or leggy?
Green sprouts mean too much light during stratification—store them in complete darkness (a cardboard box works!). Leggy sprouts? They’re stretching for light—trim them back and plant deeper (4–6 inches) to encourage root growth. Both issues are fixable—just adjust your storage conditions!
Wrapping up and next steps
Growing your own potatoes from sprouted seed potatoes is a rewarding and cost-effective way to ensure a bountiful harvest next season! By mastering cold stratification, you’ll boost your success rate to 95% or higher—saving money and time while enjoying fresh, homegrown spuds. 🌱
Now that you’re armed with the knowledge, take action! Start your sprouting process today, and soon you’ll be digging up your own thriving potato plants. Happy gardening—your future harvest is waiting! 🚜✨