
Container Gardens
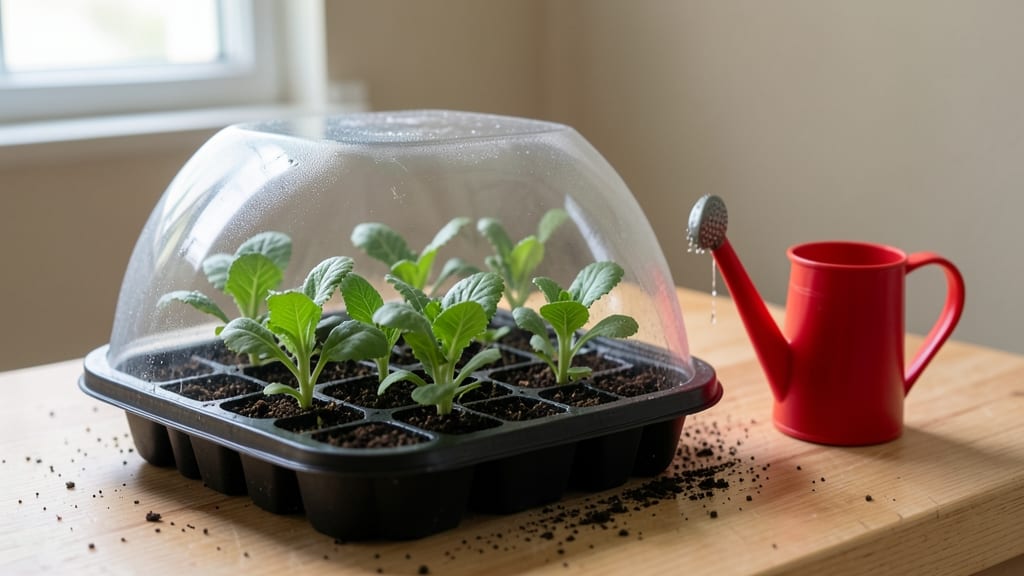
Sprouting seeds indoors lets you grow fresh herbs anytime, even without a sunny window. 🌱 I’ve grown basil, cilantro, and chives on my kitchen counter for years—no greenhouse or expensive gear required.
The trick is matching the right seeds to simple containers, keeping moisture consistent, and using basic grow lights when natural light falls short.
You’ll need just three things: seeds (herbs like basil or microgreens work best), a shallow container with drainage, and a light source—even a bright lamp will do. Most setups cost under $20 and take up less space than a coffee mug.
The payoff? Snipping fresh herbs for cooking whenever you want, no matter the season or weather outside.
Expect your first harvest in just 2-3 weeks, with plants that stay productive for months. The smell of fresh basil or the bright green of microgreens makes this one of the most rewarding indoor gardening projects. Plus, you’ll avoid store-bought herbs that wilt within days.
Works for beginners, small spaces, or anyone tired of waiting for spring to garden. Here’s how to get started without overcomplicating it—no green thumb required.
📚 In This Guide
- What you need
- Instructions
- Tips and common mistakes
- Wrapping up and next steps
What you need
- ● Seeds: Choose fast-growing herbs like basil, cilantro, parsley, or mint (1–2 tbsp per container). Opt for organic, non-GMO seeds for best results.
- ● Grow Lights: A full-spectrum LED grow light (10–15W) or a compact fluorescent bulb (CFL) with a photosynthesis spectrum (e.g., 6500K daylight bulb).
- ● Containers: Small pots (4–6 inches deep) with drainage holes or a shallow tray (like a baking dish) with a mesh screen for airflow.
- ● Potting Mix: Seed-starting mix or a lightweight, well-draining soil blend (avoid garden soil—it’s too dense!).
- ● Water: Room-temperature, filtered water (chlorine-free if possible). A spray bottle helps for gentle hydration.
- ● Humidity dome or plastic wrap to retain moisture during germination.
- ● Timer for grow lights (12–16 hours of light daily).
- ● Small hand trowel or spoon for planting.
- ● Fertilizer (balanced liquid fertilizer, diluted to half-strength, after sprouts appear).
- ● Thermometer (ideal soil temp: 65–75°F / 18–24°C for most herbs).
- ● Label your containers! Herbs look similar until they sprout.
- ● Use a tray or saucer under pots to catch excess water and prevent soggy roots.
- ● For extra speed, soak seeds in water for 4–6 hours before planting (except for delicate herbs like basil).
Step-by-Step instructions for sprouting seeds indoors
Grow fresh herbs year-round with this foolproof method—no sunlight required.
🌱 Step 1: Prepare Your Containers and Soak the Seeds
Use the 4 shallow containers you’ve chosen, each with drainage holes. Line them with a quart of clean cheesecloth or a thin layer of paper towels—this keeps seeds contained while allowing airflow. Wet the cloth or towels thoroughly with warm water until they’re damp but not dripping.
Spread 1 tablespoon of seeds evenly across each container. Here’s the thing—I like to scatter them loosely rather than crowding them, because overpacked seeds suffocate and rot. Place another layer of damp cheesecloth or towels on top, then gently mist everything with warm water until the cloth feels uniformly moist. This step is critical: if the seeds stay dry, they won’t sprout.
💧 Step 2: Maintain Moisture and Warmth for Germination
Stack the containers in a warm, dark place like a cupboard or under your sink. Keep the cheesecloth damp by misting it 2-3 times daily—you’ll know it’s right when the cloth stays moist but doesn’t pool water. Check daily for sprouts, which should appear in 3-7 days depending on the herb (basil and cilantro sprout fastest).
Real talk: if you see mold or fuzzy growth, toss the batch immediately. That’s a sign of too much moisture or poor airflow. I’ve ruined a few batches this way—don’t skip the daily checks! Once sprouts are ¼ inch tall, it’s time to move them to light.
☀️ Step 3: Transition to Light and Encourage Growth
Place the sprouting containers under 4-6 hours of indirect light daily. A bright windowsill or a grow light set 6-12 inches away works perfectly. Rotate the containers a quarter turn daily so sprouts grow straight instead of leaning toward the light. You’ll see new leaves emerge within 5-7 days—that’s your signal everything is working.
Water gently from the bottom by placing the containers in ½ inch of water for 10-15 minutes daily. Let them drain completely afterward to avoid root rot. If leaves turn yellow, you’re overwatering. If they wilt, they need more moisture. This balancing act is the key to healthy sprouts.
✂️ Step 4: Harvest at Peak Freshness
Harvest when sprouts reach 2-3 inches tall, typically 10-14 days after germination. Use clean scissors to snip just above the soil line or cheesecloth. Rinse them briefly under cool water to remove any debris, then pat dry with a paper towel. Store them in a ziplock bag in the fridge for up to 5 days—they’ll stay fresher than store-bought herbs.
Here’s the bonus: you can regrow these sprouts! After harvesting, rinse the remaining seeds, replace the cheesecloth, and repeat the process. I’ve kept basil and cilantro sprouting continuously for months this way—no need to replant seeds every time.
Tips & tricks for perfect indoor herb sprouts
Here's what I've learned after sprouting herbs indoors for years—these little tricks make all the difference between wimpy sprouts and lush, flavorful greens.
Cheesecloth vs Paper Towels: I prefer cheesecloth because it holds moisture better and provides slightly better airflow than paper towels. If you use paper towels, opt for the thinner, single-ply kind—thick towels can trap too much moisture and lead to mold. In Step 1, when lining your containers, make sure the cheesecloth or towels are completely saturated but not dripping, or you'll risk waterlogging your seeds.
Germination Speed Secret: The 3-7 day germination window in Step 2 can feel like forever, but there's a trick to speed things up! Place your containers in a warm spot (around 70-75°F is ideal). I've found that setting them on top of the fridge works perfectly—it's warm without being too hot. Also, cover each container with a plastic wrap lid (loosely) to trap heat and humidity. Just remember to remove it after sprouts appear to prevent mold.
Light Rotation Technique: In Step 3, when you're rotating your containers a quarter turn daily, I've noticed that turning them every 8 hours (instead of once daily) gives even straighter growth. This is especially helpful if your light source is uneven. Also, if you're using a grow light, keep it 6-12 inches away—closer than 6 inches can scorch your delicate sprouts, while farther than 12 inches won't provide enough intensity.
Harvesting Hack: When harvesting in Step 4, use sharp kitchen scissors instead of dull ones—they create cleaner cuts that heal faster. Here's a pro tip: harvest in the morning when herbs are most flavorful and moist. After cutting, immediately rinse your sprouts under cool water and pat them dry with a paper towel. This removes any debris and helps them stay fresh longer in the fridge. I've found they keep best when stored in a ziplock bag with a paper towel to absorb excess moisture.
Pro Tips for Sprouting Seeds Indoors
- Here's what I've learned after sprouting herbs indoors for years—these little tricks make all the difference between wimpy sprouts and lush, flavorful greens.
- Cheesecloth vs Paper Towels: I prefer cheesecloth because it holds moisture better and provides slightly better airflow than paper towels.
- Germination Speed Secret: The 3-7 day germination window in Step 2 can feel like forever, but there's a trick to speed things up!
Frequently asked questions
Got questions about sprouting seeds indoors? You’re not alone—here are some of the most common ones, answered clearly so you can get growing with confidence!
What’s the easiest seed to sprout indoors for beginners?
Start with fast-sprouting, low-maintenance seeds like basil, mint, or chives. They germinate in 3–7 days and thrive in shallow water or damp paper towels. Avoid finicky seeds like parsley or dill until you’ve mastered the basics!
How long until I see sprouts after planting?
Germination time varies by seed! Most herbs pop up in 5–14 days with consistent warmth (70–75°F) and moisture. Check daily—some, like cilantro, may take 2–3 weeks. Keep seeds in a dark, warm spot (like a cabinet) until sprouts appear, then move to light.
Do I need special equipment, or can I use household items?
No fancy tools required! Use glass jars, plastic containers, or even damp paper towels in a sealed bag. For drainage, poke holes in lids or use a colander. No grow lights? A sunny windowsill works for early stages—just rotate trays for even light.
What do I do if my seeds rot or mold instead of sprouting?
Overwatering or poor airflow causes rot. Fix it fast:
- Drain excess water immediately and let seeds dry slightly.
- Rinse seeds 2x/day with clean water (no standing water).
- Move to a well-ventilated spot (like a mesh bag) to prevent mold.
- Discard moldy seeds and start fresh with new ones.
Can I reuse the water from rinsing sprouts?
No—never reuse rinse water! It harbors bacteria (like E. coli) from seeds. Always use fresh, room-temperature water to avoid contamination. Drain thoroughly after rinsing to keep sprouts healthy and safe to eat!
Wrapping up and next steps
Sprouting seeds indoors is your ticket to year-round fresh herbs—no sunlight required! With just a few simple supplies and a little patience, you can grow vibrant greens like basil, mint, or parsley right on your windowsill or countertop. This method is not only rewarding but also budget-friendly and eco-conscious.
Now that you’re armed with the know-how, why not start your first batch today? Pick your favorite seeds, grab your supplies, and enjoy the satisfaction of harvesting homegrown herbs in weeks. Happy sprouting! 🌱✨