Vegetables
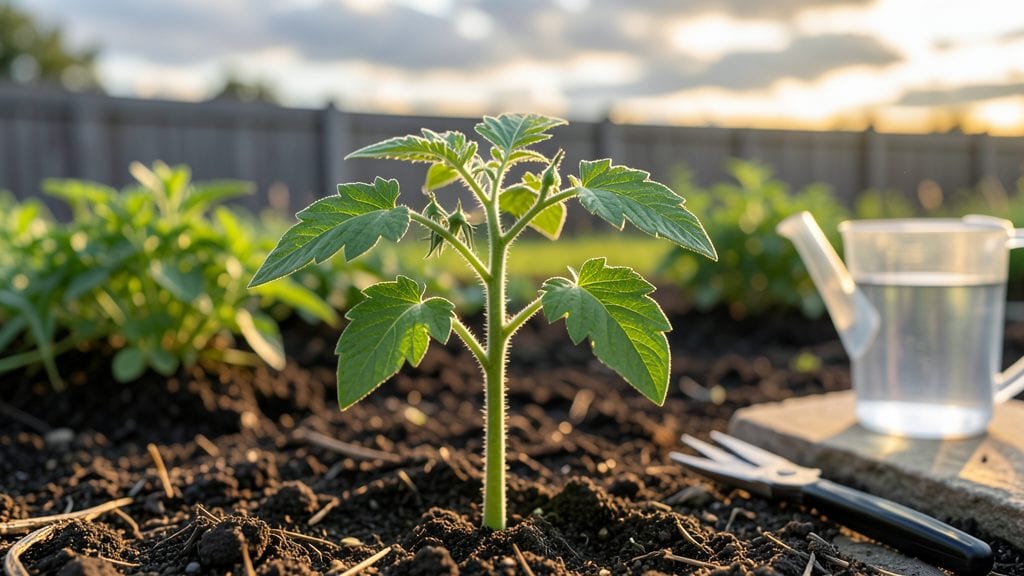
Nothing beats capturing the journey of tomato seedlings in images—from those first fuzzy cotyledons to the thick stems ready for transplanting. become crystal clear. These visual milestones help you spot problems early, like leggy stems or yellowing leaves, before they derail your harvest.
The key stages—cotyledons, true leaves, and transplant size—each have distinct features that tell you exactly what your seedlings need. You’ll learn how to measure height, count leaves, and check stem thickness to know when they’re ready for pots or the garden.
Most beginners overlook these details, but they’re the difference between thriving plants and wasted effort.
By the end, you’ll recognize what a strong seedling looks like and avoid common pitfalls like overwatering or poor lighting. The right timing for transplanting depends on these visual cues, not just calendar dates. You’ll be confident moving seedlings outside when they’re truly ready.
Perfect for first-timers or anyone who wants to fine-tune their seed-starting skills. These growth stages are your roadmap to healthier, more productive tomato plants all season long.
📚 In This Guide
- What you need
- Instructions
- Tips and common mistakes
- Wrapping up and next steps
What you need
- ● Seeds: High-quality tomato seeds (choose heirloom, hybrid, or disease-resistant varieties based on your needs). Quantity: 3–5 seeds per container (for better success rates).
- ● Seed-starting containers: Seedling trays with individual cells (biodegradable or plastic, 2–4 inches deep). Quantity: 1 tray (holds ~50–100 cells).
- ● OR Small pots (3–4 inches in diameter). Quantity: 1–2 per seedling.
- ● Seed-starting mix: Lightweight, sterile potting mix designed for seedlings (avoid garden soil—it’s too dense!). Quantity: 1–2 bags (covers ~1–2 cubic feet).
- ● Grow lights or sunny windowsill: Grow lights: LED or fluorescent (12–16 hours of light daily). Specs: 2000–4000 lumens, adjustable height.
- ● OR South-facing window with 6+ hours of direct sunlight.
- ● Spray bottle: For gentle watering (avoids disturbing seeds). Quantity: 1.
- ○ Heat mat (optional but helpful): Keeps soil warm (70–80°F) for faster germination. Specs: 10"x20" mat.
- ● Labels & markers: To track seed varieties and planting dates. Quantity: Small sticks or tags + permanent marker.
- ● Humidity dome: Retains moisture and warmth for seeds. Quantity: 1 (fits seedling tray).
- ● Fertilizer: Water-soluble, balanced fertilizer (5-5-5 or 10-10-10). Quantity: Small bottle for diluting.
- ● Tweezers: For delicate seed placement (especially tiny seeds). Quantity: 1 pair.
- ● Thermometer: Soil or air thermometer to monitor temperature. Specs: Digital or analog.
- ● Pruning shears: For trimming leggy seedlings later. Quantity: 1 pair.
Step-by-Step guide to capturing tomato seedling growth stages
Documenting each phase of seedling development helps track progress and diagnose issues early.
Prepare Your Photography Equipment and Setup
Use a DSLR camera with macro lens or a high-resolution smartphone with a close-up lens attachment to capture fine details. Natural light works best, so position seedlings near a south-facing window during morning hours when shadows are minimal. I like to use a white foam board as a backdrop to ensure consistent lighting and color accuracy without distractions.
Set up your camera on a stable tripod to avoid blurry shots from hand movement. If using a smartphone, prop it against a sturdy surface or use a small tripod. Take test shots at different angles to determine the best framing—typically, a close-up view of the seedling's stem and leaves works best for documenting growth stages.
Capture the Germination and Early Seedling Stage
Begin photographing the moment the radicle (first root) emerges from the seed, but focus on the cotyledons—the first true leaves—when they appear. These leaves are typically round and smooth-edged, signaling the seedling has successfully transitioned from relying on the seed's nutrients to photosynthesis. Use a macro setting to emphasize texture and fine details, like the tiny veins forming on the cotyledons.
Label each image with the date and seedling ID (if growing multiple varieties). I keep a small notebook nearby to jot down observations like "Day 7: Cotyledons fully unfurled" or "Day 9: First true leaves emerging." This helps track progress and compare growth rates between seedlings or years.
Document the First True Leaves and Early Growth
Once the first true leaves (usually serrated or lobed) appear, switch to a slightly wider shot to capture the entire seedling. These leaves differ from cotyledons in shape and function—they’re the plant’s first attempt at photosynthesis. Photograph the stem thickness, leaf arrangement, and color intensity, as these indicators reveal the seedling’s health and nutrient uptake.
Take images at 3-5 day intervals during this phase to capture rapid changes. Pay attention to the soil surface in the background—if it looks dry or cracked, it’s a sign the seedling may need water. I like to include a ruler or measuring tape in the frame to document the seedling’s height accurately, which helps track growth over time.
Monitor and Photograph the Vegetative Growth Phase
As the seedling enters the vegetative growth phase (typically 3-6 weeks after germination), focus on capturing the leaf structure, stem strength, and root development (if visible through the container). Use a side-angle shot to highlight the plant’s overall shape and any signs of leggy growth (a common issue if light is insufficient). Leggy seedlings have thin stems and large, widely spaced leaves, which indicate they’re stretching toward light.
Take weekly progress shots to document changes in leaf size, color, and stem thickness. If you notice yellowing leaves or stunted growth, photograph these symptoms immediately—they may signal overwatering, nutrient deficiencies, or pest activity. I also include a close-up of the soil surface to show moisture levels, as this helps diagnose irrigation issues.
Capture the Transplant-Ready Stage and Beyond
When seedlings are 4-6 weeks old and show 4-6 true leaves, they’re typically ready for transplanting. Photograph the entire seedling, including the root ball if possible, to document its size and health before moving it outdoors. Capture the leaf arrangement, stem thickness, and overall vigor—healthy seedlings should have deep green leaves, compact growth, and no signs of disease.
After transplanting, continue documenting the seedling’s adjustment period. Take images of the newly planted seedling in its permanent location, focusing on the soil level around the stem (it should be at the same depth as in the container) and the surrounding environment. Label these images with the transplant date and location to track how the seedling adapts to its new growing conditions.
Tips & tricks for perfect tomato seedling documentation
Tracking tomato seedling growth through photography reveals insights you might miss with the naked eye—here's how to elevate your documentation process.
Lighting Consistency: The south-facing window recommendation in Step 1 is critical because natural light intensity varies dramatically throughout the day. I schedule my shoots between 9 AM and 11 AM when the light is brightest yet soft enough to avoid harsh shadows. If you notice inconsistent lighting between shots, consider using a portable LED grow light as a supplement—just maintain the same distance from the seedlings for every photo to preserve color accuracy.
Documentation System: For seedlings that develop at different rates, I've found that creating a simple spreadsheet with columns for seedling ID, date, growth stage, and key observations saves time during the busy early growth phase. When you're photographing the cotyledons in Step 2, take an additional wide shot of the entire seedling tray to document relative growth between plants. This visual comparison often reveals subtle differences in health that aren't apparent in individual close-ups.
Growth Phase Transitions: The transition from 3-5 day intervals in Step 3 to weekly shots in Step 4 requires adjustment as seedlings mature. I recommend setting calendar reminders for your shooting schedule—missed shots during the rapid early growth phase can make it difficult to track progress accurately. When you notice the first true leaves in Step 3, that's your cue to begin transitioning to wider shots that capture the entire seedling structure, as these leaves indicate the plant is entering its photosynthetic phase.
Equipment Alternatives: While a DSLR with macro lens is ideal for Step 1, you can achieve excellent results with a smartphone and a simple DIY magnifying setup. Place the seedling on a small white foam board (like the one mentioned in Step 1) and use a 10x magnifying glass to create a close-up effect. For the weekly progress shots in Step 4, a basic point-and-shoot camera works perfectly—just maintain consistent framing and lighting conditions to ensure comparability between images.
Pro Tips for Tomato Seedling Images
- Tracking tomato seedling growth through photography reveals insights you might miss with the naked eye—here's how to elevate your documentation process.
- Lighting Consistency: The south-facing window recommendation in Step 1 is critical because natural light intensity varies dramatically throughout the day.
- When you're photographing the cotyledons in Step 2, take an additional wide shot of the entire seedling tray to document relative growth between plants.
Frequently asked questions
Got questions about nurturing those tiny tomato seedlings into thriving plants? You’re not alone! Here are answers to the most common queries—from timing tips to troubleshooting tricks—so you can grow like a pro.
How long does it take for tomato seedlings to appear after planting seeds?
With the right conditions (warm soil, moisture, and light), tomato seeds typically sprout in 5–14 days. If you’ve waited 2 weeks with no signs of life, try gently re-moistening the soil or checking seed viability. Patience is key—some varieties (like heirlooms) can take longer!
When is the best time to transplant tomato seedlings outdoors?
Wait until after the last frost and when nighttime temps stay above 50°F (10°C). Seedlings should have 4–6 true leaves and be 3–4 inches tall. Harden them off for 7–10 days first by gradually exposing them to outdoor conditions. Pro tip: Plant in the late afternoon to reduce transplant shock!
Why are my tomato seedlings turning yellow or leggy?
Yellow leaves often signal overwatering, nutrient deficiency (like nitrogen), or poor drainage. Leggy seedlings? They’re stretching for light—move them closer to a sunny window or grow light (12–16 hours/day). For yellowing, check soil moisture and consider a balanced fertilizer. Don’t panic! Adjust care, and they’ll bounce back.
Can I use images of tomato seedlings to compare my plant’s progress?
Comparing your seedlings to stage-by-stage images (like ours!) helps spot issues early. Look for healthy green leaves, sturdy stems, and no signs of mold or pests. Apps like GrowVeg or PlantNet also let you upload photos for expert ID help. Visual cues are your best friend in gardening!
What’s a good alternative if my tomato seeds won’t germinate?
Try these fixes:
- Fresh seeds: Some lose viability after 1–2 years. Test a few from a newer packet.
- Warmth boost: Place seeds on a seedling mat or in a warm, dark spot (like on top of the fridge) for 24 hours before planting.
- Soak seeds: Soak in lukewarm water for 12–24 hours to soften the seed coat.
- Buy seedlings: Skip the guesswork and grab healthy starter plants from a nursery (just acclimate them first!).
Wrapping up and next steps
Watching your tomato seedlings grow from tiny sprouts to thriving plants is incredibly rewarding! 🌱 With the right tomato seedling images as your guide, you’ve got all the tools to nurture healthy plants and enjoy a bountiful harvest.
Now that you’re armed with knowledge, it’s time to roll up your sleeves and get growing—whether you’re a first-time gardener or a seasoned pro!
Ready for the next step? Plant those seedlings outdoors (or in containers) once they’ve developed a few true leaves and the weather warms up. Keep an eye on their progress, and soon, you’ll be feasting on homegrown tomatoes straight from your garden! 🍅