Plants
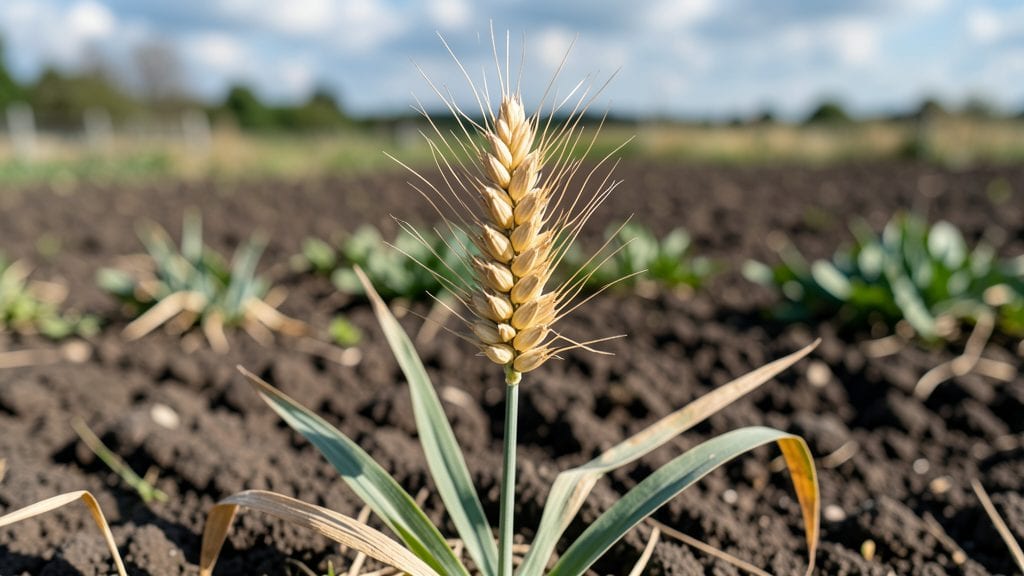
That tall, feathery wheatgrass seed head is where the magic happens—turning your lush green shoots into a self-sustaining cycle of new growth. 🌱 I used to toss those dried stems, but now I know they’re the key to free plants and zero-waste gardening.
The seed heads form when your wheatgrass matures, typically 6-8 weeks after sprouting, and each one holds dozens of tiny seeds ready for your next batch.
Encouraging seed production is easier than you think—just let a few stalks flower in your tray. Avoid cutting them back until the seed heads turn golden-brown and brittle. Once they release seeds on their own, collect them by gently shaking the stems over a bowl or paper.
These seeds stay viable for 1-2 years if stored in a cool, dry place, so you’ll never need to buy more.
You’ll end up with a steady supply of fresh wheatgrass without replanting, plus the satisfaction of watching new sprouts emerge from seeds you grew yourself. The seed heads aren’t edible, but they’re perfect for propagation—just sprinkle them over fresh soil, mist lightly, and watch your garden multiply.
This is how wheatgrass grows on autopilot.
Works for indoor trays, windowsill setups, or even small outdoor patches. The same principles apply whether you’re growing for juicing, garnishes, or just the joy of watching it thrive. Let’s turn those stems into your next harvest.
📚 In This Guide
- What you need
- Instructions
- Tips and common mistakes
- Wrapping up and next steps
What you need
- ● Wheatgrass seeds: Choose organic, non-GMO seeds (e.g., Triticum aestivum)—about 1–2 pounds (0.5–1 kg) for a small harvest.
- ● Growing containers: Shallow trays (6–8 inches deep) or pots with drainage holes (e.g., 10x20-inch trays for a large batch).
- ● 1–2 containers per harvest cycle (reusable!).
- ● Potting soil: Lightweight, organic, and seed-starting mix (avoid heavy garden soil). 2–3 inches (5–7.5 cm) depth per tray.
- ● Watering can or spray bottle: Fine mist setting to avoid displacing seeds.
- ● Grow lights or sunny windowsill: Natural sunlight: 6+ hours/day (south-facing window ideal).
- ● Grow lights: LED full-spectrum bulbs (12–16 hours/day, 6–12 inches above plants).
- ● Scissors or sharp knife: For harvesting (sterilized with rubbing alcohol).
- ● Seedling heat mat: Speeds up germination (70–75°F/21–24°C).
- ● pH test kit: Ideal soil pH for wheatgrass: 6.0–7.0.
- ● Compost or worm castings: Boosts nutrient density (mix 10% into soil).
- ● Jute or burlap sacks: For drying harvested seed heads (if saving seeds).
- ● Food processor or juicer: For turning wheatgrass into fresh juice or powder.
Step-by-step guide to growing wheatgrass seed heads for continuous harvest
Here’s how I grow wheatgrass year-round with minimal waste and maximum yield—no fancy equipment needed.
🌱 Step 1: Choose and Prepare Your Seed Heads
Start with organic, untreated wheatgrass seed heads (or whole wheat berries if that’s what you have). I always rinse them thoroughly under cool water to remove any dust or debris—this keeps your growing medium clean and prevents mold. Spread them on a clean towel to dry completely before storing in an airtight container.
If using whole wheat berries, soak them for 8-12 hours in cool water to soften the outer hull. This speeds up germination and ensures even growth. Drain well afterward—soggy seeds invite rot. You’ll know they’re ready when they sink to the bottom of the bowl.
🪴 Step 2: Set Up Your Growing Tray or Container
Use a shallow tray or container with drainage holes—no need for anything fancy. I line mine with a paper towel or coffee filter to help with moisture control and easy cleanup. Fill the bottom 1 inch deep with the potting mix or even a mix of coconut coir and perlite for better drainage.
Moisten the growing medium until it’s damp but not soggy—think of a wrung-out sponge. Press it down lightly so the surface is firm but not compacted. This prevents seeds from floating away when you add water later. The goal is a stable base for your seed heads to root into.
💧 Step 3: Plant and Hydrate the Seed Heads
Place your prepared wheatgrass seed heads (or whole berries) directly onto the moistened medium, spacing them 1-2 inches apart. If using seed heads, orient them with the cut ends facing downward—they’ll root more easily this way. Gently press them into the soil just enough so they stay upright but don’t bury them.
Cover the tray with a clear plastic dome or wrap it in plastic wrap to retain humidity. This creates a mini greenhouse effect that speeds up germination. Keep the tray in a warm spot—65-75°F is ideal—like a sunny windowsill or under a grow light. You’ll see sprouts in 3-5 days, but don’t remove the cover until you do.
☀️ Step 4: Provide Light and Maintain Moisture
Once sprouts appear, remove the cover and move the tray to a spot with bright, indirect light. Direct sunlight can scorch young shoots, so a north-facing window or a grow light 6-12 inches away works best. Wheatgrass needs 12-14 hours of light daily to grow thick and vibrant.
Water gently every 1-2 days, keeping the growing medium consistently moist but never waterlogged. I use a spray bottle to mist the soil lightly—this prevents disturbing the roots while ensuring even hydration. You’ll know it’s time to water again when the top layer feels dry to the touch.
✂️ Step 5: Harvest and Regrow for Zero Waste
When the wheatgrass reaches 6-8 inches tall (about 10-14 days after sprouting), it’s ready to harvest. Use clean scissors to cut just above the soil line, leaving the base intact. This encourages regrowth—you’ll get 2-3 more harvests from the same seed head before it’s time to replant.
After the final harvest, compost the remaining plant matter or use it as mulch. Rinse your tray thoroughly, and it’s ready for a fresh batch of seed heads. This cycle ensures you’re always growing fresh wheatgrass with minimal waste—just replant, water, and repeat.
Tips & tricks for perfect wheatgrass seed head growth
Between us, these little details make all the difference between healthy wheatgrass and a sad, moldy mess. I learned these the hard way after my first batch turned into a science experiment gone wrong.
Seed Preparation Secret: For whole wheat berries, the 8-12 hour soak is non-negotiable—don't cut corners! I use a bowl with just enough cool water to cover the berries completely. After draining, spread them on a paper towel and let them air dry for 10 minutes before planting. This prevents soggy seeds that can rot in your growing medium.
Temperature Matters: That 65-75°F range is perfect for germination, but don't stress if your home runs cooler. If your space is consistently below 65°F, place the tray on a heating pad set to low under the grow light. I've had great success keeping mine at 70°F consistently—just avoid anything above 80°F or you'll risk mold.
Lighting Hack: The 12-14 hours of light doesn't have to mean leaving your grow light on all night. Use a timer to automate it—most affordable grow lights come with this feature. Position the light 6-12 inches away and adjust based on leaf color: if they're stretching tall and pale, move it closer; if they're turning yellow, give them some space.
Harvest Timing: Those 6-8 inches might seem arbitrary, but there's a reason! At this height, the grass has maximum chlorophyll content (that's what makes it nutritious). I harvest when the blades are thick enough to roll but haven't started flowering yet. The first harvest gives you the most vibrant grass, so don't wait too long!
Pro Tips for Wheatgrass Seed Head
- Between us, these little details make all the difference between healthy wheatgrass and a sad, moldy mess.
- Seed Preparation Secret: For whole wheat berries, the 8-12 hour soak is non-negotiable—don't cut corners!
- Temperature Matters: That 65-75°F range is perfect for germination, but don't stress if your home runs cooler.
Frequently asked questions
How long does it take for wheatgrass seed heads to mature after planting?
Wheatgrass seed heads typically mature in 90–120 days after planting, depending on the variety and growing conditions. If you’re growing for seed (rather than shoots), watch for the feathery, golden-brown plumes—this signals readiness. For faster results, opt for early-maturing varieties like ‘Russian’ or ‘Amana’ wheatgrass.
Can I harvest wheatgrass seed heads more than once in a season?
Yes! Wheatgrass is a perennial in warm climates (Zones 5–9) and can produce seed heads for 3–5 years with proper care. After harvesting the first seed head, trim the plant back to 6–8 inches to encourage regrowth. In colder regions, treat it as an annual and replant yearly for consistent yields.
What should I do if my wheatgrass seed heads aren’t forming?
Missing seed heads? Check these fixes:
- Light: Wheatgrass needs 6+ hours of sunlight daily. Move pots or relocate plants to a sunnier spot.
- Water: Overwatering can drown roots—ensure soil is moist but well-draining.
- Nutrients: Add a balanced organic fertilizer (10-10-10) when tillering begins.
- Age: Seed heads form only after the plant matures (90+ days). Be patient!
Are there alternatives to wheatgrass for seed heads?
If you love the look of seed heads but want variety, try these low-maintenance, edible, or ornamental options:
- Oat grass (Avena sativa) – Fast-growing, great for sprouts and seeds.
- Barley (Hordeum vulgare) – Hardy and drought-tolerant.
- Rye (Secale cereale) – Cold-hardy with striking seed plumes.
- Quinoa (Chenopodium quinoa) – Nutrient-packed and ornamental.
How do I store harvested wheatgrass seed heads for replanting?
To save seeds for next season:
- Let seed heads fully dry on the plant (or indoors with airflow).
- Gently rub the plumes between your hands or use a fork to release seeds.
- Store seeds in a paper envelope or breathable container in a cool, dark place (like a jar in the fridge).
- Seeds stay viable for 1–2 years if kept dry.
Wrapping up and next steps
Growing a wheatgrass seed head isn’t just rewarding—it’s a game-changer for sustainable living and fresh, nutrient-packed greens year-round! 🌱 Whether you’re a seasoned gardener or a curious beginner, this method proves that zero waste and high yields go hand-in-hand.
With just a few simple steps, you can transform scraps into vibrant sprouts and enjoy the tangy, earthy flavor of homegrown wheatgrass anytime.
Ready to take the next step? Start small—try growing a single tray this week and watch your confidence (and harvest!) grow. Tag us in your wheatgrass adventures—we’d love to see your green success! 📸