
Watering
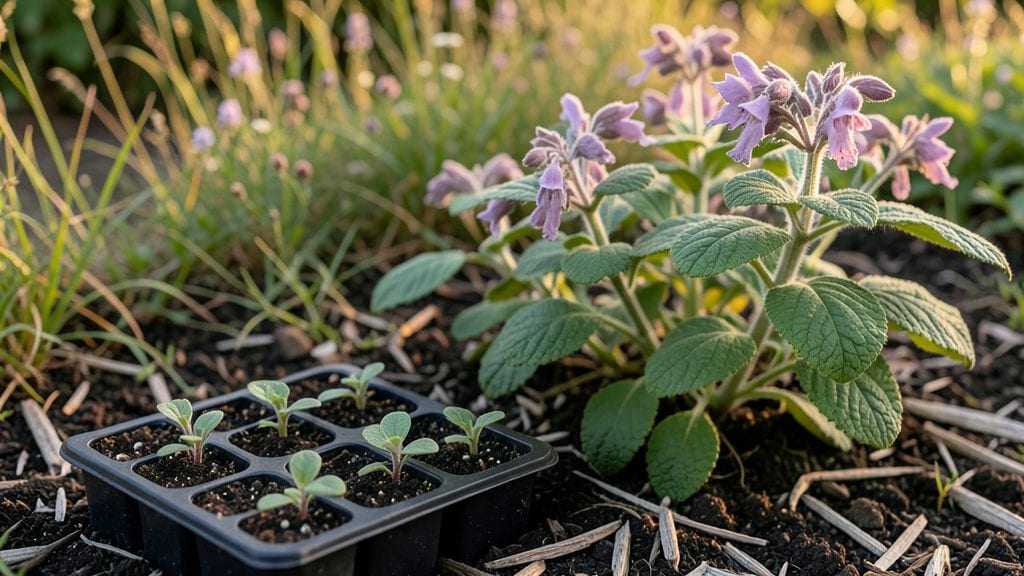
Growing a sturdy wood betony seedling starts with a cold-moist prep that tricks roots into thinking winter’s already here. 🌱 I learned the hard way that rushing this step leads to leggy, weak plants that flop in summer—so we’re doing it right from the start.
The secret isn’t complicated: it’s about keeping that soil damp but not soggy, and giving those tiny roots the chill they crave before planting. Most beginners skip this, and their seedlings never bounce back like mine do now.
Wood betony thrives when you mimic its natural woodland habitat, which means moist but well-draining soil and partial shade in its early stages. You’ll need a flat with potting mix that holds moisture without turning to mud, plus a way to keep temps steady—around 40-50°F for those first few weeks.
This isn’t a fussy plant, but it will reward you with deep green foliage and tiny purple blooms if you nail this prep work. Think of it like giving your seedlings a spa day before they hit the big garden.
By the time you transplant, you’ll have seedlings with thick stems and a network of roots ready to handle dry spells. The payoff?
A perennial that spreads like crazy, perfect for borders or pollinator gardens—plus, it’s got a history of medicinal uses, though we’re growing it here for looks and resilience. The key is patience: those first few weeks set the stage for years of low-maintenance growth.
Let’s get those seeds started the right way.
Works in zones 3-8, whether you’re tucking them into shady garden corners or container setups. The cold-moist trick applies whether you’re starting from seed or buying young plants—just adjust the timing based on your last frost date.
Here’s how to make it foolproof, even if your thumb’s more brown than green.
📚 In This Guide
- What you need
- Instructions
- Tips and common mistakes
- Wrapping up and next steps
What you need
- ● Wood betony seeds: 1 packet (50–100 seeds, depending on desired quantity). Opt for organic, untreated seeds for best results.
- ● Seed-starting mix: 1–2 gallons of high-quality, sterile potting soil (look for a blend labeled for seedlings or seed-starting).
- ● Containers: Small seed trays (with drainage holes) or
- ● Individual pots (3–4 inches deep) for better root development.
- ● Cold frame or refrigerator: A small, lidded container (like a plastic bin) or a dedicated cold frame for stratification.
- ● Spray bottle: For gentle watering to avoid disturbing seeds.
- ● Plastic wrap or humidity dome: To retain moisture during germination.
- ● Labels and markers: To track planting dates and seed varieties.
- ● Gloves: To keep hands clean while handling soil.
- ○ Fine-mesh sieve: For sifting soil to create a smooth seedbed (optional but helpful).
- ● Grow lights or sunny windowsill: If you’re extending the cold-moist phase indoors.
- ○ Moisture meter: To monitor soil dampness (optional but useful for precision).
- ● Transplanting tweezers: For delicate seedling handling when it’s time to move them outdoors.
Step-by-Step instructions for cold-moist wood betony seedling prep
Here’s how to give your wood betony seedlings the perfect start with cold-moist prep.
🌱 Step 1: Prepare the Seed Tray and Soil Mix
Fill a clean seed tray with a well-draining mix of 50% peat moss and 50% perlite—this keeps moisture consistent while preventing root rot. I like to moisten the mix first by sprinkling it with water until it feels like a damp sponge (not dripping). This ensures even moisture distribution without compacting the soil.
Press the mix lightly into the tray so it’s firm enough to hold seeds but still airy. The goal is to create a fine, even surface where seeds can nestle just below. If the mix is too loose, seeds may sink too deep; if too packed, they’ll struggle to push through. Tap the tray gently on the table to settle everything evenly.
💧 Step 2: Sow Seeds and Apply Cold-Moist Treatment
Scatter the wood betony seeds thinly across the tray—no more than 1 seed per inch—since they germinate slowly and need space. Cover them with a thin layer of vermiculite (about ¼ inch deep) to hold moisture while keeping light exposure minimal. This layer also helps regulate temperature fluctuations, which wood betony seedlings appreciate.
Mist the tray lightly with water until the vermiculite feels evenly damp but not soggy. Place the tray in a plastic bag and seal it loosely (leave a small gap for airflow). Store it in a cool, dark location—like a refrigerator’s crisper drawer—where temperatures stay between 35-45°F. This cold-moist stratification mimics natural conditions and encourages strong root development.
⏰ Step 3: Monitor Moisture and Wait for Germination
Check the tray every 7-10 days to ensure the vermiculite remains moist but not waterlogged. If it feels dry to the touch, mist it lightly again. Wood betony seeds can take 4-8 weeks to germinate, so patience is key. You’ll know it’s working when tiny green sprouts appear—usually within 6-8 weeks under these conditions.
Once seedlings emerge, remove the tray from cold storage and move it to a bright, indirect light spot. Avoid direct sunlight at first—it can scorch tender leaves. Keep the vermiculite lightly moist (not wet) and watch for the first true leaves (the second set after the initial cotyledons). This is your cue that the seedlings are ready for their next phase.
☀️ Step 4: Transition to Growing Conditions
After 2-3 weeks of growth, gradually introduce the seedlings to full light by moving them to a sunny window or under a grow light. Wood betony thrives in partial shade to full sun, so I start with 4-6 hours of light daily and increase exposure over 7-10 days. This slow transition prevents shock and encourages sturdy stems.
Water the tray from the bottom by placing it in a shallow tray of water for 10-15 minutes, then drain excess. This method keeps moisture consistent without disturbing the delicate roots. Once seedlings have 3-4 sets of true leaves, they’re ready for individual pots—just be gentle when transplanting to avoid damaging their tender growth.
Tips & tricks for perfect wood betony seedling prep
These practical tips will help you create the ideal cold-moist environment for your wood betony seedlings to thrive.
Soil Mix Consistency: The 50% peat moss and 50% perlite mix in Step 1 is crucial for moisture control. After moistening, press it just enough to create a firm but airy surface—think of it like damp sand at the beach. If you press too hard, seeds won't push through easily; if too loose, they'll sink too deep. I find tapping the tray gently on the table helps settle it evenly without compacting. This balance ensures consistent moisture while preventing root rot.
Vermiculite Layer Precision: When covering seeds with vermiculite in Step 2, aim for exactly ¼ inch depth. Too thin and moisture escapes; too thick and seeds suffocate. I use a ruler to verify depth—this layer should feel like a damp, cool sponge. The vermiculite also helps maintain the 35-45°F temperature range by slowing heat fluctuations, which is essential for cold-moist stratification.
Moisture Monitoring: During the 7-10 day checks in Step 3, use your fingers to gauge moisture—vermiculite should feel like a wrung-out sponge, not a dripping washcloth. I find keeping a small spray bottle nearby helps maintain even moisture without over-saturating. Remember, wood betony seeds need patience; the 4-8 week germination window is normal, but consistent moisture keeps them from drying out during this critical period.
Light Transition Strategy: When moving seedlings to light in Step 4, start with just 4-6 hours of indirect light daily. I place mine under a sheer curtain near a south-facing window to filter sunlight gently. Gradually increase exposure over 7-10 days—this slow transition prevents leaf scorch while building their resilience. The first true leaves (second set) are your signal they're ready for more light, but don't rush this process.
Pro Tips for Wood Betony Seedling
- These practical tips will help you create the ideal cold-moist environment for your wood betony seedlings to thrive.
- Soil Mix Consistency: The 50% peat moss and 50% perlite mix in Step 1 is crucial for moisture control.
- Vermiculite Layer Precision: When covering seeds with vermiculite in Step 2, aim for exactly ¼ inch depth.
Frequently asked questions
Got questions about nurturing your wood betony seedlings? You’re not alone! Here are some of the most common concerns—and straightforward answers—to help you set those delicate roots on the path to success.
What’s the best time to plant wood betony seedlings?
Plant your seedlings in early spring or early fall when soil temps are cool (50–65°F). Avoid summer heat—it stresses young plants. If you’re in a warm climate, opt for fall planting to let roots establish before winter. Pro tip: Wait until after the last frost for spring planting to prevent cold damage!
How often should I water wood betony seedlings?
Keep soil consistently moist (not soggy!) for the first 4–6 weeks. Water deeply 2–3 times per week, adjusting for rain. Once established, reduce to once a week (or when the top inch of soil feels dry). Warning: Overwatering causes root rot—drainage is key!
Can I grow wood betony from seed instead of seedlings?
Yes! But seedlings give you a head start. If starting from seed, stratify them (mix with damp sand, refrigerate 4–6 weeks), then sow in spring. Seedlings are easier for beginners—just ensure your source is organic and disease-free for best results.
What pests should I watch for with wood betony seedlings?
Keep an eye out for aphids and slugs—they love tender new growth. Use neem oil or diatomaceous earth for mild infestations. For slugs, set out beer traps or handpick them at night. Prevention tip: Mulch lightly to deter pests without smothering seedlings!
How do I protect seedlings from late frosts?
Cover seedlings with frost cloth or a lightweight row cover when frost is forecasted. Remove it during the day for airflow. Avoid plastic—it traps moisture and can cause rot. If temps drop below 20°F, consider moving potted seedlings to a sheltered spot. Bonus: Mulch with straw for extra insulation!
Wrapping up and next steps
Growing a thriving wood betony seedling starts with the right cold-moist prep—patience and consistency are your best friends! 🌱 By following these steps, you’ll give your seedlings the strong root foundation they need to flourish in their new home.
Whether you’re a seasoned gardener or just starting out, your hard work will soon pay off with vibrant, resilient plants.
Ready to take the next step? Once your seedlings are established, transplant them into well-draining soil and keep an eye on their progress. Before you know it, you’ll have a lush garden teeming with wood betony’s beauty! 🌿