Lawn
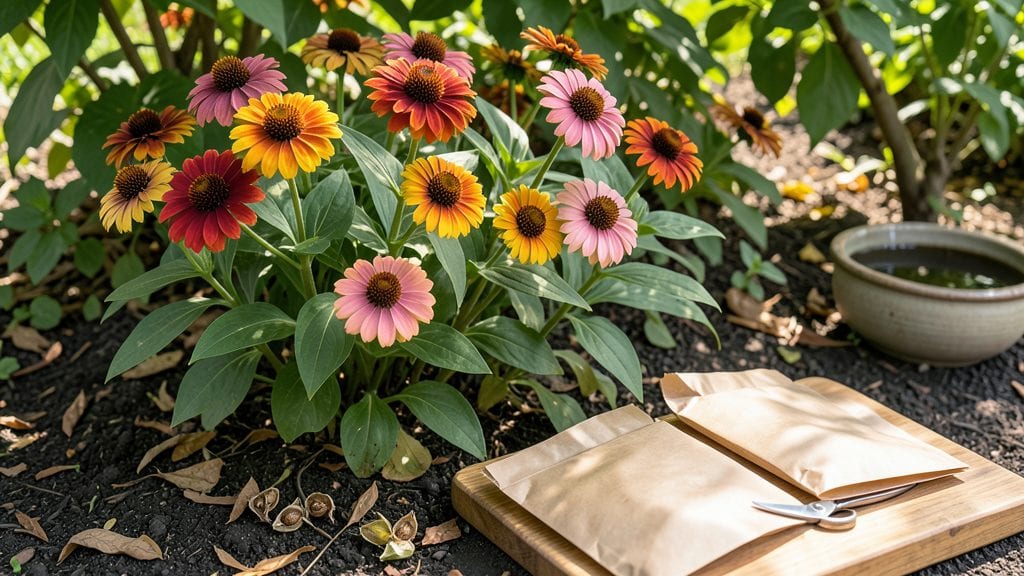
The a zinnia seed collection lets you grow heirloom varieties for free next year—no nursery needed. ✨ I’ve saved seeds from my garden for five seasons now, and the secret to success starts with timing and patience. The right technique turns last year’s spent blooms into next summer’s showstopper flowers.
You’ll need just a few things: a pair of clean scissors, brown paper bags, and a dry spot indoors. Harvest seeds when the flower heads turn brown and papery, usually in late summer or early fall.
The key is letting them fully mature before collecting—green or damp seeds won’t last through storage.
Once you’ve dried the seed heads for a week or two, you’ll have plump seeds ready to store. Keep them in a cool, dark place, and they’ll stay viable for up to three years.
The first time I saw my saved seeds sprout into tall, vibrant zinnias, I knew I’d never buy them again.
This method works for all zinnia types, from dwarf varieties to towering giants. Whether you’re a beginner or a seasoned gardener, saving seeds is the easiest way to multiply your favorite blooms without spending a dime.
📚 In This Guide
- What you need
- Instructions
- Tips and common mistakes
- Wrapping up and next steps
What you need
- ● Mature zinnia flowers – Choose fully bloomed, dried flowers (brownish centers) with seed heads.
- ● Pruning shears or scissors – Sharp, clean tools to snip seed heads.
- ● Paper bags or brown lunch bags – 1-2 per batch (breathable and lightweight).
- ● Drying rack or mesh screen – A flat, elevated surface (like a cooling rack or hardware cloth over a tray).
- ● Air-tight containers – Small jars, envelopes, or seed packets (label them!).
- ● Permanent marker – For labeling varieties and dates.
- ● Desiccant packets – For extra moisture control in storage containers.
- ● Fine mesh sieve – To separate seeds from chaff before storage.
- ● Humidity indicator – Ensures seeds stay dry during storage.
- ● Seed catalog or notebook – Track varieties, germination rates, and notes for next season.
Step-by-Step instructions for collecting zinnia seeds
Here's how to save seeds from your favorite zinnias—simple, rewarding, and perfect for next year's garden.
🌱 Step 1: Select and Identify Mature Zinnia Heads
Wait until the blooms have fully faded and the seed heads turn brown and papery—that’s your signal they’re ready. I like to pick heads from the healthiest plants, avoiding any that looked diseased or pest-damaged. The seed heads should feel dry and brittle when you gently squeeze them.
Look for the classic zinnia shape: a round, flat disc with tiny seeds clustered in the center. If you see green stems or leaves still attached, the seed isn’t fully mature yet. Patience here pays off—rushing means lower germination rates later.
💧 Step 2: Harvest and Dry the Seed Heads
Cut the dried seed heads from the stem with clean scissors, leaving about 1 inch of stem attached. This makes handling easier and prevents seeds from scattering. Lay them out on a clean, dry surface—like a piece of newspaper or a mesh screen—in a warm, dry spot with good airflow.
I place mine on a windowsill where they get indirect light. Avoid direct sun or damp areas, as moisture can cause mold. Let them dry for 7-10 days, flipping them occasionally to ensure even drying. You’ll know they’re ready when the seed heads crumble easily in your fingers.
✂️ Step 3: Extract Seeds from the Heads
Once fully dry, hold the seed head over a clean bowl or tray and gently rub the dried disc between your fingers. The seeds will fall out like tiny, dark brown specks. I find it helps to tap the head lightly against the bowl to dislodge any stubborn seeds.
Remove any debris, like chaff or stems, by sifting the seeds through a fine-mesh strainer. Store the seeds in a labeled envelope or small paper bag—just enough to hold them loosely. Labeling is key; I write the variety and date on the bag so I remember what I’m planting next spring.
🪴 Step 4: Store Seeds for Next Season
Place the labeled envelope in a cool, dark, and dry spot—like a pantry or seed storage box. Zinnia seeds stay viable for 2-3 years if kept dry, but I’ve had great luck planting them within a year. Avoid refrigeration unless you’re storing them long-term, as the humidity can cause mold.
Check the seeds occasionally to ensure they’re still dry. If you notice any moisture or mustiness, transfer them to a fresh envelope with a silica gel packet to absorb excess humidity. Proper storage means vibrant blooms waiting for you next season!
Tips & tricks for perfect zinnia seed collection
A few simple tricks will help you maximize your seed yield and ensure vibrant blooms next season.
Timing is Everything: The 7-10 day drying period in Step 2 is crucial—don't rush it! I've learned the hard way that seeds dried too quickly often fail to germinate. If your climate is particularly humid, extend drying to 12-14 days. Place a small fan nearby to improve airflow without creating drafts that scatter seeds.
Seed Head Selection: In Step 1, look for seed heads that have completely turned brown and feel papery. If you see any green remnants, those seeds won't be viable. I always collect from the healthiest plants in my garden, avoiding any that showed signs of disease or pest damage during the growing season.
Storage Wisdom: For long-term storage beyond the 2-3 years mentioned in Step 4, consider adding a silica gel packet to your seed envelope. These packets absorb excess moisture and can extend viability to 5 years or more. Just make sure the packet is unopened and unused before adding it to your seed storage.
Labeling System: Don't just write the variety on your seed envelope—include the harvest date and any notable characteristics. I've used this system for years and it's saved me from planting the wrong variety. For example, I'll write "Profusion Red - 2024 - Early Bloomer" so I know exactly what I'm getting next spring.
Pro Tips for Zinnia Seed Collection
- A few simple tricks will help you maximize your seed yield and ensure vibrant blooms next season.
- Timing is Everything: The 7-10 day drying period in Step 2 is crucial—don't rush it!
- Seed Head Selection: In Step 1, look for seed heads that have completely turned brown and feel papery.
Frequently asked questions
Got questions about saving zinnia seeds for next year? You’re not alone! Here are some common concerns—and clear answers—to help you master the process like a pro.
When is the best time to collect zinnia seeds?
Harvest seeds when the flower heads turn brown and dry but before they shatter (usually late summer to early fall). Wait too long, and seeds may scatter—miss the window, and you’ll lose your chance for next season’s blooms!
How long do zinnia seeds stay viable in storage?
Zinnia seeds typically stay fresh for 2–4 years if stored properly in a cool, dry place. For best results, label seed packets with the collection date—this helps track viability and germination rates.
Can I collect seeds from deadheaded zinnias?
Yes, but only if you missed the seed-saving window! Deadheading removes spent blooms before seeds form. For seeds, let some flowers mature naturally—skip deadheading on a few stems to ensure a harvest.
What’s the best way to store zinnia seeds if I don’t have envelopes?
No envelopes? No problem! Use small paper bags, glass jars with lids, or even folded paper with the seed type and date written on it. Just ensure they’re airtight to prevent moisture damage.
My seeds won’t germinate—what went wrong?
Check these common culprits:
- Old seeds: Test viability by soaking a few in water—sinkers are good, floaters are bad.
- Moisture issues: Seeds need consistent dampness (not soggy) to sprout.
- Light exposure: Zinnias need light to germinate—don’t bury seeds deeply!
Wrapping up and next steps
Collecting zinnia seeds is a rewarding way to preserve beauty for next season—and it’s easier than you think!
With just a few simple steps, you’ll ensure your garden stays vibrant with bold blooms year after year. Now that you’re equipped with the know-how, why not share your newfound skills? Try gifting saved seeds to fellow gardening enthusiasts or experiment with different varieties to expand your floral palette.
Happy growing! 🌸