
Propagation
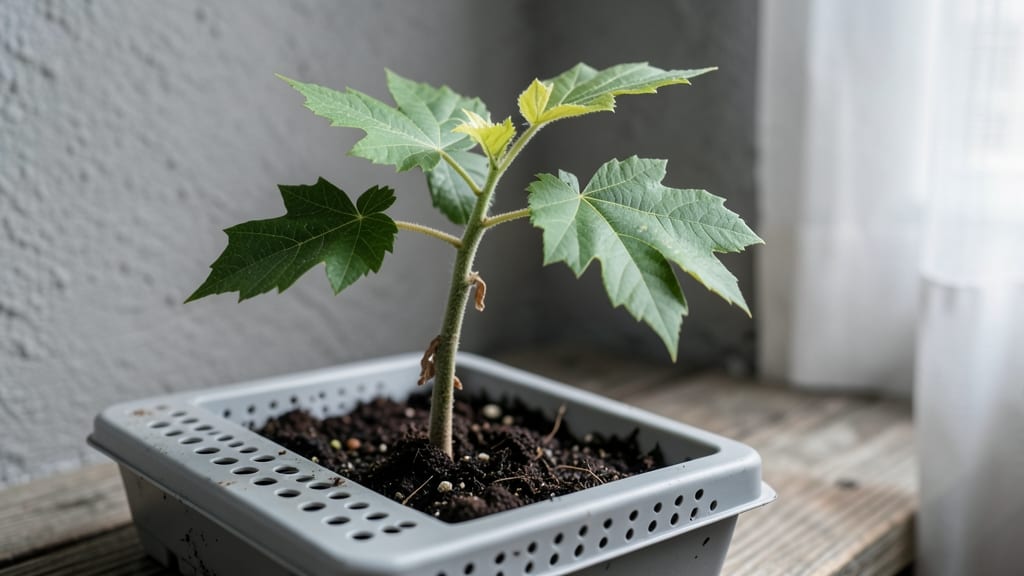
Growing acer from seed means your future shade tree starts with a single winged key. 🌱 I’ve struggled with maple seeds before—some sprouted in weeks, others took a year—but the cold stratification trick makes the difference between frustration and success.
The secret isn’t just patience; it’s mimicking nature’s timing to break dormancy.
You’ll need a few supplies: a plastic bag or container, damp peat moss or perlite, and a freezer (or even a cold garage). Sugar maples and Japanese maples both respond well, but the process is the same—just adjust timing based on your climate.
The goal is to trick the seed into thinking winter’s passed, so it’s ready to grow when spring arrives.
Once stratified, germination takes 4-12 weeks in warm, bright conditions. You’ll see tiny roots first, then a shoot breaking through the soil—proof you’ve done it right. Early care is simple: keep the soil moist but not soggy, and avoid moving the pot until roots establish.
By next spring, you could have a seedling ready to plant outdoors.
This method works for any acer variety, but timing matters—start in late fall for spring planting. The payoff? A tree that grows true to its parent, with vibrant fall colors and strong roots. Let’s get those seeds ready for their winter nap.
📚 In This Guide
- What you need
- Instructions
- Tips and common mistakes
- Wrapping up and next steps
What you need
- ● Fresh acer seeds: Collect green, winged samaras (helicopters) from mature maple trees in fall (September–October). Aim for 10–20 seeds to maximize success.
- ● Cold stratification supplies: Ziploc bags or airtight containers (1–2 per batch of seeds).
- ● Moistened peat moss or coconut coir (enough to lightly cover seeds).
- ● Refrigerator (set to 34–40°F (1–4°C) for 6–12 weeks).
- ● Germination setup: Seed-starting mix (sterile, well-draining blend like 50% peat moss + 50% perlite).
- ● Small pots or seed trays (3–4" deep, with drainage holes).
- ● Spray bottle (for gentle watering).
- ● Growth support: Grow lights or sunny windowsill (12–16 hours of light daily).
- ● Humidity dome or plastic wrap (to retain moisture during germination).
- ● Seed stratification timer (to track cold treatment duration).
- ● Heating mat (for faster germination, set to 70–75°F (21–24°C)).
- ● Fertilizer (balanced 5-5-5 or fish emulsion once seedlings sprout).
- ● Label markers (to track seed varieties and planting dates!).
- ● Outdoor hardening tray (for gradual acclimation before transplanting).
Step-by-step instructions for growing acer trees from seed
Here’s how to break the dormancy cycle and coax acer seeds into strong, blooming saplings next spring.
🌱 Step 1: Harvest and Clean the Seeds
Collect acer seeds from ripe samaras in late fall or early winter—wait until the winged seeds detach naturally from the tree. Remove any remaining pulp or debris by soaking the seeds in lukewarm water for 24 hours. This softens the outer coating and helps prevent fungal issues later. After soaking, spread the seeds on a paper towel to dry for 1-2 days in a shaded spot.
I like to label each batch with the acer species and harvest date—some varieties germinate faster than others. Store the dried seeds in a paper envelope (not plastic) in a cool, dry place until stratification. The key here is patience: acer seeds need cold to break dormancy, and rushing this step will leave you with weak or no sprouts.
❄️ Step 2: Cold Stratify the Seeds for 60-90 Days
Place the dried seeds in a sealed plastic bag with a damp paper towel or sphagnum moss (keep it moist but not soggy). Store the bag in your refrigerator’s crisper drawer, where temperatures hover around 35-45°F. Check the seeds every 2 weeks—if the towel dries out, mist it lightly with water and reseal the bag.
This cold period mimics winter conditions and tricks the seed into thinking it’s time to grow. Real talk: skipping stratification means waiting years for germination, if ever. After 60-90 days, the seeds will be ready for planting. You’ll know it’s working when the outer shell softens slightly—it should feel slightly pliable between your fingers.
🌱 Step 3: Plant Stratified Seeds in a Controlled Environment
Fill a 4-inch deep container with sterile seed-starting mix (never garden soil—it’s too dense and may harbor pathogens). Plant each seed ½ inch deep, spacing them 1 inch apart in rows. Press the soil gently around the seeds to ensure good contact but don’t compact it too tightly. Water lightly with a spray bottle until the surface feels evenly moist.
Cover the container with a clear plastic dome or wrap it in plastic wrap to retain humidity. Place it in a spot with indirect light (a north-facing window works well) and maintain a temperature of 65-75°F. Germination can take 2-4 weeks, so stay patient. You’ll see the first true leaves emerge as small, rounded cotyledons—this is your signal that the seeds have broken dormancy successfully.
☀️ Step 4: Provide Light and Care for Young Saplings
Once the seedlings sprout, remove the plastic cover immediately to prevent fungal growth. Move the container to a spot with bright, indirect light for the first 2 weeks, then gradually introduce 4-6 hours of direct sunlight daily to harden them. If using a grow light, position it 3-4 inches above the seedlings and keep it on for 12-14 hours per day.
Water the seedlings when the top inch of soil feels dry—this usually means every 3-4 days, but adjust based on your home’s humidity. Overwatering is the biggest mistake here; it causes damping-off, a fungal disease that rots the stems at the soil line. You’ll notice healthy seedlings have sturdy stems and vibrant green leaves—if they look weak or leggy, they need more light or less water.
🪴 Step 5: Transplant and Overwinter for Blooms Next Spring
After the seedlings develop 3-4 sets of true leaves (usually by late spring), transplant them into 6-inch pots filled with a mix of potting soil and perlite. Harden them off by placing them outdoors in a shaded area for 1-2 hours daily over 10-14 days, gradually increasing their time outside. By early fall, they should be ready to plant in the ground or larger containers.
Here’s the thing—acer seedlings grow slowly, and blooms won’t appear for 5-10 years. But if you’ve followed these steps, your young trees will be strong enough to handle winter and surprise you with their first flowers next spring. Keep an eye out for pests like aphids, and mulch around the base to retain moisture and regulate soil temperature.
Tips & tricks for perfect acer seed germination
Patience and precision are your best tools when growing acer trees from seed—these tricks will help you avoid the most common pitfalls and maximize your success rate.
Seed Selection Tip: Not all acer seeds are created equal! Look for plump, fully formed samaras with no cracks or damage. The heavier the seed, the better—it usually means higher viability. I always test a few seeds from each batch by gently squeezing them; they should feel firm but yield slightly to pressure. Discard any that feel hollow or overly light, as they won't germinate properly.
Stratification Temperature Matters: While the refrigerator's crisper drawer (around 35-45°F) works well, you can also use a seed stratification fridge if available—these maintain more consistent temperatures. If your fridge fluctuates, place the seed bag on a shelf away from the door where temps stay most stable. The goal is to simulate winter conditions precisely, so avoid placing seeds near the freezer or in areas where temps might drop below 35°F or rise above 45°F.
Germination Timing Secret: The 2-4 week germination window can feel like forever, but there's a trick to track progress: After planting stratified seeds in Step 3, mark the container's location with a date. Most acer seeds will germinate within 3 weeks if conditions are ideal. If you see no sprouts by 4 weeks, it's time to troubleshoot—either the seeds didn't complete stratification properly or the environment isn't right.
Light Transition Strategy: When moving seedlings from indirect light to direct sunlight in Step 4, do it gradually over 7-10 days. Start with just 1 hour of morning sun daily, then increase by 30 minutes every 2 days. This slow acclimation prevents sunburn on delicate young leaves. I've seen seedlings go from vibrant green to crispy brown overnight when moved too quickly—don't make my mistake!
Pro Tips for Acer From Seed
- Patience and precision are your best tools when growing acer trees from seed—these tricks will help you avoid the most common pitfalls and maximize your success rate.
- Seed Selection Tip: Not all acer seeds are created equal!
- Stratification Temperature Matters: While the refrigerator's crisper drawer (around 35-45°F) works well, you can also use a seed stratification fridge if available—these maintain more consistent temperatures.
Frequently asked questions
Got questions about growing acer from seed? You’re not alone—this process can feel tricky, but with the right know-how, you’ll be well on your way to vibrant saplings! Here are answers to the most common queries to help you navigate cold stratification and beyond.
Why does my acer seed need cold stratification?
Cold stratification mimics winter conditions, breaking seed dormancy by softening the hard outer coat. Without it, many acer seeds (like maple or boxelder) may never germinate. Think of it as a natural jumpstart—your seeds need this chill period to "wake up" and sprout reliably come spring.
How long should I cold-stratify acer seeds?
Most acer seeds require 60–90 days of cold stratification (34–41°F or 1–5°C). Place them in a moist medium (like peat moss) in a sealed bag or fridge. Check progress monthly—if mold appears, reduce moisture slightly. Patience pays off: proper stratification ensures 70–90% germination rates!
Can I skip cold stratification and just plant the seeds outdoors?
Outdoor planting can work, but success is hit-or-miss. If your climate has harsh winters (below 20°F/-7°C), seeds may stratify naturally. However, unpredictable weather or mild winters can lead to poor germination. For reliable results, indoor stratification is the safer bet—especially if you’re impatient for blooms!
My stratified seeds aren’t germinating—what’s going wrong?
Check these fixes:
- Moisture: Seeds should stay damp (not soggy). Re-moisten if the medium dries out.
- Temperature: Keep them in the fridge (not freezer!). Fluctuations can disrupt dormancy.
- Freshness: Older seeds (over 1 year) may lose viability. Test a few in warm water—if they sink, they’re likely still good.
- Patience: Some seeds take 3–6 months to sprout. Avoid peeking too often!
How do I know if my acer seedling is healthy?
A thriving acer seedling has:
- Two smooth, glossy cotyledons (first leaves) appearing within 2–4 weeks after warm-up.
- Slow, steady growth (no yellowing or wilting).
- Strong roots—gently tug the seedling to check for resistance (not loose soil).
Wrapping up and next steps
Growing acer from seed is a rewarding journey that unlocks nature’s beauty for years to come!
With patience and the right cold stratification techniques, you’ll soon watch tiny seedlings transform into stunning maples—complete with vibrant foliage and future blooms. Your next step? Start small: collect seeds this fall, prep your setup, and let winter work its magic.
Before you know it, you’ll be nurturing a thriving acer sapling—one seed at a time! 🌱✨