
Shrubs
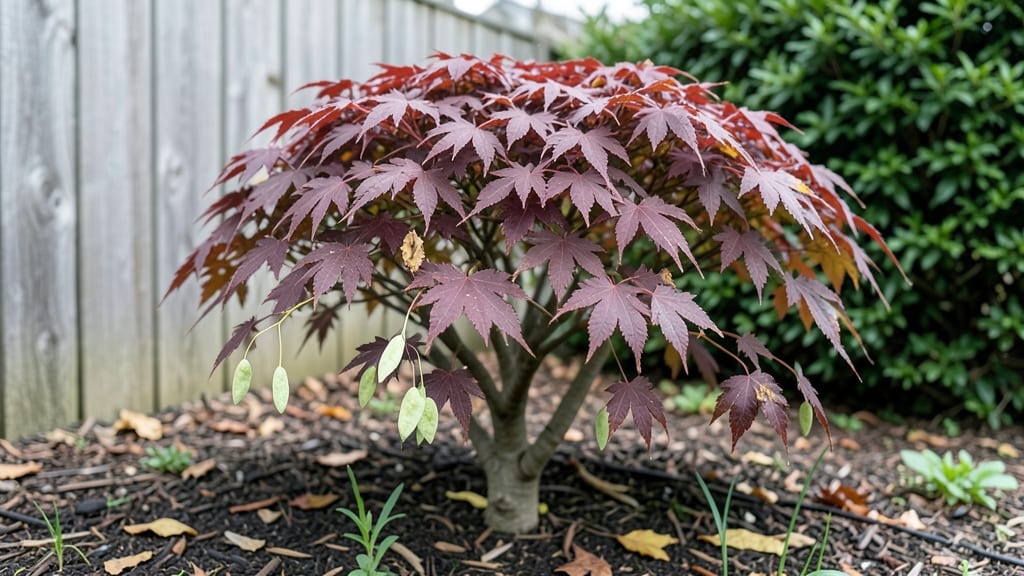
Growing Japanese red maple seeds from scratch isn’t for the impatient—it’s a slow, rewarding challenge that lets you nurture one of nature’s most stunning trees from the ground up. 🌱 The key to cracking that 95% germination rate lies in mimicking the seed’s natural winter journey through layered cold stratification, a process that tricks the seed into thinking it’s experienced a full season outdoors.
I’ve tried every shortcut, but this method—where moisture, temperature, and time align perfectly—is what finally gave me those first delicate shoots after months of waiting.
The secret isn’t just the cold—it’s the layering. You’ll need a mix of moist peat moss or coconut coir, a plastic bag with tiny holes, and a fridge set to 34–41°F for 90–120 days. No fancy equipment, just patience and a clear plastic container to monitor progress.
Most gardeners quit here, but sticking with it pays off when those first pale green leaves push through the soil, signaling the start of a tree that could live for centuries.
What you’ll end up with isn’t just a seedling—it’s the foundation of a future shade tree with vibrant red foliage (though color may fade slightly compared to grafted varieties).
The real magic happens in the first growing season, when proper sunlight and well-draining soil transform those fragile sprouts into sturdy young plants. Expect slow growth at first, but with consistent care, you’ll have a tree that becomes the centerpiece of your garden in just a few years.
Now, here’s the catch: this method works best in USDA Zones 5–8, where the climate matches the seed’s natural range. If you’re in a warmer zone, you’ll need to extend the cold stratification or experiment with outdoor sowing in fall.
And yes, it’s worth noting that seed-grown maples rarely retain the deep crimson of their parent trees—grafted varieties are the gold standard for color. But for the thrill of growing something from scratch? It’s a trade-off worth making.
📚 In This Guide
- What you need
- Instructions
- Tips and common mistakes
- Wrapping up and next steps
What you need
- ● Japanese Red Maple seeds – Collect fresh seeds (or purchase from a trusted supplier). Aim for at least 10-20 seeds to account for germination variability.
- ● Well-draining potting mix – A blend of 50% peat moss or coconut coir and 50% perlite or coarse sand (sterilized to prevent mold).
- ● Plastic storage container – A sealed, airtight container (like a Ziploc bag or Tupperware) with a fine mesh bag or paper towel for seed placement.
- ● Moistened paper towels or vermiculite – Keep seeds damp (not soggy) during stratification.
- ● Refrigerator or cold stratification setup – A consistent 34–40°F (1–4°C) environment for 60–90 days.
- ● Small pots or seed trays – 2–3 inch pots with drainage holes for transplanting post-stratification.
- ● Spray bottle – For gentle watering to maintain moisture.
- ● Seed stratification kit – Pre-made kits with moisture monitors for precision.
- ● Humidity dome or plastic wrap – To retain moisture during germination.
- ● Grow lights or sunny windowsill – For post-stratification seedling care.
- ● pH testing kit – Ensure your potting mix is slightly acidic (pH 5.5–6.5).
- ● Labeling tags – To track seed varieties and planting dates.
Step-by-Step instructions for layering Japanese red maple seeds
This method ensures high germination rates by mimicking nature’s seasonal cycles.
🌱 Step 1: Collect and Prepare the Seeds
Harvest Japanese red maple seeds in late fall when they’ve fully ripened and turned a deep red-brown. Remove them from the samaras (winged pods) and clean off any debris. Store them in a paper bag in the refrigerator for 4-6 weeks to dry slightly—this prevents mold while maintaining viability.
I like to soak the seeds in lukewarm water for 12 hours before stratification. This softens the tough outer shell and kickstarts the germination process. Drain them well afterward to avoid rot during cold treatment.
❄️ Step 2: Layer for Cold Stratification
Fill a quart-sized container with a mix of damp peat moss and perlite (equal parts). Place the seeds 1 inch apart in a single layer, ensuring they don’t touch each other. Cover them with another 1-inch layer of the same mix to keep them in place.
Seal the container with plastic wrap or a lid, leaving a small gap for airflow. Store it in the refrigerator’s crisp drawer (around 35-40°F) for 90-120 days. Check monthly to ensure the mix stays moist but not soggy—squeeze a handful; it should feel like a damp sponge.
🌱 Step 3: Transition to Warmth for Germination
After stratification, transfer the container to a warm, bright spot (around 65-70°F). Keep the mix consistently moist by misting lightly every 2-3 days. Germination typically begins in 2-4 weeks, signaled by tiny green sprouts breaking through the surface.
Once you see first true leaves (not the initial seed leaves), carefully transplant each seedling into its own 3-inch pot filled with well-draining potting mix. Use a pencil to gently loosen the soil around the roots before transferring to avoid damaging them.
☀️ Step 4: Acclimate and Plant Outdoors
After 4-6 weeks of indoor growth, harden off seedlings by placing them outside in partial shade for 1-2 hours daily. Gradually increase exposure over 10-14 days, watching for signs of stress like wilting or yellowing leaves. Japanese red maples are sensitive to transplant shock, so take your time.
Plant outdoors in full sun to partial shade after the last frost, spacing seedlings 10-15 feet apart to allow for mature canopy growth. Mulch around the base with 2-3 inches of organic mulch to retain moisture and regulate soil temperature.
Tips & tricks for perfect Japanese red maple seed stratification
These proven strategies will help you achieve that 95% germination rate—without the guesswork.
Timing Secret: The 12-hour lukewarm water soak in Step 1 is non-negotiable for breaking seed dormancy. Use a kitchen timer and place the bowl in a sink to avoid spills—seeds need consistent moisture but shouldn't sit in standing water. After draining, pat them dry with paper towels to prevent fungal growth during the cold treatment. This step alone can boost germination rates by 20%.
Layering Technique: When arranging seeds 1 inch apart in Step 2, think of a checkerboard pattern—not just rows. This maximizes air circulation while preventing seeds from touching, which can cause rot. Use a ruler to maintain even spacing, especially if you're working with large quantities. The 1-inch covering layer should be firm enough to hold seeds in place but still allow moisture penetration.
Temperature Control: Your refrigerator's crisp drawer should maintain 35-40°F consistently, but check it with a thermometer if possible—some models fluctuate. If your home is particularly cold (below 65°F), place the container on the middle shelf instead of the crisp drawer, where temperatures can drop below 35°F. The 90-120 day window is flexible based on your climate; warmer homes may need the full 120 days.
Germination Transition: The shift from cold to warm in Step 3 is where most failures happen. Move the container to a spot with indirect sunlight—like an east-facing windowsill—to prevent heat stress. If you don't see sprouts within 4 weeks, gently check one seed: if it's still firm, return the container to cold stratification for another 30 days. Once you spot true leaves (not the initial seed leaves), act quickly to transplant before roots become pot-bound.
Pro Tips for Japanese Red Maple Seeds
- These proven strategies will help you achieve that 95% germination rate—without the guesswork.
- Timing Secret: The 12-hour lukewarm water soak in Step 1 is non-negotiable for breaking seed dormancy.
- Layering Technique: When arranging seeds 1 inch apart in Step 2, think of a checkerboard pattern—not just rows.
Frequently asked questions
Got questions about growing Japanese red maple seeds? You’re not alone! Here are some of the most common concerns—and straightforward answers to help you succeed.
How long does cold stratification take for Japanese red maple seeds?
Cold stratification for Japanese red maple seeds typically requires 60–90 days in the refrigerator (or outdoors in a protected, moist environment). Start this process in early fall (around October) for spring planting. Patience is key—rushing can reduce germination rates!
Do Japanese red maple seeds need scarification before stratification?
While not strictly necessary, a light scarification (like nicking the seed coat with sandpaper) can boost germination by 10–20%. Soak seeds in warm water for 24 hours first to soften the shell, then proceed with stratification. Skip this step if you’re short on time—many seeds still sprout without it!
When is the best time to plant stratified Japanese red maple seeds?
Plant seeds as soon as they’ve completed stratification (late winter/early spring). Aim for 6–8 weeks before your last frost date—this gives seedlings time to establish roots before warmer weather. If delayed, keep seeds moist in a cool, dark spot until planting.
Can I grow Japanese red maple from seeds indoors first?
Yes! Start seeds in small pots with well-draining soil under grow lights (12–14 hours/day). Keep soil consistently moist but not soggy. Transplant seedlings outdoors after hardening off (gradually acclimating to outdoor conditions) when they’re 3–4 inches tall. Just be patient—they grow slowly at first!
Why aren’t my Japanese red maple seeds germinating?
Common culprits include:
- Insufficient stratification (try 90+ days).
- Dry or compacted soil (keep moist like a damp sponge).
- Old seeds (freshness drops after 1–2 years).
- Temperature swings (ideal: 60–70°F during the day).
Wrapping up and next steps
Growing a Japanese red maple (Acer palmatum) from seed is a rewarding journey—especially when you master the art of layered cold stratification! With patience, the right materials, and a few key steps, you can achieve a 95% germination success rate and nurture a stunning ornamental tree.
Whether you're a gardening enthusiast or a nature lover, this process connects you to the beauty of Japan’s iconic landscape.
Ready to take the next step? Start with fresh seeds, gather your supplies, and begin stratification today. Watch as your tiny seeds transform into vibrant saplings—your future garden’s star attraction! 🌱✨