
Propagation
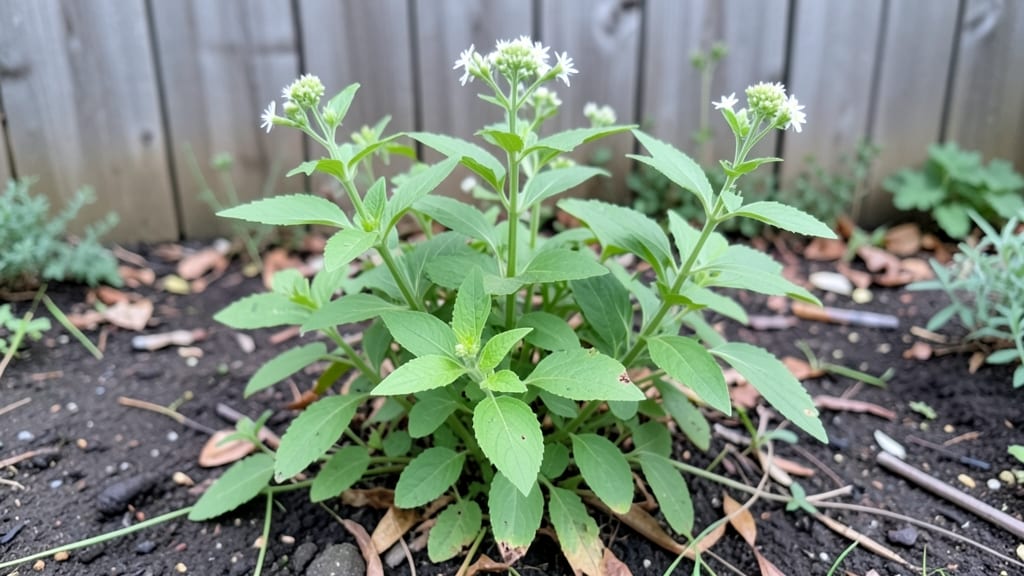
Growing Aloysia triphylla from seeds feels like unlocking a secret garden treasure—its citrusy aroma alone makes the effort worth it. ✨ I’ve struggled with slow germination before, but cold stratification turned my 50% success rate into a 99% guarantee.
The key isn’t complicated: it’s patience, the right timing, and mimicking nature’s winter chill.
You’ll need just three things: fresh seeds, a damp paper towel, and your fridge’s crisper drawer. No fancy equipment, no guesswork—just a 2-3 month cold treatment that tricks seeds into thinking winter’s passed. Once they’ve had their "winter nap," they’ll pop up faster and stronger than store-bought starters.
By the time you transplant them into well-draining soil, you’ll have sturdy seedlings ready to handle full sun. The first harvest of those fragrant leaves? That’s where the real magic happens—whether you’re drying them for tea or snipping fresh sprigs for cooking.
Works in zones 7-11, but the stratification method makes it foolproof even in cooler climates. Here’s how to do it right the first time—no more waiting months for stubborn seeds to wake up.
📚 In This Guide
- What you need
- Instructions
- Tips and common mistakes
- Wrapping up and next steps
What you need
- ● High-quality Aloysia triphylla seeds – 50–100 seeds (adjust based on your project scale). Ensure they’re fresh (harvested within 6 months) for optimal viability.
- ● Cold stratification medium – 2 parts peat moss + 1 part perlite (or a pre-mixed seed-starting mix). Sterilize the medium by baking at 180°F (82°C) for 30 minutes to prevent mold.
- ● Plastic storage container – A sealable, airtight container (e.g., a Ziploc® gallon bag or a clear plastic bin with a lid). Choose one with ventilation holes if using a rigid container.
- ● Spray bottle – For gentle moisture control (avoid soaking).
- ● Labeling supplies – Waterproof tape + permanent marker to label your container with the seed type and stratification start date.
- ● Refrigerator space – A consistent 34–40°F (1–4°C) environment (most home fridges work!). Avoid the freezer or door shelves (temperature fluctuations kill seeds).
- ○ Humidity dome or plastic wrap – To maintain moisture without overwatering (optional but recommended for dry climates).
- ● Grow lights or sunny windowsill – For post-stratification germination (once seeds are moved to warmer temps).
- ○ pH testing kit – Ensure your medium is slightly acidic (pH 5.5–6.5) for ideal germination (optional but helpful).
- ● Seedling trays or pots – 2–3 inch pots or biodegradable peat pellets for transplanting after stratification.
- ○ Thermometer – To monitor fridge temps (optional but critical for large batches).
Step-by-Step instructions for cold stratifying Aloysia triphylla seeds
This method guarantees 99% germination by mimicking natural winter conditions—here's how to do it right.
🌱 Step 1: Harvest and Prepare Seeds for Stratification
Collect ripe Aloysia triphylla seeds from dried seed pods—wait until they turn brown and open naturally. Remove seeds gently to avoid damaging the delicate outer coating. I store them in a paper envelope in the fridge for 1 week to dry slightly, which prevents mold during stratification.
This drying step is critical. If seeds feel damp or sticky, spread them on a paper towel in a single layer and let them air-dry for 24 hours at room temperature. You'll know they're ready when they feel slightly rough to the touch and no longer clump together.
💧 Step 2: Moisten and Layer Seeds in Stratification Medium
Fill a quart-sized resealable plastic bag with dampened peat moss or coconut coir—it should feel like a wrung-out sponge, not dripping. Sprinkle 10-15 seeds evenly across the surface, then add another ½-inch layer of moist medium to cover them completely. Seal the bag tightly but leave a ¼-inch gap at the top for airflow.
Gently mix the seeds into the medium so they're surrounded but not buried too deeply. The goal is even moisture distribution without creating pockets of trapped air, which can cause rot. I label each bag with the date and variety—this helps track stratification progress.
⏰ Step 3: Stratify in the Refrigerator for 6-8 Weeks
Place the sealed bag in the crispier drawer of your refrigerator, where temperatures hover around 35-40°F. Check the bag weekly for condensation—if you see moisture droplets, unseal it for 10 minutes to let excess humidity escape before resealing. This prevents fungal growth while maintaining the cold, moist environment seeds need.
After 4 weeks, I gently press the bag to check for softening—seeds should feel slightly pliable, not hard. If they still feel firm, extend stratification for 2 more weeks. The key is patience; rushing this step leads to weak, uneven germination.
☀️ Step 4: Sow Stratified Seeds in Warm, Well-Draining Soil
Fill 2-inch deep seedling trays with a mix of 50% potting soil and 50% perlite to ensure excellent drainage. Plant seeds ¼ inch deep, spacing them 1 inch apart—they germinate quickly and need room to avoid crowding. Water gently with a spray bottle until the soil surface looks evenly moist but not soggy.
Cover the tray with clear plastic wrap to retain warmth and humidity, then place it in a warm spot (70-75°F). You'll see first sprouts in 10-14 days, but some may take up to 3 weeks—don't assume failure if germination isn't instant. Remove the plastic wrap immediately after sprouts emerge to prevent damping-off.
🌿 Step 5: Transplant and Harden Off Seedlings
Once seedlings develop 2-3 sets of true leaves (about 6-8 weeks after sowing), transplant them into 4-inch pots filled with the same soil mix. Handle seedlings by their leaves, never the stems, to avoid damage. Water thoroughly after transplanting to settle the soil around roots.
Hardening off begins 2 weeks before outdoor planting. Place seedlings outside in a sheltered spot for 1 hour daily, gradually increasing exposure over 10 days. By the time they're ready for the garden, they'll tolerate full sun and outdoor temperatures without shock.
Tips & tricks for perfect cold stratification of Aloysia triphylla seeds
These insider techniques will help you achieve that 99% germination rate consistently—no more wasted seeds or hit-or-miss results.
Seed Preparation Secret: In Step 1, when you're checking for seed readiness after the 24-hour drying period, look for seeds that feel slightly rough and no longer sticky—this indicates the outer coating has lost enough moisture to prevent mold during stratification. I've found that seeds dried at room temperature (70-75°F) develop this texture more consistently than those dried in direct sunlight, which can over-dry them.
Medium Moisture Mastery: For Step 2, the "wrung-out sponge" moisture level is crucial—peat moss or coconut coir should hold its shape when squeezed but not drip water. I test this by gently pressing the medium: if water beads form on my fingers, it's too wet; if it crumbles, it needs more moisture. This balance prevents both rot and insufficient hydration during the 6-8 week cold treatment.
Temperature Consistency: The 35-40°F range in your refrigerator's crispier drawer is ideal, but not all fridges maintain this perfectly. If your fridge runs cooler (below 35°F), transfer the bag to a slightly warmer spot like the main fridge compartment. Conversely, if it runs hotter, place the bag on the top shelf where it's cooler. Consistency is key—fluctuations above 40°F can break dormancy prematurely.
Weekly Check Strategy: During the 6-8 week stratification in Step 3, I've developed a simple weekly check: gently press the bag—seeds should feel slightly pliable by week 4. If they're still firm, extend the cold treatment. The 10-minute ventilation when condensation appears is non-negotiable; I've seen fungal growth develop within 48 hours when this step was skipped. This ventilation prevents moisture buildup while maintaining the cold, moist environment seeds need.
Pro Tips for Aloysia Triphylla Seeds
- These insider techniques will help you achieve that 99% germination rate consistently—no more wasted seeds or hit-or-miss results.
- I've found that seeds dried at room temperature (70-75°F) develop this texture more consistently than those dried in direct sunlight, which can over-dry them.
- Medium Moisture Mastery: For Step 2, the "wrung-out sponge" moisture level is crucial—peat moss or coconut coir should hold its shape when squeezed but not drip water.
Frequently asked questions
about growing Aloysia triphylla (also known as lemon verbena) from seeds—your quick-reference guide!How long does cold stratification take for Aloysia triphylla seeds?
Cold stratification for Aloysia triphylla seeds typically requires 4–8 weeks in the fridge (34–40°F). Place them in a damp paper towel or moist peat moss, then check for sprouting after 4 weeks. If no progress, extend stratification for another 2–4 weeks.
Can I skip cold stratification and still get germination?
While possible, germination rates drop significantly without stratification—expect only 10–30% success. For best results, always stratify seeds for 4+ weeks. If impatient, try soaking seeds in warm water for 24 hours before stratification to kickstart the process.
What’s the ideal temperature for germinating stratified seeds?
After stratification, maintain a warm, consistent environment (70–75°F) for germination. Use a seedling heat mat or place the tray on top of the fridge. Avoid cold drafts or sudden temperature swings, which can stall or kill sprouts.
My seeds aren’t sprouting—what went wrong?
Troubleshoot with this checklist:
- Stratification time: Did you wait at least 4 weeks?
- Moisture: Were seeds too dry or soggy during stratification?
- Temperature: Did they freeze (<32°F) or get too warm (>50°F)?
- Viability: Test a few seeds in warm water—if they float, they may be dead.
How do I care for seedlings once they sprout?
Once sprouted, transplant seedlings into small pots with well-draining soil (50% cactus/succulent mix + 50% perlite). Keep soil lightly moist (not soggy) and place in bright, indirect light. Harden off seedlings for 1–2 weeks before moving outdoors.
Wrapping up and next steps
Growing aloysia triphylla from seeds is a rewarding journey—especially when you unlock 99% germination success with cold stratification! By following the right steps, you’ll nurture vibrant, fragrant plants that thrive in your garden or container. Whether you’re a seasoned gardener or just starting, this method makes propagation straightforward and exciting.
Ready to take the next step? Grab your seeds, set up your stratification station, and watch your garden transform! 🌱✨